Guide

sam edelman shoe size guide

Sam Edelman Shoe Size Guide: A Comprehensive Overview (Updated April 30, 2026)

Navigating Sam Edelman’s footwear requires understanding their sizing standards. This guide provides detailed information, ensuring a perfect fit for every customer.
Discover accurate sizing and product care details directly from Sam Edelman’s official resources, updated today, April 30, 2026.

Welcome to the world of Sam Edelman footwear! Understanding the brand’s sizing approach is crucial for a comfortable and stylish experience. Sam Edelman has cultivated a reputation for on-trend designs, but consistent fit can sometimes be a question for shoppers. This section serves as your starting point, offering a foundational understanding of how Sam Edelman approaches shoe sizing across its diverse collections.

Unlike some brands with universally standardized fits, Sam Edelman’s sizing can exhibit slight variations depending on the specific style and construction of the shoe. Factors like heel height, toe shape, and material influence the overall fit. Therefore, relying solely on your usual shoe size isn’t always sufficient.

This guide aims to demystify the process, providing you with the tools and knowledge to confidently select the right size. We’ll delve into general considerations, explore customer feedback, and offer detailed size charts for both women’s, men’s, and children’s shoes. Remember to consult the official Sam Edelman Size Guide for the most up-to-date information and specific product recommendations. Proper sizing ensures you enjoy the full comfort and style Sam Edelman has to offer!

Understanding Sam Edelman’s Fit Philosophy

Sam Edelman prioritizes creating fashionable footwear that empowers individuals to express their personal style. While not adhering to a rigid, one-size-fits-all approach, the brand generally aims for a balance between comfort and contemporary aesthetics. This translates to designs that are often true to size, but with nuances that require careful consideration.

The design philosophy often incorporates current trends, which can influence the shape and construction of shoes. For example, pointed-toe styles may run slightly narrower than rounded-toe options. Sam Edelman frequently utilizes quality materials, but these materials can also impact fit – leather tends to stretch more than synthetic alternatives.

The brand acknowledges the importance of a comfortable fit, recognizing that happy feet lead to confident strides. They encourage customers to utilize their detailed size guides and consider width options when available. Referencing the official Sam Edelman sizing resources is key to understanding how a particular style is intended to fit. Ultimately, Sam Edelman strives to deliver stylish shoes that feel as good as they look.

General Sam Edelman Shoe Size Considerations

When selecting Sam Edelman shoes, several factors beyond your standard size are crucial. Foot shape plays a significant role; wider feet may benefit from considering width options or sizing up half a size. Conversely, narrower feet might find a snugger fit in their usual size, or potentially size down.

Consider the sock thickness you intend to wear with your shoes. Thicker socks will require more room, potentially necessitating a larger size. Also, remember that sizing can vary slightly between different styles within the Sam Edelman collection.

The official Sam Edelman size guide is an invaluable resource, providing specific measurements for each size. It’s always recommended to measure your feet periodically, as size can change over time. Pay attention to customer reviews, as they often offer insights into the fit of specific styles. Prioritizing accurate foot measurement and consulting the brand’s resources will significantly improve your chances of finding the perfect fit.

True to Size? Common Customer Feedback

Customer feedback regarding Sam Edelman sizing is often mixed, indicating a need for careful consideration. Many customers report that Sam Edelman shoes generally run true to size, particularly in classic styles like loafers and flats. However, a significant number experience inconsistencies, especially with boots and heels.

A recurring theme in reviews suggests that certain styles, particularly those with pointed toes, tend to run slightly small. In these cases, sizing up half a size is frequently recommended. Conversely, some customers find sandals and espadrilles to be a bit roomy, potentially requiring an insole for a secure fit.

Checking the official Sam Edelman website for specific style notes is crucial. Reading recent customer reviews before purchasing is also highly advised, as they provide valuable real-world insights into the fit and comfort of each shoe. Ultimately, individual experiences vary, making research essential.

Sam Edelman Women’s Shoe Size Guide

Sam Edelman’s women’s shoe sizes typically align with standard US sizing, ranging from 5 to 11, including half sizes. However, variations exist between styles, so consulting specific size charts is vital. For the most accurate measurement, it’s recommended to measure your feet later in the day, as they tend to swell.

When determining your size, consider the shape of your foot and the style of shoe. Pointed-toe styles may require sizing up, while wider feet might benefit from exploring width options (discussed later). The official Sam Edelman size guide provides detailed charts for various shoe types.

Pay close attention to customer reviews, as they often highlight specific fit issues. Remember that sizing can differ between boots, sandals, and flats. Utilizing the provided resources and considering individual foot characteristics will significantly improve your chances of finding the perfect fit within the Sam Edelman collection.

Women’s Shoe Width Options

Sam Edelman primarily offers women’s shoes in a standard medium (B) width. However, recognizing the diversity of foot shapes, they are gradually expanding width options in select styles. Currently, some styles are available in narrow (AA) and wide (D) widths, though availability varies significantly depending on the shoe and color.

Checking the product details on the Sam Edelman website is crucial to confirm if a specific shoe is offered in alternative widths. If you typically require a narrow or wide fit, filtering search results by width can save time.

For those unable to find a suitable width, consider exploring styles with adjustable features like buckles or laces, which can provide a more customized fit. Customer reviews often mention whether a shoe runs narrow or wide, offering valuable insights. Prioritizing comfort and proper fit is essential, and exploring all available options ensures a satisfying experience.

Converting Women’s Sizes (US, EU, UK)

Accurate size conversion is vital when purchasing Sam Edelman shoes internationally. While Sam Edelman primarily lists sizes in US measurements, understanding equivalent EU and UK sizes is essential for a proper fit. Here’s a general conversion guide, but slight variations can occur between styles.

US sizes generally correspond as follows: US 6 = EU 36 / UK 3; US 6.5 = EU 36.5 / UK 3.5; US 7 = EU 37 / UK 4; US 7.5 = EU 37.5 / UK 4.5; US 8 = EU 38 / UK 5; US 8.5 = EU 38.5 / UK 5.5; US 9 = EU 39 / UK 6; US 9.5 = EU 39.5 / UK 6.5; US 10 = EU 40 / UK 7; US 10.5 = EU 40.5 / UK 7;5; US 11 = EU 41 / UK 8.

Referencing Sam Edelman’s official size chart is always recommended for the most precise conversion. Remember that these are approximate conversions, and individual shoe styles may fit differently.

Specific Women’s Styles & Sizing

Sam Edelman’s diverse women’s collection requires nuanced sizing considerations. Different styles, from boots to sandals and flats, can fit uniquely. Understanding these variations ensures optimal comfort and style.

Boots, particularly heeled and tall varieties, often benefit from considering sock thickness. A thicker sock may necessitate sizing up half a size. Sandals, especially those with delicate straps, may run narrower; consider a width option if available. Flats, while generally true to size, can sometimes feel snug initially, stretching with wear.

Consulting the official Sam Edelman size guide and reading customer reviews specific to the style you’re interested in is highly recommended. Pay attention to comments regarding length, width, and overall fit. Prioritize comfort and allow for a slight break-in period for optimal enjoyment of your Sam Edelman footwear.

Women’s Boot Sizing (Heels, Ankle Boots, Tall Boots)

Sam Edelman boots, encompassing heels, ankle boots, and tall boots, present unique sizing challenges. Factors like shaft height, heel shape, and material influence the fit. Careful consideration is crucial for both comfort and style.

Heels can alter weight distribution, potentially causing feet to slide forward; consider a heel grip or insole. Ankle boots should provide a snug, yet comfortable, fit around the ankle to prevent slippage. Tall boots require accurate calf circumference measurements to ensure a flattering and secure fit.

When purchasing tall boots, measure the widest part of your calf while wearing the socks you intend to wear with the boots. Always refer to the official Sam Edelman size chart and read reviews specific to the boot style. If between sizes, opting for the larger size may be preferable, especially for boots intended for extended wear.

Women’s Sandal Sizing

Sam Edelman sandals, ranging from delicate flats to statement heels, generally run true to size, but nuances exist. Factors like strap placement and footbed contouring can impact the overall fit and comfort.

For sandals with delicate straps, ensure they don’t dig into your skin or cause rubbing. A slightly wider foot may benefit from sizing up, particularly in styles with narrow strap designs. Platform sandals can sometimes require adjusting to the increased height; consider a half size down if you prefer a more secure fit.

When selecting sandals, pay attention to the toe box shape. A rounded or almond-toe shape typically offers more room than a pointed toe. Consult the Sam Edelman sizing guide for specific style recommendations. Reading customer reviews can provide valuable insights into how a particular sandal style fits in practice, helping you make an informed decision.
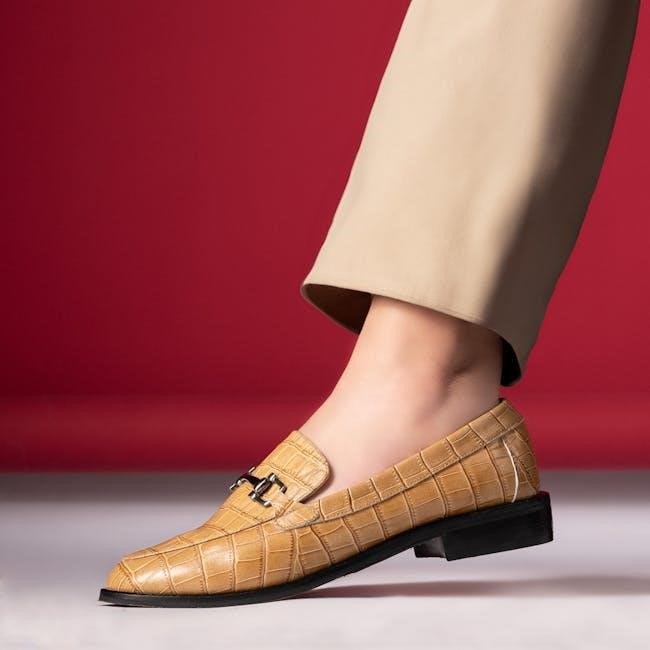
Women’s Flat Sizing

Sam Edelman flats, celebrated for their versatility and style, typically align with standard US sizing, however, individual styles can vary. Understanding these subtle differences is key to finding your perfect fit.

Pointed-toe flats may feel snugger than rounded or almond-toe variations. If you’re between sizes, consider sizing up for enhanced comfort, especially if you have wider feet. Ballet flats with minimal structure often conform to the foot’s shape over time, so a snug initial fit is acceptable.

Loafers and slip-on flats should provide a secure yet comfortable fit. Ensure there’s minimal heel slippage while allowing enough room for your toes to move freely. Refer to the official Sam Edelman size chart and customer reviews for specific style guidance. Prioritize comfort and consider wearing socks or hosiery when trying on flats to replicate your intended wear.

Sam Edelman Men’s Shoe Size Guide

Navigating Sam Edelman’s men’s shoe sizing requires attention to detail, as consistency can vary between styles. Generally, Sam Edelman men’s shoes adhere to standard US sizing, but it’s crucial to consult specific size charts for optimal fit.

When selecting your size, consider the type of shoe. Sneakers often require a bit more room for comfort and athletic movement, while dress shoes and loafers typically benefit from a closer, more precise fit. Always measure both feet, as slight variations in size are common, and fit the larger foot.

Refer to the official Sam Edelman size chart for accurate conversions and measurements. Pay attention to width options, as some styles are available in multiple widths. Prioritize comfort and ensure adequate toe space to prevent discomfort during extended wear. Customer reviews can also provide valuable insights into specific style fit.

Men’s Shoe Width Options

Sam Edelman recognizes that not all feet are created equal, and offers varying width options in select men’s shoe styles. While many styles are available in a standard Medium (D) width, those with broader or narrower feet can benefit from exploring available alternatives.

Widths typically include Narrow (2E), Wide (4E), and Extra Wide (6E). Determining your correct width is crucial for comfort and proper foot support. A shoe that is too narrow can cause pinching and discomfort, while a shoe that is too wide can lead to slippage and instability.

To determine your width, it’s best to have your feet professionally measured. Alternatively, you can assess the fit of your current well-fitting shoes. Refer to the Sam Edelman sizing guide for detailed instructions and width charts. Don’t hesitate to consult customer reviews for insights into specific style width fits.

Converting Men’s Sizes (US, EU, UK)

When purchasing Sam Edelman shoes internationally, or comparing sizes across different retailers, accurate conversion is essential. Shoe sizing systems vary between the United States, Europe (EU), and the United Kingdom (UK). Utilizing a reliable conversion chart ensures you select the correct size.

Generally, a US size 8 equates to a UK size 7 and an EU size 41-42. However, these are approximate conversions, and slight variations can occur depending on the specific shoe style and manufacturer. Always consult the official Sam Edelman size chart for the most precise measurements.

It’s advisable to measure your feet and compare them to the Sam Edelman chart, rather than relying solely on conversions. Remember that conversions are guidelines, and individual foot shapes can influence the best fit. Consider reading customer reviews for specific style feedback regarding sizing accuracy across different regions.

Specific Men’s Styles & Sizing

Sam Edelman’s men’s collection features diverse styles, each potentially requiring a slightly adjusted approach to sizing. While the general size guide provides a foundation, understanding nuances within specific categories is crucial for optimal comfort and fit.

Men’s sneakers often run true to size, but those with wider feet may consider ordering half a size up. Loafers and dress shoes, particularly those in leather, may require a break-in period and benefit from a snug fit initially. Referencing customer reviews for specific models is highly recommended.

Boots, especially those with thicker linings, may necessitate sizing up by half a size to accommodate socks. Always check the product description for any specific sizing recommendations provided by Sam Edelman. Utilizing the official size guide in conjunction with style-specific feedback will ensure a confident purchase.

Men’s Sneaker Sizing

Sam Edelman men’s sneakers generally adhere to standard US sizing, but individual styles can present slight variations. Most customers find that their usual sneaker size provides a comfortable fit, however, considering foot width is paramount.

Men with wider feet may benefit from ordering half a size up, particularly in styles with a narrower toe box. Pay close attention to the sneaker’s construction; those with reinforced toe caps or substantial padding might feel more snug. Checking the product-specific reviews on the Sam Edelman website is invaluable.

For those between sizes, it’s often recommended to size up rather than down. A little extra room allows for sock thickness and natural foot expansion during activity. Always consult the official Sam Edelman size chart before making a purchase to ensure the best possible fit and avoid unnecessary returns.

Men’s Loafer & Dress Shoe Sizing

Sam Edelman’s men’s loafers and dress shoes typically run true to size, but a precise fit is crucial for both comfort and appearance. Unlike sneakers, these styles offer less inherent give, making accurate sizing even more important. Consider the sock thickness you intend to wear with the shoes. Thicker dress socks will require slightly more room.

For loafers, particularly those with a pointed toe, ensure adequate length to prevent toe cramping. A snug, but not tight, fit across the width is ideal. Dress shoes, especially oxfords and derbies, should provide a secure heel hold to avoid slippage.

If you’re between sizes, opting for the larger size is generally advisable, especially for dress shoes. Referencing the official Sam Edelman size guide and reading customer reviews specific to the style you’re interested in will provide valuable insights. A well-fitted dress shoe enhances both style and confidence.

Sam Edelman Kids’ Shoe Size Guide

Finding the right fit for growing feet is paramount, and Sam Edelman offers a dedicated sizing approach for children’s shoes. Kids’ sizes change rapidly, so regular measurements are essential. Sam Edelman categorizes kids’ shoes into toddler and youth sizes, each with distinct ranges. Unlike adult sizing, children’s sizes don’t always correlate directly with age; foot length is the key determinant.

When measuring, have your child stand with their heel against a wall, wearing socks similar to those they’ll wear with the shoes. Mark the longest point of their foot and measure the distance from the wall. Consult the official Sam Edelman size chart to find the corresponding size.

Allow for approximately half an inch of growth room for toddlers and a quarter of an inch for youth sizes. Always prioritize comfort and ensure the shoe doesn’t pinch or rub. Remember that Sam Edelman’s kids’ styles are designed for both fashion and functionality, so a proper fit is crucial for healthy foot development.

Kids’ Shoe Size Charts (Toddler & Youth)

Sam Edelman provides distinct size charts for toddler and youth footwear, reflecting the developmental stages of children’s feet. The toddler range typically covers sizes 4T to 10T, while youth sizes begin at 11Y and extend upwards. These charts correlate US sizes with international standards, aiding customers globally.

Here’s a general guideline (always refer to the official Sam Edelman size chart for the most accurate information):

  • Toddler: 4T (US) = 19.5 cm, 5T (US) = 20.3 cm, 6T (US) = 21.0 cm, 7T (US) = 21.6 cm, 8T (US) = 22.2 cm, 9T (US) = 22.9 cm, 10T (US) = 23.5 cm
  • Youth: 11Y (US) = 24.1 cm, 12Y (US) = 24.8 cm, 13Y (US) = 25.4 cm, 1Y (US) = 26.0 cm, 2Y (US) = 26.7 cm, 3Y (US) = 27.3 cm

Remember that these are approximate conversions, and slight variations may occur between styles. Regularly checking the official size chart is crucial for ensuring a comfortable and well-fitting shoe for your child. Prioritize accurate foot measurement for optimal results.

Measuring Your Feet for Sam Edelman Shoes

Accurate foot measurement is paramount for selecting the correct Sam Edelman shoe size. Begin by tracing your foot on a piece of paper while standing, ensuring your weight is evenly distributed. Measure the length from the heel to the longest toe in both feet – discrepancies are common! Use a ruler or measuring tape, and record the measurement in inches or centimeters.

It’s best to measure your feet at the end of the day, as they tend to swell slightly. Wear the socks you intend to wear with your Sam Edelman shoes during the measurement process. Compare your foot length to the official Sam Edelman size chart.

Consider foot width as well. If your foot is wider than average, you may need to size up or explore width options if available. Don’t rely solely on your usual shoe size, as sizing can vary between brands and styles. Precise measurement guarantees a comfortable fit and minimizes the chance of returns.

Step-by-Step Foot Measurement Guide

Follow these steps for an accurate foot measurement before purchasing Sam Edelman shoes: First, place a piece of paper larger than your foot flat on the floor against a wall. Stand with your heel against the wall. Trace around your foot carefully, keeping the pen or pencil vertical.

Next, measure the length of the tracing from the back of the heel to the tip of your longest toe in inches or centimeters. Repeat with the other foot – sizes can differ! Measure the width of the widest part of your foot, noting this measurement as well.

Ensure you’re wearing socks similar to those you’d wear with the shoes. Compare your measurements to the Sam Edelman size chart to determine your ideal size. If your measurements fall between sizes, consider ordering both and returning the less comfortable fit. Accurate measurements are key to a satisfying Sam Edelman experience!

Using the Sam Edelman Size Chart Effectively

The Sam Edelman size chart is your primary tool for finding the perfect fit. Access the most current chart directly on their website at Sam Edelman’s Sizing and Product Care page. Locate your foot length measurement (obtained from the foot measurement guide) on the chart.

Match your length to the corresponding US, EU, or UK size. Remember that Sam Edelman’s sizing can sometimes vary slightly between styles. Pay attention to any specific sizing recommendations provided on the product page of the shoe you’re interested in.

Consider your foot width when selecting a size; width options are available for some styles. Don’t assume your usual size will always fit – always refer to the chart. Utilizing the chart correctly minimizes the chance of needing returns and maximizes your comfort with Sam Edelman footwear.

Dealing with Size Issues & Returns

Despite careful measurement, incorrect sizing can occur. Sam Edelman offers a straightforward return and exchange policy to address these issues. You can find detailed information regarding their policy on the Sizing and Product Care page of their website.

Items must generally be returned within 30 days of the delivery date, in original condition, and with tags attached. Initiate the return process through Sam Edelman’s website, following the provided instructions. Exchanges are often possible, subject to availability.

Keep your order confirmation and shipping documentation for a smooth return process. If you encounter any difficulties, don’t hesitate to contact Sam Edelman’s customer service for assistance. Understanding their return policy beforehand ensures a hassle-free experience if a size adjustment is needed.

Sam Edelman’s Return & Exchange Policy

Sam Edelman strives for customer satisfaction, offering a clear return and exchange policy detailed on their Sizing and Product Care page. Generally, unworn merchandise with original tags can be returned within 30 days of the delivery date for a full refund to the original payment method.

Returns are typically processed within 7-10 business days of receiving the returned item. Exchanges are subject to product availability and may require a separate purchase if the desired size isn’t immediately in stock. Shipping costs for returns are often the responsibility of the customer, unless the return is due to a Sam Edelman error.

Final sale items are not eligible for return or exchange. Carefully review the product description before purchasing. For a seamless experience, initiate returns through the Sam Edelman website and retain all shipping documentation.

Contacting Sam Edelman Customer Service for Sizing Assistance

Need personalized guidance with Sam Edelman sizing? Their dedicated customer service team is readily available to assist you. The primary resource for support is found on the Sizing and Product Care page, offering frequently asked questions and detailed charts.

For direct assistance, you can reach Sam Edelman customer service via email or phone. While specific contact details may vary, checking their official website’s “Contact Us” section provides the most up-to-date information. Be prepared to provide details about the specific style you’re interested in, along with your foot measurements for accurate recommendations.

Live chat support may also be available during business hours, offering immediate assistance. Clearly articulate your sizing concerns to ensure the representative can provide the most helpful advice. Don’t hesitate to ask clarifying questions to confirm the best fit for your needs.

Manuals

prevena plus 125 instruction manual

Prevena Plus 125 Instruction Manual: A Comprehensive Guide

Welcome! This manual provides essential guidance for utilizing the Prevena Plus 125 system‚ ensuring optimal incision care and a smooth therapeutic experience.

Carefully review all sections to understand proper setup‚ operation‚ maintenance‚ and safety protocols for your Prevena therapy unit‚ as directed by your physician.

The Prevena Plus 125 system represents a significant advancement in incision management‚ offering a proactive approach to wound healing following surgical procedures. This system‚ chosen by your doctor‚ utilizes Negative Pressure Wound Therapy (NPWT) to create an optimal environment for recovery.

It’s designed to help minimize the risk of complications‚ such as surgical site infections‚ and promote faster healing times. Understanding the core principles of the Prevena Plus 125 is crucial for successful therapy.

This guide will walk you through each step‚ from initial setup and operation to ongoing maintenance and safety considerations. Remember to always follow your healthcare provider’s specific instructions‚ as they are tailored to your individual needs. Keeping the therapy unit safe‚ avoiding kinks in the tubing‚ and understanding showering guidelines are key aspects of proper care.

The Prevena Plus 125 is a valuable tool in your recovery journey.

What is the Prevena Plus 125?

The Prevena Plus 125 is a portable‚ self-contained therapy unit designed for closed incision management. It’s a sophisticated system that applies controlled negative pressure to the wound area‚ drawing away excess fluids and promoting a healthier healing environment. This differs from traditional wound care methods by actively managing the incision site.

Essentially‚ it creates a sealed environment‚ reducing the risk of bacterial contamination and minimizing dead space where infections can thrive. The system is comprised of the therapy unit itself‚ specialized dressings‚ and connecting tubing.

Your doctor selected Prevena Therapy specifically for your needs‚ recognizing its potential to improve outcomes. It’s important to understand that the Prevena Plus 125 is not simply a bandage; it’s an active therapy system requiring careful attention to ensure optimal performance and safety. Maintaining a safe location for the unit is vital.

Key Components of the System

The Prevena Plus 125 system consists of several crucial components working in harmony. First‚ the Therapy Unit itself – a portable device delivering controlled negative pressure. Secondly‚ the Dressing‚ a specialized‚ multi-layered construct applied directly to the incision‚ creating a sealed environment.

Connecting Tubing links the dressing to the therapy unit‚ facilitating the suction process. It’s vital to ensure this tubing remains free from kinks or pinches to maintain effective therapy. The system also includes collection reservoirs within the dressing to gather wound fluids.

Understanding each component’s role is essential for proper operation and maintenance. Regularly inspect the tubing for integrity and ensure the unit is positioned securely to prevent accidental disconnections or damage. Proper care of these components directly impacts the effectiveness of your Prevena therapy.

Setting Up Your Prevena Plus 125

Preparation is key! This section details the initial steps for setting up your Prevena Plus 125 system‚ ensuring correct functionality and optimal therapeutic results.

Initial Inspection of the Therapy Unit

Before first use‚ a thorough inspection of the Prevena Plus 125 therapy unit is crucial. Carefully examine the unit for any visible signs of damage incurred during shipping or handling. This includes checking the casing for cracks‚ dents‚ or breaks.

Verify that all ports and connectors are intact and free from obstructions. Ensure the power cord is undamaged and the plug is secure. Confirm the unit powers on without issue‚ observing the display screen for clarity and proper illumination.

Inspect the tubing connections for any kinks or pinches that could compromise therapy. A safe placement is vital – avoid locations where the unit could be easily pulled‚ dropped‚ or exposed to liquids. Proper initial inspection guarantees optimal performance and patient safety.

Connecting the Tubing

Proper tubing connection is essential for effective Prevena Plus 125 therapy. Begin by ensuring the therapy unit is powered off. Gently connect one end of the provided tubing to the designated port on the unit‚ ensuring a secure and airtight seal.

The other end of the tubing will connect to the dressing applied to the incision site. Confirm this connection is also secure‚ preventing any potential leaks in negative pressure.

Carefully inspect the entire length of the tubing‚ verifying there are no kinks‚ twists‚ or obstructions that could impede fluid drainage or pressure delivery. Avoid placing the tubing in a position where it could be pinched or compressed. A correctly connected tubing system is vital for optimal wound healing.

Powering On and Basic Operation

Initiating the Prevena Plus 125 therapy unit is straightforward. First‚ ensure the tubing is securely connected to both the unit and the wound dressing. Then‚ locate the power button – typically indicated by a universal power symbol – and press it to activate the device.

The unit will undergo a brief self-check‚ indicated by lights or audible tones. Once operational‚ the display will illuminate‚ showing key therapy parameters. Familiarize yourself with the alarm indicators and their meanings.

The Prevena Plus 125 is designed for continuous operation. Keep the unit in a safe location‚ away from potential hazards like liquids or accidental impacts. Regular monitoring of the display ensures consistent and effective therapy.

Using the Prevena Plus 125 for Incision Management

Effective wound care is key! The Prevena Plus 125 utilizes Negative Pressure Wound Therapy (NPWT) to promote healing of appropriate incision types‚ as determined by your doctor.

Understanding Negative Pressure Wound Therapy (NPWT)

Negative Pressure Wound Therapy (NPWT)‚ the core principle behind the Prevena Plus 125 system‚ involves applying controlled levels of suction to the wound area. This innovative approach significantly enhances the healing process through multiple mechanisms.

Firstly‚ NPWT gently removes excess wound fluid – exudate – and infectious material‚ creating a cleaner‚ more optimal wound environment. Secondly‚ it promotes increased blood flow to the wound bed‚ delivering vital oxygen and nutrients essential for tissue regeneration.

Furthermore‚ NPWT encourages granulation tissue formation‚ the building block of new tissue‚ and helps to reduce edema‚ minimizing swelling around the incision. By consistently applying this controlled negative pressure‚ the Prevena Plus 125 system supports faster healing and potentially reduces the risk of complications. It’s a clinically proven method for improved wound management.

Appropriate Wound Types for Prevena Plus 125

The Prevena Plus 125 system is specifically designed for closed incision management‚ meaning it’s best suited for wounds that have been surgically closed. It’s particularly effective in minimizing the risk of surgical site infections (SSIs) and promoting optimal healing in these cases.

Appropriate wound types include post-operative incisions following various surgical procedures‚ such as abdominal surgeries‚ orthopedic procedures‚ and general surgical repairs. It can also be used on incisions at high risk of complications‚ like those in patients with diabetes or obesity.

However‚ the Prevena Plus 125 is not intended for open wounds‚ heavily exudating wounds‚ or wounds with exposed bone or tendon. Your healthcare provider will determine if the Prevena Plus 125 is the right choice for your specific wound type and healing needs.

Applying the Dressing

Proper dressing application is crucial for effective therapy with the Prevena Plus 125. Begin with a thoroughly cleansed and dried incision site‚ following your healthcare provider’s specific instructions. Carefully apply the provided Prevena dressing‚ ensuring a complete seal around the incision.

The dressing typically consists of a soft‚ absorbent layer and an adhesive outer layer. Avoid wrinkles or creases in the dressing‚ as these can compromise the negative pressure seal. Connect the tubing securely to the dressing‚ ensuring a tight and leak-proof connection.

Finally‚ connect the tubing to the Prevena Plus 125 therapy unit. Your clinician will demonstrate the correct technique and verify the seal before initiating therapy.

Maintaining Your Prevena Plus 125 System

Regular maintenance ensures optimal performance and longevity of your Prevena Plus 125 unit. Cleaning‚ troubleshooting‚ and proper battery care are essential components.

Cleaning the Therapy Unit

Maintaining a clean therapy unit is crucial for preventing infection and ensuring proper functionality of your Prevena Plus 125 system. Always disconnect the unit from the power source before initiating any cleaning procedures.

Use a soft‚ slightly damp cloth to gently wipe down the exterior surfaces of the unit. Avoid using harsh chemicals‚ abrasive cleaners‚ or excessive moisture‚ as these can damage the device. Pay particular attention to areas that may come into contact with the wound or dressing.

The tubing connectors should be inspected regularly for debris and cleaned with a sterile wipe if necessary. Ensure all components are completely dry before reconnecting them to the therapy unit. Do not immerse the unit in water or any other liquid.

Follow these cleaning guidelines consistently to maintain a hygienic and effective therapy environment‚ contributing to optimal wound healing and patient safety.

Troubleshooting Common Issues

Encountering issues with your Prevena Plus 125? Here’s guidance for resolving common problems. If the unit doesn’t power on‚ verify the power cord connection and battery charge. An alarm may indicate a leak in the tubing – inspect connections and the dressing seal.

If the unit displays an error message‚ consult the full instruction manual for specific code definitions. Kinked or pinched tubing can obstruct suction; gently straighten the tubing to restore flow. Ensure the therapy unit is placed on a stable surface to avoid disruptions.

If issues persist‚ do not attempt self-repair. Contact your healthcare provider or the manufacturer’s support line for assistance. Document any error messages or observed issues to aid in diagnosis and resolution.

Promptly addressing these concerns ensures continued effective therapy and optimal wound healing.

Battery Management and Replacement

Optimizing battery life is crucial for uninterrupted Prevena Plus 125 therapy. Regularly check the battery level indicator on the therapy unit. Avoid fully discharging the battery‚ as this can reduce its lifespan. When the unit is not in use for extended periods‚ store it with a partially charged battery.

To replace the battery‚ ensure the unit is powered off and disconnected from the power source. Follow the manufacturer’s instructions detailed in the full manual for safe battery removal and installation. Use only approved replacement batteries to maintain device performance and safety.

Dispose of used batteries responsibly‚ following local regulations for battery recycling. A healthy battery ensures consistent negative pressure and reliable therapy delivery.

Contact customer support if you experience rapid battery drain or difficulty with battery replacement.

Safety Precautions and Considerations

Prioritize safety! Understand contraindications‚ potential complications‚ and shower guidelines as directed by your doctor for optimal Prevena Plus 125 therapy outcomes.

Contraindications for Use

Important Considerations: The Prevena Plus 125 system is not suitable for all patients. Certain medical conditions and wound characteristics preclude its safe and effective use.

Specifically‚ the system should not be applied to wounds exhibiting untreated osteomyelitis‚ exposed bone or tendon‚ necrotic tissue with eschar‚ or significant sinus tracts. Patients with known allergies to adhesive components within the dressing should also avoid using this system.

Furthermore‚ the Prevena Plus 125 is contraindicated in cases of uncontrolled coagulation disorders or active hemorrhage. Deeply invasive wounds extending into body cavities require careful evaluation and may not be appropriate for NPWT.

Always consult with a healthcare professional to determine if Prevena Plus 125 therapy is the right choice for your specific wound and medical history. Ignoring these contraindications could lead to adverse events and impede the healing process.

Potential Complications

Awareness is Key: While Prevena Plus 125 therapy is generally safe‚ potential complications can occur. Vigilant monitoring and prompt reporting to your healthcare provider are crucial.

Common complications include skin irritation or maceration around the wound edges due to the dressing’s adhesive properties. Infection is a risk with any open wound‚ so watch for signs like increased pain‚ redness‚ swelling‚ or pus.

Bleeding‚ both under the dressing and from the wound itself‚ can sometimes occur. In rare cases‚ the therapy may disrupt wound healing or cause a fistula formation. Allergic reactions to the dressing materials are also possible‚ though uncommon.

Regularly inspect the wound and surrounding skin. Immediately report any concerning changes to your doctor to ensure timely intervention and optimal healing outcomes.

Showering with the Prevena Plus 125

Maintaining Hygiene: A quick‚ light shower may be permissible while using the Prevena Plus 125 system‚ but only if explicitly approved by your doctor. It’s vital to confirm this with your healthcare provider first‚ as individual circumstances vary.

When showering is allowed‚ protect the therapy unit from direct water exposure. Avoid prolonged or forceful water streams. Gently cleanse the skin around the dressing with mild soap and water‚ being careful not to dislodge or saturate the dressing.

After showering‚ pat the area dry with a soft towel. Ensure the tubing connections remain secure and dry. Never submerge the therapy unit in water. Always follow your doctor’s specific instructions regarding showering frequency and duration.

Prioritize keeping the system dry to maintain its functionality and prevent potential complications.

Advanced Features and Settings

Explore Capabilities: This section details adjustable therapy settings‚ alarm interpretations‚ and methods for monitoring your healing progress with the Prevena Plus 125.

Adjusting Therapy Settings (If Applicable)

Personalized Therapy: While the Prevena Plus 125 is often pre-programmed by your healthcare provider‚ some models may allow for limited adjustments to therapy parameters. Always consult with your doctor or wound care specialist before attempting any changes.

Potential adjustable settings could include therapy pressure levels‚ intermittent or continuous suction modes‚ and dwell times. These adjustments are tailored to individual wound characteristics and healing progress. Incorrect settings can hinder healing or cause complications.

Caution: Never exceed the pressure levels prescribed by your clinician. Monitor the wound site closely for any adverse reactions after a setting change. Document all adjustments made and report any concerns to your healthcare team immediately. Unauthorized modifications void the warranty and may compromise your treatment.

Refer to the full clinician’s manual for detailed instructions on accessing and modifying settings‚ if applicable to your specific Prevena Plus 125 unit.

Alarm Functions and Interpretation

System Alerts: The Prevena Plus 125 incorporates several alarm functions to alert you to potential issues during therapy. Understanding these alarms is crucial for maintaining effective treatment and ensuring patient safety.

Common alarms include low pressure‚ occlusion (blockage in the tubing)‚ low battery‚ and system malfunction. Each alarm is accompanied by a visual and audible signal. The display screen will typically indicate the specific alarm type.

Troubleshooting: A low-pressure alarm may indicate a leak in the system; check all connections. An occlusion alarm suggests a kinked or blocked tube – gently straighten or replace the tubing. A low battery alarm prompts immediate charging or battery replacement.

Never ignore an alarm. Consult the troubleshooting section of this manual or contact your healthcare provider if you are unsure how to address an alarm. Document all alarm events and resolutions.

Monitoring Therapy Progress

Consistent Observation: Regularly assess your incision site while using the Prevena Plus 125. Note any changes in wound appearance‚ such as increased redness‚ swelling‚ drainage‚ or pain. Document these observations for your healthcare provider.

Dressing Evaluation: Check the dressing under the Prevena film periodically‚ without fully removing the system‚ to ensure it remains intact and appropriately moist. Avoid disturbing the wound bed unnecessarily.

Therapy Adherence: Maintaining consistent therapy settings‚ as prescribed by your doctor‚ is vital for optimal healing. Ensure the unit operates continuously‚ and address any alarms promptly to avoid interruptions.

Follow-up Appointments: Attend all scheduled follow-up appointments with your healthcare provider. They will evaluate your progress and adjust the therapy plan as needed. Report any concerns or questions you may have.

Clinician-Specific Instructions

Critical Assessment: Thoroughly verify the Prevena 125 unit’s normal operation before and during patient therapy; re-orient or relocate if performance is abnormal.

Verifying Normal Operation of the 125 Unit

Initial System Check: Before initiating therapy‚ clinicians must meticulously verify the Prevena Plus 125 unit is functioning correctly. Begin by visually inspecting the unit for any physical damage‚ ensuring all connections are secure and intact.

Power-On Sequence: Power on the device and observe the display screen for clear illumination and proper initialization. Confirm the unit successfully completes its self-test sequence without displaying any error messages. Listen for the normal operational sounds of the pump‚ indicating proper motor function;

Pressure Verification: Utilize a calibrated pressure gauge to validate the accuracy of the negative pressure settings. Ensure the delivered pressure aligns with the prescribed therapy parameters. Monitor the pressure readings throughout the therapy cycle to confirm consistent performance.

Alarm Functionality: Test all alarm functions – high and low pressure‚ occlusion‚ and battery level – to ensure they activate appropriately and audibly alert personnel to potential issues. Document all verification steps in the patient’s medical record.

Re-orienting or Relocating the Unit

Maintaining Therapy Continuity: Should the need arise to re-orient or relocate the Prevena Plus 125 therapy unit‚ clinicians must prioritize uninterrupted negative pressure therapy. Avoid any abrupt movements that could disrupt the established pressure settings or compromise the wound dressing seal.

Careful Handling: Gently lift and move the unit‚ ensuring the tubing remains free from kinks‚ pinches‚ or excessive tension. Securely reposition the unit in a stable location‚ preventing accidental dislodgement or falls. Verify the tubing’s pathway is clear and unobstructed.

Post-Relocation Verification: Following relocation‚ immediately re-verify the unit’s normal operation‚ as outlined in the verification protocol. Confirm the pressure settings remain accurate and the alarm functions are responsive. Document the relocation event and subsequent verification in the patient’s chart.

Patient Comfort: Throughout the process‚ maintain patient comfort and explain the reason for the unit’s repositioning. Address any concerns or questions the patient may have regarding the relocation.

Documentation and Reporting

Comprehensive Record Keeping: Meticulous documentation is crucial when utilizing the Prevena Plus 125 system. Clinicians must accurately record all relevant therapy details in the patient’s medical record‚ including initial assessment findings‚ dressing application dates and times‚ and any observed wound characteristics.

Therapy Parameter Logging: Document the specific therapy settings employed – pressure levels‚ therapy duration‚ and any adjustments made throughout the treatment course. Record any alarms triggered by the unit‚ along with the corresponding interventions implemented.

Adverse Event Reporting: Any adverse events or complications experienced by the patient during Prevena therapy must be promptly documented and reported according to institutional protocols. This includes skin irritation‚ infection signs‚ or device malfunctions.

Treatment Progress Notes: Regularly update the patient’s chart with progress notes detailing wound healing progression‚ dressing changes‚ and overall therapy effectiveness. This detailed record supports informed clinical decision-making.

Manuals

arctic king air conditioner user manual

Article Plan: Arctic King Air Conditioner User Manual

This comprehensive guide details installation, operation, maintenance, and troubleshooting for Arctic King air conditioners, ensuring optimal performance and user satisfaction․

Arctic King offers affordable cooling solutions, including window and portable units; this manual provides essential guidance for proper setup, safe operation, and long-lasting performance․

Brand Overview & Product Range

Arctic King, a trusted name in home appliances, focuses on delivering reliable and budget-friendly cooling solutions․ The brand caters to a wide range of needs, offering both window and portable air conditioner models․

Their product range includes various BTU capacities to suit different room sizes, from compact units ideal for bedrooms to more powerful options for larger living spaces․ Specific models like the WWK08CW01N, AKPD-14CR4, AKPD-14ER4, and AKPD-14HR4 represent their commitment to diverse customer requirements․

Arctic King emphasizes ease of use and maintenance, aiming to provide comfortable cooling without unnecessary complexity․ The availability of detailed user manuals, like the one this article supports, underscores this dedication to customer support․

Importance of the User Manual

The Arctic King air conditioner user manual is a vital resource for maximizing your unit’s performance and lifespan․ It contains crucial safety instructions, preventing potential hazards during installation and operation․

Beyond safety, the manual provides step-by-step guidance on proper setup, ensuring efficient cooling and preventing common issues․ Understanding the control panel, operating modes (Cool, Fan, Dry, Auto), and maintenance procedures – like filter cleaning – is key to optimal functionality․

Furthermore, the manual offers valuable troubleshooting tips and explains error codes, potentially saving costly service calls․ Retaining this document for future reference is highly recommended for continued, trouble-free use of your Arctic King appliance․

Safety Precautions

Prioritize electrical safety and heed all general warnings within this manual to prevent fire, shock, or injury during Arctic King AC use․

Electrical Safety Guidelines

Always ensure the Arctic King air conditioner is properly grounded to prevent electrical shock․ Never operate the unit with a damaged power cord or plug; replace immediately․ Avoid using extension cords, as they can overheat and pose a fire risk․

Do not expose the air conditioner to rain or moisture․ Disconnect the unit from the power source before cleaning or performing any maintenance․

The electrical requirements specified on the unit’s nameplate must be strictly adhered to․ Incorrect voltage can damage the air conditioner and void the warranty․ If you are unsure about your electrical system, consult a qualified electrician before installation and operation․

Never attempt to repair the air conditioner yourself; contact authorized service personnel for assistance․

General Safety Warnings

Keep children and pets away from the air conditioner during operation․ Do not insert objects through the vents, as this can cause damage or injury․ Ensure proper ventilation around the unit; do not block airflow․

Never operate the air conditioner in a hazardous environment or near flammable materials․ If the unit malfunctions, immediately disconnect it from the power source and contact a qualified technician․

Avoid placing heavy objects on top of the air conditioner․ Regularly inspect the unit for any signs of damage․ Do not use the air conditioner for purposes other than its intended use – cooling and dehumidifying․

Always follow the instructions outlined in this manual for safe and effective operation․

Installation Guide

Proper installation is crucial for optimal performance․ This section provides detailed instructions for both window and portable Arctic King air conditioner models․

Window Air Conditioner Installation

Before beginning, ensure the window is structurally sound and can support the unit’s weight․ Carefully remove the air conditioner from its packaging and inspect for any shipping damage․ Assemble any included side panels, following the diagrams in the manual․ Position the unit within the window opening, ensuring a secure and level fit․

Extend the side panels to fill the gaps, and secure them with screws or foam insulation provided․ Proper sealing prevents air leakage and maximizes cooling efficiency․

Crucially, the unit should slightly tilt outwards to allow for condensate drainage․ Secure the air conditioner to the window frame using the provided mounting brackets, following all safety guidelines․ Finally, plug in the unit and test its operation․

Portable Air Conditioner Setup

Unpack your Arctic King portable AC and verify all components are present, including the exhaust hose, window kit, and remote control․ Assemble the window kit according to the manual’s instructions, ensuring a snug fit to prevent hot air from re-entering the room․ Connect the exhaust hose to the unit and the window kit – proper connection is vital for efficient operation․

Place the AC on a level surface, away from obstructions․ Ensure adequate ventilation around the unit․ Plug in the power cord and allow a few hours for the refrigerant to settle before operating; Use the remote or control panel to power on and select your desired settings․

Understanding Your Arctic King Air Conditioner

Familiarize yourself with the unit’s components and control panel for effective operation and maintenance, maximizing cooling performance and extending its lifespan․

Component Identification

Locating and understanding each part of your Arctic King air conditioner is crucial for proper use and maintenance․ Key components include the front panel, housing the control panel and air filter․ The air filter itself, typically removable, cleans incoming air․

The cooling coils, often behind the filter, are responsible for cooling the air․ The fan, both inside and outside the unit, circulates air․ For window units, side panels adjust to window size; Portable models have exhaust hoses and window kits․

Drainage ports or tanks manage condensation․ Power cords and control cables connect the unit․ Refer to diagrams in your specific model’s manual for precise locations and functions of each component․ Knowing these parts aids in troubleshooting and upkeep․

Control Panel Overview

The Arctic King air conditioner control panel is your command center for adjusting settings․ Typically, a “Power” button initiates operation․ “Mode” selects cooling, fan-only, dry/dehumidify, or auto functions․ Temperature adjustment buttons, often “+” and “-”, control the desired room temperature․

Fan speed controls (Low, Medium, High) regulate airflow․ A timer function allows for scheduled operation․ Some models feature a “Sleep” mode for quiet, energy-efficient cooling overnight․ Digital displays show the set temperature and operating mode․

Error codes may appear on the display, indicating issues․ Refer to the troubleshooting section of this manual for code definitions․ Familiarize yourself with each button’s function for optimal control and comfort․

Operating Modes Explained

Arctic King ACs offer Cool, Fan, Dry, and Auto modes, providing versatile climate control options to suit individual preferences and environmental conditions․

Cool Mode: Settings and Usage

Cool mode is your primary setting for lowering room temperature․ To activate, select “Cool” using the Mode button on your Arctic King unit․

Temperature adjustment is crucial; use the “Up” and “Down” arrows to set your desired coolness level, typically ranging from 60°F to 80°F (16°C to 27°C)․

Fan speed can be adjusted independently within Cool mode – choose from Low, Medium, or High for personalized airflow․ Remember, a lower fan speed conserves energy but provides less immediate cooling․

For efficient operation, close windows and doors to prevent warm air from entering․ Some models feature “Sleep” mode within Cool, gradually increasing the temperature overnight for comfort and energy savings․

Regular filter cleaning optimizes cooling performance in this mode․

Fan Mode: Different Fan Speeds

Fan mode circulates air without actively cooling it, providing ventilation and a refreshing breeze․ Select “Fan” on your Arctic King air conditioner’s control panel to engage this function․

Typically, three fan speed options are available: Low, Medium, and High․ Low speed offers a gentle airflow, ideal for quiet operation and minimal disturbance․ Medium provides a balanced circulation, suitable for most situations․

High speed delivers maximum airflow for rapid air movement and increased ventilation․ Adjust the speed using the designated buttons on the control panel․

Fan mode is excellent for distributing air after using Cool or Dry mode, or simply for maintaining air circulation on moderate days․ It consumes less energy than Cool mode․

Dry Mode (Dehumidifying): How it Works

Dry Mode, or dehumidifying, reduces moisture in the air without significantly lowering the room temperature․ This is achieved by running the air conditioner’s cooling coils at a lower temperature, causing condensation to form and be collected․

Select “Dry” on the control panel to activate this mode․ The fan typically operates at a low speed during dehumidification to maximize moisture removal; The unit extracts excess humidity, creating a more comfortable environment, especially in damp climates․

Dry mode is ideal for rainy seasons or humid areas where you want to reduce stickiness without feeling overly chilled․ It helps prevent mold and mildew growth by lowering humidity levels․

The collected water is usually drained through a designated outlet or evaporated internally․

Auto Mode: Intelligent Temperature Control

Auto Mode offers a convenient, hands-free operation by automatically adjusting cooling and fan speeds to maintain a desired room temperature․ The air conditioner intelligently monitors the ambient temperature and adjusts its settings accordingly, optimizing both comfort and energy efficiency․

To activate Auto Mode, simply select it on the control panel․ You’ll typically set a target temperature, and the unit will work to achieve and maintain it․ The fan speed will vary based on the temperature difference between the room and the setpoint․

This mode is perfect for situations where consistent comfort is desired without constant manual adjustments․ It’s an energy-saving option as it avoids unnecessary cooling․

Maintenance & Cleaning

Regular cleaning of filters and coils is crucial for maintaining optimal performance, efficiency, and extending the lifespan of your Arctic King unit․

Filter Cleaning: Step-by-Step Instructions

Maintaining a clean air filter is paramount for efficient operation and air quality․ First, disconnect the power to your Arctic King air conditioner․ Locate the filter, usually behind the front grille – consult your model’s diagram․ Gently remove the filter, noting its orientation for correct re-installation․

Vacuum the filter to remove loose dust and debris․ For a deeper clean, wash the filter with mild soap and lukewarm water; avoid harsh chemicals․ Rinse thoroughly and allow it to dry completely before re-inserting․ A clogged filter restricts airflow, reducing cooling efficiency and potentially damaging the unit; Inspect the filter regularly – ideally every two weeks during heavy use – and clean or replace as needed․ Replacing filters is recommended every 30-90 days for optimal performance․

Coil Cleaning: Best Practices

Regularly cleaning the evaporator and condenser coils enhances cooling efficiency and extends your Arctic King AC’s lifespan․ Disconnect power before starting․ Locate the coils – the evaporator is inside, the condenser outside․ Use a soft brush attachment on your vacuum to gently remove dust and debris․

For deeper cleaning, use a commercially available coil cleaner, following the product’s instructions carefully․ Avoid bending the fins; they are delicate and crucial for heat exchange․ Rinse with a low-pressure stream of water (if applicable, check your model’s instructions)․ Ensure coils are completely dry before reassembling and powering on․ Professional cleaning is recommended annually for optimal results, especially for the condenser coil exposed to outdoor elements․

Troubleshooting Common Issues

This section provides solutions for typical problems like insufficient cooling, water leaks, and error codes, helping you quickly resolve AC malfunctions․

Air Conditioner Not Cooling

If your Arctic King air conditioner isn’t cooling effectively, several factors could be at play․ First, ensure the filter is clean; a clogged filter restricts airflow, hindering cooling performance․

Next, verify the thermostat is set to a temperature lower than the room temperature and that you’ve selected ‘Cool’ mode․ Check for obstructions blocking the vents, both inside and outside the unit․

Also, confirm the window (for window units) is properly sealed to prevent warm air from entering․ For portable units, ensure the exhaust hose is correctly installed and isn’t kinked or damaged․

If the problem persists, there might be a refrigerant leak or a compressor issue, requiring professional service;

Water Leaking from Unit

Water leakage from your Arctic King air conditioner often indicates a drainage issue․ In cooling mode, condensation is normal, and the unit should drain this water․ However, if excessive water leaks, check the drain hose for clogs or kinks․

Ensure the unit is slightly tilted towards the drain outlet to facilitate proper water flow․ For window units, confirm the exterior drain pan isn’t full or blocked․

Portable units require emptying the water tank regularly; an overflowing tank will cause leaks․ Improper installation, like not being level, can also contribute to leakage․

If the leak continues despite these checks, a damaged drain pan or internal component might be the cause, necessitating professional repair․

Error Codes and Their Meanings

Arctic King air conditioners utilize error codes to signal specific malfunctions, aiding in troubleshooting․ While code lists vary by model, common errors include “E1” or “F1” indicating a sensor failure (temperature sensor often)․ “E2” or “F2” typically points to a compressor issue, requiring professional attention․

“E3” or “F3” often signals a fan motor problem, potentially due to obstruction or motor failure․ “E4” or “F4” can indicate a refrigerant leak, a serious issue needing a qualified technician․

Consult your specific model’s manual for a complete error code list and recommended actions․

Ignoring error codes can lead to further damage․ If you’re unsure, contact Arctic King support for assistance․

Warranty Information & Support

Arctic King offers a limited warranty covering parts and labor for one year; retain your proof of purchase for claims and support inquiries․

Warranty Coverage Details

Arctic King’s warranty safeguards against manufacturing defects in materials and workmanship for a period of one year from the original purchase date․ This coverage extends to both parts and labor required to correct such defects, when the unit is used under normal operating conditions and in accordance with the provided user manual․

The warranty does not cover damage resulting from misuse, abuse, improper installation, power surges, or acts of nature․ Cosmetic damage is also typically excluded․ To initiate a warranty claim, you must provide proof of purchase (receipt or invoice) and a detailed description of the issue․ Contact Arctic King’s customer support for assistance with the claim process and authorized service locations․ Modifications or unauthorized repairs will void the warranty․

PDF

art history volume 1 6th edition pdf

Art History Volume 1 6th Edition PDF: A Comprehensive Plan

DeviantArt fosters a vibrant art community, showcasing diverse styles—from digital art to traditional painting—and connecting artists globally through shared creativity.

This sixth edition of Art History Volume 1 builds upon a strong foundation, offering a comprehensive and visually engaging exploration of artistic traditions. Reflecting the dynamic nature of the field, this iteration incorporates recent scholarship and diverse perspectives. DeviantArt, a thriving online community, mirrors this spirit by showcasing a vast spectrum of artistic expression, from digital creations inspired by Windows 11 aesthetics to traditional mediums.

The PDF format ensures accessibility for students, allowing for convenient study across various devices. This edition emphasizes not only the historical context of artworks but also their cultural significance, encouraging critical thinking and a deeper appreciation for the human creative impulse. Like the diverse artwork found on platforms like DeviantArt, this textbook aims to broaden understanding and inspire further exploration.

The Significance of Art History Studies

Studying art history, as presented in Art History Volume 1, transcends mere memorization of dates and artists. It cultivates critical thinking, visual literacy, and an understanding of cultural contexts. Platforms like DeviantArt demonstrate the ongoing evolution of artistic expression, mirroring the historical shifts explored in the text. Analyzing artworks – be they ancient sculptures or contemporary digital pieces – allows us to decipher societal values, beliefs, and power structures.

This edition emphasizes the interconnectedness of art and history, revealing how artistic movements reflect and shape the world around them. Just as DeviantArt connects artists and enthusiasts, art history connects us to past civilizations and fosters a deeper appreciation for human creativity across time and cultures.

Understanding the PDF Format and Accessibility

The PDF format for Art History Volume 1, 6th Edition ensures consistent presentation across various devices, preserving the visual integrity of artworks. This digital format facilitates easy navigation, searchability, and annotation, enhancing the learning experience. Like the expansive DeviantArt platform, which hosts diverse artistic styles, the PDF allows for detailed examination of images.

Accessibility features, such as text-to-speech compatibility and adjustable font sizes, cater to diverse learning needs. The PDF’s portability allows students to study anytime, anywhere, mirroring the global reach of online art communities. Optimized file sizes ensure efficient download and storage, making this resource readily available.

Ancient Art (Prehistoric to Ancient Egypt)

DeviantArt’s diverse art reflects humanity’s creative journey, echoing the evolution from prehistoric cave paintings to the monumental structures of Ancient Egypt.

Prehistoric Art: Cave Paintings and Early Sculpture

DeviantArt serves as a modern echo of prehistoric expression, mirroring the impulse to create found in ancient cave paintings and early sculptural forms. Just as early humans utilized pigments and stone, contemporary artists on the platform explore diverse mediums to convey meaning and emotion.

The platform’s vast collection showcases a spectrum of styles, reminiscent of the abstract and representational imagery found in Paleolithic art. From digital paintings evoking the dynamism of Lascaux’s bulls to sculpted figures inspired by Venus figurines, DeviantArt demonstrates the enduring human fascination with form and storytelling. The community aspect also parallels the social function of prehistoric art, fostering connection and shared cultural experiences.

Exploring DeviantArt offers a unique lens through which to appreciate the origins of artistic expression, highlighting the continuity between ancient and contemporary creative endeavors.

Ancient Near Eastern Art: Mesopotamia and the Fertile Crescent

DeviantArt’s expansive gallery reflects the complex narratives and symbolic power characteristic of Ancient Near Eastern art, particularly from Mesopotamia and the Fertile Crescent. The platform hosts numerous digital renderings inspired by ziggurats, cuneiform inscriptions, and the majestic imagery of Assyrian palaces.

Similar to the monumental scale and hierarchical proportions found in ancient reliefs, many artists on DeviantArt create works that convey authority and divine power. The platform’s focus on character design and world-building often echoes the mythological themes prevalent in Mesopotamian art, such as the Epic of Gilgamesh.

DeviantArt, therefore, provides a contemporary space to explore and reinterpret the artistic legacy of one of civilization’s earliest cradles.

Ancient Egyptian Art: Pharaohs, Pyramids, and the Afterlife

DeviantArt’s digital landscape frequently showcases interpretations of Ancient Egyptian iconography, reflecting the enduring fascination with pharaohs, pyramids, and beliefs surrounding the afterlife. Numerous artists create stunning depictions of gods like Ra, Osiris, and Isis, often incorporating hieroglyphs and traditional color palettes.

The platform’s community embraces the symbolic weight of Egyptian art, with many pieces exploring themes of resurrection, divine kingship, and the journey through the underworld. Character designs often feature elaborate headdresses, jewelry, and clothing mirroring those worn by ancient Egyptians.

DeviantArt, thus, serves as a modern forum for reimagining and celebrating the artistic achievements of this ancient civilization.

Key Characteristics of Ancient Egyptian Art

DeviantArt’s vast collection reveals how contemporary artists interpret key characteristics of Ancient Egyptian art – notably, its emphasis on symbolism and hierarchical scale. Many digital paintings and illustrations demonstrate a flattened perspective and stylized human forms, echoing the conventions of ancient reliefs and paintings.

The prevalence of profile views, combined with frontal torsos, is frequently observed in fan art and original character designs inspired by Egyptian aesthetics. Furthermore, the use of vibrant colors – particularly blues, greens, and golds – is a common tribute to the original palettes.

DeviantArt showcases a modern appreciation for these enduring artistic principles.

Ancient Greek and Roman Art

DeviantArt’s diverse art community explores classical themes, showcasing artists’ interpretations of Greek idealism and Roman power through digital and traditional mediums.

Archaic, Classical, and Hellenistic Greek Art

DeviantArt serves as a modern platform mirroring the evolution of Greek art, from the rigid formality of the Archaic period—evident in kouroi and korai sculptures—to the balanced idealism of the Classical era.

The site showcases interpretations of the Classical focus on human proportion and harmony, alongside explorations of the Hellenistic period’s increased dynamism and emotional expression. Artists on DeviantArt demonstrate a fascination with these stylistic shifts, often reinterpreting iconic forms like Greek pottery and architectural elements.

Furthermore, the platform allows for a digital reimagining of these ancient styles, blending traditional aesthetics with contemporary techniques, fostering a continuous dialogue between past and present artistic expression.

Greek Sculpture: Idealism and Realism

DeviantArt’s digital art community frequently engages with the core tenets of Greek sculpture: the pursuit of both idealized beauty and realistic representation. Artists explore how the Greeks strived for perfection in form, yet simultaneously captured anatomical accuracy and emotional nuance.

The platform hosts numerous works inspired by iconic sculptures like the Doryphoros (Spear-Bearer), demonstrating an understanding of the Classical canon of proportions. Simultaneously, explorations of drapery, musculature, and facial expressions showcase a commitment to realism.

DeviantArt provides a space for contemporary artists to deconstruct and reinterpret these principles, often blending them with modern artistic sensibilities and digital techniques.

Roman Art: Engineering, Portraiture, and Imperial Power

DeviantArt’s expansive community reflects the Roman fascination with both practical engineering and the glorification of power through art. The platform showcases digital renderings inspired by Roman architectural feats – aqueducts, amphitheaters, and triumphal arches – highlighting their innovative construction.

Furthermore, the tradition of Roman portraiture, emphasizing realism and conveying status, finds echoes in contemporary digital portraits shared on DeviantArt. Artists explore how likeness was used to project authority and commemorate individuals.

The platform also serves as a space to examine how art was employed to legitimize imperial rule and celebrate military victories, mirroring the Roman emphasis on propaganda and spectacle.

Roman Architecture: Innovations and Influence

DeviantArt’s digital art community frequently reimagines Roman architectural innovations, like the arch, vault, and dome, demonstrating their enduring influence. Users share concept art depicting futuristic cities built upon Roman principles, showcasing the practicality and aesthetic appeal of these designs.

The platform also highlights how Roman building techniques—concrete, brickwork—revolutionized construction and enabled large-scale projects. Artists explore the interplay between form and function in Roman structures, like the Colosseum and Pantheon.

DeviantArt serves as a visual testament to Rome’s lasting legacy, with artists drawing inspiration from its architectural grandeur and adapting its elements into contemporary designs.

Early Christian and Byzantine Art

DeviantArt displays mosaics and icons, mirroring Byzantine art’s spiritual focus, alongside digital interpretations of centralized church designs by talented artists.

The Rise of Christianity and Early Christian Art

DeviantArt’s expansive community reflects the burgeoning influence of Christianity, mirroring its early artistic expressions. The platform showcases digital interpretations of catacomb paintings, illustrating the faith’s initial clandestine nature. Artists explore themes of salvation and resurrection, echoing the core tenets of the emerging religion.

Furthermore, the site features modern renditions of early Christian symbols – the fish, the lamb, and the cross – demonstrating their enduring power. Users connect through shared appreciation for these foundational artistic representations. The platform’s diverse range of styles, from traditional painting to digital illustration, provides a unique lens through which to examine the evolution of Early Christian art, fostering a vibrant dialogue among artists and enthusiasts alike.

Byzantine Art: Mosaics, Icons, and Centralized Churches

DeviantArt serves as a digital gallery for Byzantine-inspired artwork, showcasing the splendor of mosaics and icons. Artists recreate the shimmering gold backgrounds and stylized figures characteristic of this period, demonstrating mastery of digital painting techniques. The platform hosts interpretations of iconic imagery – Christ Pantocrator, the Virgin Mary – reflecting the spiritual depth of Byzantine art.

Furthermore, users share designs for centralized churches, inspired by structures like Hagia Sophia, exploring architectural principles and decorative elements. This online community fosters appreciation for Byzantine aesthetics, allowing artists to connect and share their interpretations of this influential style. The platform’s diverse range of artistic expressions provides a modern perspective on a historical tradition.

Influence of Byzantine Art on Eastern Europe

DeviantArt visually documents the enduring legacy of Byzantine art in Eastern Europe. Artists depict the stylistic echoes in frescoes, icon painting, and church architecture across countries like Russia, Serbia, and Bulgaria. The platform showcases how Byzantine motifs – stylized figures, rich colors, and religious symbolism – were adapted and integrated into local artistic traditions.

Users share artwork illustrating the influence on regional variations, demonstrating how Byzantine aesthetics shaped national identities. Digital artists recreate historical examples and explore contemporary interpretations, fostering a deeper understanding of this cultural exchange. DeviantArt becomes a virtual museum, preserving and celebrating the lasting impact of Byzantine art on Eastern European visual culture.

Medieval Art (Romanesque and Gothic)

DeviantArt’s diverse collection features medieval-inspired artwork, showcasing pilgrimage churches, stained glass, and pointed arches, reflecting the era’s artistic evolution.

Romanesque Art: Pilgrimage Churches and Sculptural Reliefs

DeviantArt serves as a digital gallery, exhibiting a wide range of artistic interpretations, including those inspired by Romanesque architecture. This period, flourishing roughly from 1000 to 1200 AD, witnessed the rise of magnificent pilgrimage churches designed to accommodate the increasing flow of travelers to holy sites.

These structures were not merely places of worship; they were complex architectural achievements, often featuring rounded arches, massive walls, and relatively small windows. Sculptural reliefs, frequently adorning portals and capitals, played a crucial role in conveying biblical stories and moral lessons to a largely illiterate population. Artists on DeviantArt often recreate or reimagine these powerful visual narratives, demonstrating the enduring influence of Romanesque aesthetics. The platform allows exploration of this style’s unique blend of religious devotion and artistic expression.

Gothic Art: Cathedrals, Stained Glass, and Pointed Arches

DeviantArt’s expansive community frequently showcases artwork inspired by the soaring heights and intricate details of Gothic cathedrals; Emerging in the mid-12th century, Gothic art dramatically departed from the Romanesque, prioritizing verticality and light. Pointed arches, ribbed vaults, and flying buttresses enabled the construction of taller, more spacious structures, exemplified by masterpieces like Chartres and Notre-Dame.

Stained glass windows became a defining feature, transforming sunlight into a kaleidoscope of color and illustrating biblical scenes for worshippers. Sculptural programs, though still present, became more naturalistic. Artists on the platform explore these elements, often digitally recreating the luminous effects of stained glass or depicting the architectural grandeur. DeviantArt provides a space to appreciate and reinterpret this influential artistic period.

The Development of Gothic Architecture

DeviantArt’s digital artists often engage with architectural themes, including the evolution of Gothic design. Initially emerging in France, Gothic architecture represented a significant technological and aesthetic leap. The pointed arch, a key innovation, distributed weight more efficiently than rounded Romanesque arches, allowing for taller buildings and larger windows.

Ribbed vaults and flying buttresses further supported these structures, enabling thinner walls and increased light. This pursuit of height and luminosity symbolized a reaching towards the divine. Artists on the platform frequently depict these features, showcasing the intricate engineering and spiritual aspirations of the era. The style spread across Europe, adapting to regional variations, as seen in the artwork shared on DeviantArt.

Renaissance Art (Early and High Renaissance)

DeviantArt’s community explores Renaissance ideals through digital recreations and inspired works, mirroring the period’s focus on humanism and classical artistic principles.

Early Renaissance in Florence: Brunelleschi, Donatello, and Masaccio

DeviantArt serves as a modern gallery, reflecting the innovative spirit of the Early Renaissance masters. Artists on the platform, much like Brunelleschi, experiment with perspective and architectural forms in digital landscapes and designs. The sculptural dynamism of Donatello finds echoes in character designs and 3D modeling, showcasing a renewed interest in anatomical accuracy and expressive poses.

Furthermore, the dramatic use of light and shadow pioneered by Masaccio is replicated in digital paintings and illustrations, creating depth and emotional impact. The platform’s diverse community demonstrates a continuing fascination with these foundational figures, reinterpreting their techniques and themes for contemporary audiences, proving the enduring legacy of Florentine innovation.

High Renaissance: Leonardo da Vinci, Michelangelo, and Raphael

DeviantArt’s expansive collection mirrors the High Renaissance’s pursuit of ideal beauty and technical mastery. The intricate detail and sfumato technique reminiscent of Leonardo da Vinci are evident in highly rendered digital paintings and photorealistic illustrations. Michelangelo’s powerful figures and dynamic compositions inspire character art and dramatic scenes, showcasing anatomical precision and emotional intensity.

Similarly, Raphael’s harmonious compositions and graceful figures find expression in collaborative artwork and fan art, demonstrating a shared appreciation for balance and clarity. The platform fosters a space where artists explore these Renaissance ideals, pushing boundaries and creating new interpretations of classic themes, echoing the era’s spirit of innovation.

Renaissance Humanism and its Impact on Art

DeviantArt reflects Renaissance Humanism’s focus on individual potential and earthly experience through diverse portraiture and character design. Artists explore themes of human emotion, intellect, and physicality, mirroring the era’s shift from solely religious subjects. The platform’s collaborative nature embodies humanist ideals of shared knowledge and artistic exchange, fostering a community where creators learn and inspire one another.

The celebration of classical antiquity, a core tenet of Humanism, is visible in artwork referencing Greek and Roman mythology and aesthetics. This revival of classical forms and ideas fuels creative exploration, demonstrating a continued fascination with human-centered narratives and artistic expression, much like the Renaissance masters.

The Role of Patronage in Renaissance Art

DeviantArt mirrors Renaissance patronage systems through commission opportunities and artist support networks. Just as wealthy families funded masterpieces, today’s platform allows artists to gain visibility and income through direct engagement with fans and collectors. This digital patronage empowers creators, fostering artistic innovation and allowing them to pursue ambitious projects.

The platform’s “core members” and subscription models echo the historical relationship between artists and benefactors, providing resources and recognition. This dynamic fosters a vibrant ecosystem where artistic talent is nurtured and celebrated, similar to the flourishing of art during the Renaissance due to generous patronage.

Baroque and Rococo Art

DeviantArt’s diverse galleries showcase dramatic and ornate styles, reflecting Baroque grandeur and Rococo elegance, mirroring historical artistic expressions;

Baroque Art: Drama, Emotion, and Grandeur

DeviantArt exemplifies how artists connect and share their work, mirroring the Baroque period’s emphasis on emotional impact and dramatic presentation. The platform’s diverse range of digital and traditional art reflects the Baroque’s characteristic grandeur, seen in elaborate compositions and intense emotional displays.

Like the Baroque masters, contemporary artists on DeviantArt often utilize strong contrasts of light and shadow, creating a sense of dynamism and theatricality. The community fosters exploration of themes mirroring Baroque concerns – spirituality, power, and the human condition.

The platform’s accessibility allows for widespread appreciation of artistic skill, echoing the Baroque’s intention to inspire awe and devotion through visually stunning creations. DeviantArt, in essence, provides a modern forum for the continued exploration of Baroque aesthetics.

Rococo Art: Elegance, Ornamentation, and Aristocratic Life

DeviantArt’s curated collections of wallpapers and themes demonstrate a modern parallel to Rococo’s focus on refined aesthetics and decorative detail. The platform showcases intricate designs and pastel palettes, reminiscent of the aristocratic salons that inspired Rococo art.

Similar to the Rococo emphasis on leisure and pleasure, DeviantArt provides a space for artists to explore lighthearted and fanciful subjects. The community’s embrace of diverse styles allows for the expression of elegance and ornamentation, mirroring the Rococo’s celebration of beauty.

The accessibility of DeviantArt democratizes artistic appreciation, offering a contemporary equivalent to the Rococo’s patronage system, where art flourished within aristocratic circles. It’s a digital gallery of refined tastes.

Key Artists of the Baroque Period

DeviantArt’s diverse artist profiles, like those of sonic-clubs and MiracleSpoonhunters FM, echo the Baroque’s emphasis on individual expression and dramatic skill. Each artist’s unique style, showcased on the platform, parallels the distinct approaches of Baroque masters.

The platform’s focus on sketching and digital art reflects the Baroque period’s technical virtuosity and exploration of light and shadow. Artists share their process, mirroring the Baroque emphasis on craftsmanship and innovation.

DeviantArt’s community aspect fosters collaboration and inspiration, akin to the workshops of Baroque artists. The exchange of ideas and techniques creates a dynamic environment for artistic growth, much like the Baroque era’s artistic circles.

Modern and Contemporary Art

DeviantArt’s expansive collection, including AI-generated art and wallpapers, demonstrates the ongoing evolution and diverse expressions within contemporary artistic practices.

Impressionism and Post-Impressionism

DeviantArt serves as a digital gallery, mirroring the innovative spirit of Impressionism and Post-Impressionism. The platform hosts a vast array of artwork, showcasing how contemporary artists engage with light, color, and subjective perspectives—hallmarks of these movements.

Users can explore pieces reminiscent of Monet’s landscapes or Van Gogh’s emotive brushstrokes, alongside entirely new interpretations. The site’s community aspect allows for discussion and analysis, fostering a deeper understanding of these pivotal periods.

Furthermore, DeviantArt’s accessibility enables a broader audience to appreciate the legacy of these styles, connecting historical movements with modern creative expression, and inspiring new generations of artists.

Early 20th Century Art: Fauvism, Expressionism, and Cubism

DeviantArt’s expansive collection reflects the radical shifts of the early 20th century, showcasing works echoing Fauvism’s bold colors, Expressionism’s emotional intensity, and Cubism’s fragmented forms. The platform allows artists to experiment with these styles, pushing boundaries and challenging traditional representation.

Users can discover digital art inspired by Matisse’s vibrant palettes, or pieces that capture the angst of Munch’s iconic imagery. The site’s collaborative environment encourages exploration of abstract concepts and innovative techniques, mirroring the avant-garde spirit of the era.

DeviantArt thus provides a dynamic space for both appreciating and reinterpreting these groundbreaking movements.

Surrealism and Abstract Expressionism

DeviantArt serves as a digital canvas for the dreamlike imagery of Surrealism and the emotive power of Abstract Expressionism. Artists on the platform explore the subconscious, creating works reminiscent of Dalí’s melting clocks and Magritte’s enigmatic scenes.

The site’s community fosters experimentation with automatic drawing, gestural brushstrokes, and non-representational forms, echoing Pollock’s drip paintings and Rothko’s color field explorations. Users share and critique pieces that delve into the realms of fantasy, emotion, and the purely abstract.

DeviantArt’s accessibility allows for a broad engagement with these influential movements, inspiring new interpretations and artistic expressions.

Pop Art and Contemporary Art Trends

DeviantArt reflects the vibrant energy of Pop Art, showcasing works inspired by Warhol’s screenprints and Lichtenstein’s comic-strip aesthetics. Artists embrace popular culture, consumerism, and mass media as subject matter, creating bold and iconic imagery.

The platform also tracks emerging contemporary art trends, including digital art, AI-generated pieces, and innovative uses of traditional mediums. Users explore themes of identity, technology, and social commentary, pushing the boundaries of artistic expression.

DeviantArt’s diverse community fosters a dynamic exchange of ideas, shaping the future of art and providing a space for experimentation and innovation.

PDF

all i want for christmas is them pdf

Understanding “All I Want For Christmas Is You” PDF Availability

Mariah Carey’s festive hit experiences surging popularity each year‚ driving demand for accessible sheet music. Numerous PDF versions are readily available online‚
catering to musicians of all levels. These digital resources offer convenient access to arrangements for various instruments and vocal groups‚ simplifying practice and performance.

Overview of the Song’s Popularity

“All I Want For Christmas Is You”‚ released in 1994‚ has transcended generations to become a modern holiday standard. Initially a moderate success‚ the song experienced a remarkable resurgence in the 2000s‚ fueled by radio play and inclusion in popular films.

Its enduring appeal stems from its upbeat tempo‚ catchy melody‚ and relatable lyrics‚ capturing the joyful spirit of the Christmas season. The song consistently charts globally each December‚ frequently reaching the top of the Billboard Hot 100‚ even decades after its release.

This sustained popularity translates into a high demand for musical arrangements‚ particularly sheet music. Musicians‚ choirs‚ and bands seek to recreate the song’s magic‚ leading to a proliferation of PDF versions available online‚ catering to diverse skill levels and instrumentation. The song’s cultural impact ensures its continued relevance for years to come.

The Rise in Demand for Sheet Music PDFs

The increasing accessibility of digital sheet music‚ particularly in PDF format‚ has dramatically fueled demand for “All I Want For Christmas Is You” arrangements. This trend aligns with a broader shift towards online music resources‚ offering convenience and affordability compared to traditional printed sheet music.

Platforms like Sharpschool.com‚ SheetsFree.com‚ MuseScore.com‚ and Scribd.com host numerous PDF versions‚ catering to a wide range of musical needs. The ease of downloading and printing PDFs eliminates shipping costs and waiting times‚ appealing to musicians seeking immediate access to arrangements.

Furthermore‚ the availability of diverse arrangements – from solo piano to SSA vocal scores – expands the song’s accessibility to different ensembles and skill levels. This digital format also facilitates easy sharing and collaboration among musicians‚ contributing to the song’s continued performance and popularity during the holiday season.

Sources for “All I Want For Christmas Is You” PDFs

Numerous online platforms provide PDF sheet music for this beloved song‚ including Sharpschool.com‚ SheetsFree.com‚ MuseScore.com‚ and Scribd.com‚ offering varied arrangements.

Sharpschool.com PDF ⎯ A Potential Resource

Sharpschool.com hosts a PDF version of “All I Want For Christmas Is You‚” accessible as of April 1st‚ 2026. This resource‚ found at cdnsm5-ss16.sharpschool.com/UserFiles/Servers/Server_105872/File/All I Want For Christmas.pdf‚ presents a straightforward option for those seeking sheet music. While the provided description is currently blank‚ the file’s presence suggests it contains musical notation for the song.

Users should exercise caution and verify the completeness and accuracy of the arrangement before relying on it for performance or study. It’s crucial to remember that the quality of PDFs found on various websites can differ significantly. Further investigation might be needed to determine if this particular PDF suits specific musical needs‚ such as instrumentation or skill level. Always double-check the source and consider cross-referencing with other available versions.

SheetsFree.com: Accessing Sheet Music

SheetsFree.com provides a PDF of Mariah Carey’s “All I Want For Christmas Is You” located at sheetsfree.com/sheets/other/christmas/Mariah Carey ⎯ All I Want for Christmas Is You.pdf. The listing details a multi-page document‚ spanning seven pages‚ labeled as “FREEDOMSHEETS.COM”. This suggests a potentially complete arrangement of the song‚ though the specific instrumentation isn’t immediately clear from the description.

The website offers a preview indicating page content‚ allowing users to assess the sheet music’s layout and complexity before downloading. As with any free online resource‚ verifying the accuracy and legality of the arrangement is recommended. Users should be aware of potential copyright restrictions and ensure compliance with applicable laws when utilizing downloaded sheet music for performance or distribution. It’s a readily available option for quick access.

MuseScore.com: Piano Sheet Music Options

MuseScore.com hosts a piano sheet music arrangement of “All I Want For Christmas Is You” by Mariah Carey‚ accessible at musescore.com/khatharsis/all-i-want-for-christmas-is-you-for-piano. This version is specifically designed for solo piano‚ offering a convenient option for pianists looking to learn and perform the song. The sheet music is available for both download in PDF format and playback in MIDI‚ allowing musicians to hear the arrangement before playing.

Notably‚ this arrangement was originally published on December 11‚ 2016. Users can freely download and print the sheet music‚ making it a popular choice for piano enthusiasts. MuseScore’s platform also allows for community interaction‚ with users potentially offering feedback or modifications to the arrangement. It’s a valuable resource for piano players seeking a readily available and playable version.

Scribd.com: SSA Arrangements in PDF Format

Scribd.com provides an SSA (Soprano‚ Alto‚ Soprano) arrangement of “All I Want For Christmas Is You” in PDF format‚ located at scribd.com/document/621243630/All-I-Want-for-Christmas-SSA. This arrangement caters specifically to vocal ensembles‚ offering parts for each voice type within the SSA configuration. The document‚ totaling 11 pages‚ has garnered 6K views and received positive feedback‚ with 100% of 2 voters finding it useful.

Published on Saturday‚ December 13‚ 2025‚ at 01:17:30 GMT‚ this PDF is available for free download or online reading. Scribd’s platform allows users to share and access a wide range of documents‚ making it a convenient resource for choral directors and singers seeking arrangements of popular songs. The document is AI-enhanced for title clarity and offers saving options for later access.

Types of PDF Arrangements Available

Diverse PDF arrangements exist‚ including piano solos‚ SSA vocal scores‚ and potentially full band/orchestral versions. These cater to varied musical preferences and skill levels‚ offering flexibility.

Piano Sheet Music PDFs

Piano sheet music PDFs for “All I Want For Christmas Is You” are exceptionally popular‚ readily found on platforms like MuseScore.com and SheetsFree.com. These arrangements range in difficulty‚ accommodating beginner to advanced pianists. MuseScore specifically offers a free downloadable PDF and MIDI file‚ ideal for practice and learning the song’s iconic melody and harmonies.

SheetsFree.com provides a multi-page PDF version‚ offering a complete musical score. These PDFs typically include standard musical notation‚ including treble and bass clef‚ key signatures‚ and rhythmic values. Many versions prioritize solo piano performance‚ faithfully recreating the song’s original sound.

The availability of these PDFs allows pianists to quickly access and learn the song‚ making it a staple during the holiday season. Different arrangements may feature varying levels of ornamentation or simplified chords‚ catering to individual preferences and skill sets.

SSA (Soprano‚ Alto‚ Soprano) Arrangements

For vocal ensembles‚ SSA (Soprano‚ Alto‚ Soprano) arrangements of “All I Want For Christmas Is You” provide a beautiful harmonic texture. Scribd.com hosts a readily available PDF of an SSA arrangement‚ offering a version tailored for female vocalists. This format is particularly popular with choirs and vocal groups seeking to perform the song during the holiday season.

These arrangements typically feature layered harmonies‚ with the soprano lines carrying the melody and the alto providing supporting harmonies. The SSA voicing creates a bright and uplifting sound‚ perfectly capturing the song’s joyful spirit. The Scribd document is accessible for download and online viewing‚ offering a convenient resource for choral directors and singers.

These PDFs often include detailed vocal parts and may even offer suggestions for dynamics and phrasing‚ enhancing the overall performance quality.

Solo Piano Versions

Piano enthusiasts rejoice! Numerous solo piano arrangements of “All I Want For Christmas Is You” are easily accessible in PDF format. MuseScore.com stands out as a prominent source‚ offering a free downloadable sheet music version specifically designed for solo piano performance. This arrangement allows pianists to recreate the song’s iconic melody and harmonies with individual expression.

These PDFs often cater to varying skill levels‚ ranging from simplified arrangements for beginners to more complex versions for advanced players. The MuseScore version provides both PDF and MIDI formats‚ enabling musicians to not only read the music but also hear it played back digitally.

Solo piano arrangements capture the essence of the song‚ allowing for intimate and expressive performances‚ perfect for holiday gatherings or personal enjoyment.

Full Band/Orchestral Arrangements (Potential Search Terms)

While readily available PDFs primarily focus on piano and vocal arrangements‚ locating full band or orchestral versions requires more targeted searching. Direct PDF links for these larger ensembles are less common‚ often necessitating purchases from music retailers or creation from existing parts.

Effective search terms include: “All I Want For Christmas Is You band arrangement PDF‚” “orchestral score PDF‚” “big band chart Mariah Carey‚” or “full ensemble sheet music.” Exploring online music forums and arrangement marketplaces can also yield results.

Be prepared to encounter arrangements requiring transcription or adaptation. Websites specializing in custom arrangements might offer services to create a full band/orchestral PDF based on the original song. Patience and diligent searching are key to uncovering these more elaborate arrangements.

Using and Downloading PDFs

Downloading PDFs is straightforward‚ but users must consider legality and copyright. Ensure sources are reputable to avoid infringement and utilize compatible PDF readers for optimal viewing.

Legality and Copyright Considerations

Accessing sheet music PDFs‚ while convenient‚ necessitates careful attention to copyright laws. “All I Want For Christmas Is You” is a copyrighted composition‚ meaning unauthorized distribution or reproduction can be illegal. Downloading from unofficial sources may expose users to legal risks and potentially support copyright infringement.

When utilizing PDFs from platforms like Sharpschool‚ SheetsFree‚ MuseScore‚ or Scribd‚ it’s crucial to verify the source’s legitimacy and licensing agreements. Some platforms offer legally obtained‚ free sheet music‚ while others may host user-uploaded content with uncertain copyright status.

Purchasing sheet music from authorized retailers or subscribing to legitimate sheet music services guarantees compliance with copyright regulations. Respecting intellectual property rights ensures continued creation and availability of musical works for everyone to enjoy. Always prioritize legal and ethical access to sheet music PDFs.

PDF Readers and Compatibility

Viewing and interacting with “All I Want For Christmas Is You” PDF sheet music requires a compatible PDF reader. Adobe Acrobat Reader is the industry standard‚ offering reliable performance across various operating systems – Windows‚ macOS‚ and mobile devices. However‚ numerous free alternatives exist‚ including Foxit Reader‚ SumatraPDF‚ and built-in browser PDF viewers.

Compatibility issues are generally rare‚ but can occur with older PDF versions or complex formatting. Ensure your PDF reader is updated to the latest version to support modern PDF features. Some PDFs may contain embedded fonts; if these aren’t installed on your system‚ the reader might substitute them‚ altering the sheet music’s appearance.

Most readers allow zooming‚ printing‚ and annotation features‚ enhancing the learning and practice experience. Consider testing the PDF on your preferred device and reader to confirm optimal display and functionality before relying on it for performance or teaching purposes.

Printing Sheet Music from PDFs

Printing “All I Want For Christmas Is You” sheet music from a PDF requires careful consideration to ensure readability and preserve formatting. Before printing‚ review the print preview to confirm page orientation‚ margins‚ and scaling. Select “Actual Size” or “100%” scaling to avoid compression or stretching of the musical notation.

Paper quality significantly impacts the final print. Using heavier-weight paper prevents bleed-through from ink and provides a more durable sheet. For optimal results‚ choose a paper size that matches the PDF’s original dimensions – typically Letter (8.5 x 11 inches) or A4.

Most PDF readers offer options for printing specific page ranges or multiple copies. Experiment with different printer settings to achieve the desired print quality. Consider grayscale printing to conserve color ink‚ as sheet music is typically black and white. Always test print a single page before printing the entire arrangement.

Converting PDFs to Other Formats (MIDI)

Converting “All I Want For Christmas Is You” PDFs to MIDI format allows for greater flexibility in music production and arrangement. While direct conversion isn’t always perfect‚ several software options facilitate this process. MuseScore‚ for example‚ can import PDFs and export them as MIDI files‚ though manual correction of errors may be necessary.

Online PDF to MIDI converters are also available‚ but their accuracy can vary. These tools often struggle with complex musical notation or multiple instruments. The resulting MIDI file can then be imported into a Digital Audio Workstation (DAW) for editing‚ playback‚ and further manipulation.

Keep in mind that PDF to MIDI conversion is not lossless; some musical nuances may be lost during the process. The quality of the original PDF significantly impacts the conversion outcome. Expect to spend time refining the MIDI file to ensure accurate representation of the original composition.

Finding Specific Arrangements

Numerous online resources allow targeted searches for desired arrangements‚ including key signatures‚ skill levels‚ and instrumentation. Sharpschool‚ SheetsFree‚ MuseScore‚ and Scribd offer diverse options for musicians.

Searching for Specific Key Signatures

Locating sheet music in a preferred key is crucial for comfortable vocal performance or instrumental playing. Many musicians adapt songs to suit their vocal range or instrument capabilities. While a standard version might exist‚ finding a PDF transposed to a different key can significantly enhance playability.

Online platforms like MuseScore often allow users to filter search results by key signature. However‚ this functionality isn’t universally available across all sheet music websites. When a direct search doesn’t yield results‚ exploring forums or requesting transcriptions from music communities can be beneficial.

Furthermore‚ understanding basic music theory allows for self-transposition‚ though this requires proficiency. Websites offering PDF sheet music‚ such as SheetsFree‚ may not always explicitly state the key‚ necessitating careful review of the notation before downloading. Considering the original key and potential transposition needs before searching saves valuable time.

Locating Simplified Versions for Beginners

For aspiring musicians‚ tackling complex arrangements can be daunting. Simplified sheet music versions of “All I Want For Christmas Is You” are invaluable for building foundational skills. These arrangements typically feature fewer chords‚ simpler rhythms‚ and reduced ornamentation‚ making the song more accessible.

Searching specifically for “easy piano” or “beginner” arrangements often yields suitable results on platforms like MuseScore. These versions prioritize playability over intricate detail‚ allowing learners to focus on fundamental techniques. Websites may also offer arrangements with chord symbols instead of full notation‚ simplifying accompaniment.

However‚ quality can vary significantly. Previewing the sheet music before downloading is essential to ensure the simplification is appropriate for the skill level. Consider arrangements that break down sections into smaller‚ manageable parts‚ fostering a sense of accomplishment and encouraging continued learning.

Identifying Arrangements for Different Skill Levels

The availability of “All I Want For Christmas Is You” PDFs spans a wide spectrum of difficulty. Identifying the appropriate arrangement requires careful consideration of one’s musical proficiency. Beginner arrangements typically feature simplified chords‚ single-note melodies‚ and slower tempos‚ ideal for those new to the song or instrument;

Intermediate players can explore versions with more complex chord voicings‚ rhythmic variations‚ and introductory fills. These arrangements often retain the song’s core essence while presenting a greater technical challenge. Advanced musicians might seek out fully orchestrated or jazz-influenced arrangements‚ demanding a high level of skill and musicality.

Websites like MuseScore often include skill level indicators or user comments that can aid in selection. Previewing the sheet music is crucial; assess the complexity of the notation‚ the speed of the tempo‚ and the overall technical demands before committing to an arrangement.

Exploring Different Interpretations and Styles

Beyond standard piano and vocal arrangements‚ the PDF landscape for “All I Want For Christmas Is You” offers diverse interpretations. Discovering these variations can enrich your musical experience and inspire unique performances. SSA (Soprano‚ Alto‚ Soprano) arrangements‚ found on platforms like Scribd‚ cater specifically to vocal ensembles‚ providing harmonies and vocal arrangements distinct from the original.

Furthermore‚ while full orchestral PDFs are less common‚ searching with specific terms might yield results. Musicians can adapt existing arrangements or create their own‚ blending genres like jazz‚ classical‚ or even electronic music. The availability of MIDI files‚ often accompanying piano PDFs‚ allows for experimentation with different instrumentation and sounds.

Exploring these stylistic variations encourages creativity and allows musicians to personalize the song‚ moving beyond a simple replication of the original and crafting a truly individual rendition.