Manuals

bowflex xtl user manual

Welcome to the Bowflex XTL User Manual! This guide provides essential information to help you safely and effectively use your equipment. Read carefully to ensure optimal results.

1.1 Overview of the Bowflex XTL

The Bowflex XTL is a versatile home fitness system designed for effective strength training and muscle building. Part of the Power Pro series, it offers adjustable resistance levels, making it suitable for users of all fitness levels. Known for its durability and compact design, the XTL model provides a comprehensive workout experience with attachments like the leg extension and chest bar. Originally released in the late 1990s to early 2000s, it remains popular among fitness enthusiasts for its reliability and efficiency. This equipment allows users to target multiple muscle groups, promoting overall physical fitness. With its user-friendly interface and customizable features, the Bowflex XTL is an excellent choice for those seeking a convenient and productive home gym solution.

1.2 Importance of Reading the Manual

Reading the Bowflex XTL user manual is essential for safe and effective use of the equipment. It provides critical information on assembly, maintenance, and proper usage techniques. The manual outlines safety precautions to avoid injuries and ensures you understand how to adjust resistance levels correctly. Additionally, it covers troubleshooting common issues and warranty details. By following the guidelines, you can maximize the equipment’s performance and extend its lifespan. Proper assembly and maintenance are vital for functionality, and the manual serves as a comprehensive guide. Take the time to review it thoroughly to make the most of your Bowflex XTL experience and achieve your fitness goals safely and efficiently.

Assembly Instructions for the Bowflex XTL

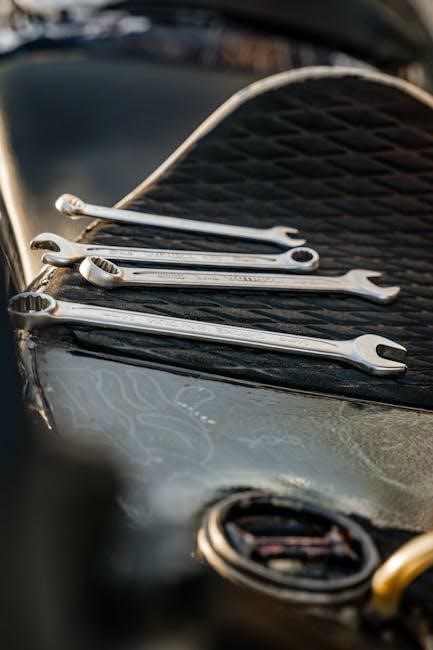
Assembly requires a 9/16 wrench and 7/16 wrench. Follow the step-by-step guide carefully to ensure proper setup and functionality. This ensures safety and optimal performance.

2.1 Pre-Assembly Checklist

Before assembling your Bowflex XTL, ensure you have all necessary tools and components. Gather a 9/16 wrench, 7/16 wrench, and Allen wrench for adjustments. Clear a large, flat workspace to organize parts. Unpack all components carefully to avoid damage. Verify the presence of all hardware, cables, and attachments. Refer to the manual for a detailed inventory list. Familiarize yourself with the assembly process to avoid confusion. Ensure proper lighting and ventilation in your workspace. Wear safety gloves to protect your hands during assembly. Double-check the manual for specific pre-assembly tips to ensure a smooth and safe setup. Having everything prepared will save time and reduce the risk of errors.

2.2 Step-by-Step Assembly Guide

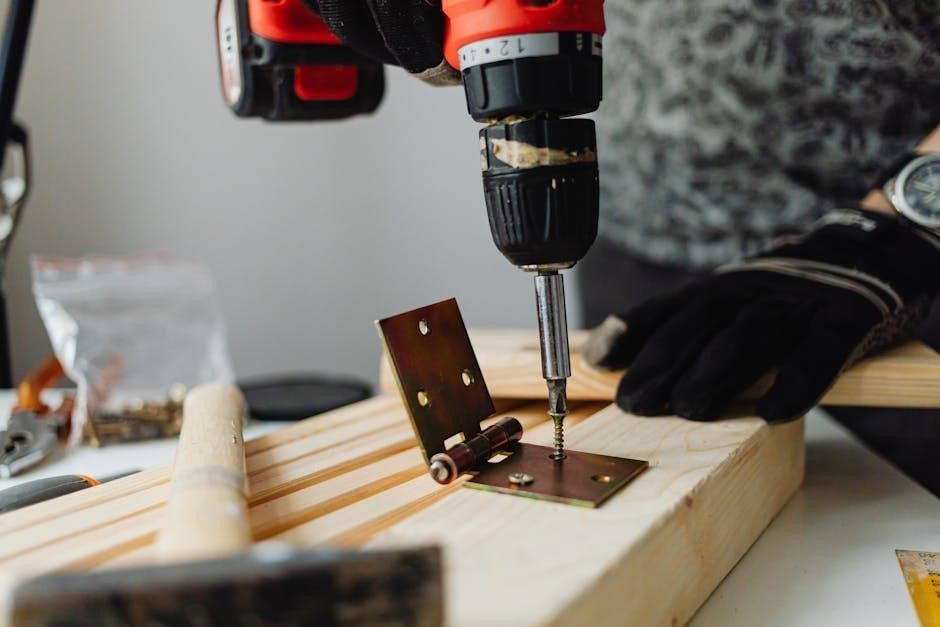
Begin by attaching the legs and frame using the provided bolts. Secure the bench and seat to the main frame with the 9/16 wrench; Next, connect the cable system, ensuring all pulleys align properly. Attach the resistance rods to the frame using the 7/16 wrench. Install the chest bar and other accessories according to the manual. Tighten all connections firmly to avoid loose parts. Double-check the cable tensions and resistance settings. Finally, test the equipment by performing a few light exercises to ensure smooth operation. Refer to the manual for visual guides to confirm each step is completed correctly. Proper assembly ensures safety and optimal performance of your Bowflex XTL;

Understanding the Exercise and Workout Guide

Maximize your workout potential with the Bowflex XTL by optimizing resistance levels and exploring various exercises. Tailor routines to target specific muscle groups for effective results.

3.1 Key Features of the Bowflex XTL

The Bowflex XTL is designed to offer a versatile and effective workout experience. Its key features include adjustable resistance levels, allowing users to customize their workouts based on fitness goals. The machine incorporates multiple cable pulleys, enabling a wide range of exercises targeting different muscle groups. Interchangeable attachments provide flexibility for various exercises, while the durable construction ensures long-lasting performance. Additionally, the XTL is known for its space-saving design, making it ideal for home use. The comprehensive guide included with the manual highlights these features, helping users maximize their training sessions. By leveraging these components, the Bowflex XTL delivers a robust platform for achieving strength and fitness objectives.

3.2 Adjusting Resistance Levels

Adjusting resistance levels on the Bowflex XTL is a straightforward process designed to suit your fitness goals. The machine allows for progressive overload, a key component of muscle growth. To modify resistance, use the provided pins or levers to select the desired weight. Ensure the cables are securely fastened to prevent slippage during workouts. The manual provides detailed step-by-step instructions for adjusting resistance safely and effectively. Proper adjustment ensures optimal performance and minimizes the risk of injury. Regularly reviewing the manual will help you master this feature, enabling you to tailor your workouts for maximum efficiency. This customization capability makes the Bowflex XTL an excellent choice for both beginners and advanced users seeking a versatile training experience.

Maintenance and Troubleshooting

Regularly clean and lubricate the Bowflex XTL. Check cables and pulleys for wear. Use a 9/16 wrench for adjustments. Address common issues promptly for optimal performance.

4.1 Routine Maintenance Tips

Regular maintenance is crucial to ensure the longevity and performance of your Bowflex XTL. Clean the equipment with a soft cloth and mild detergent to remove sweat and dirt. Lubricate moving parts periodically to reduce friction and wear. Inspect cables and pulleys for signs of wear or damage and replace them if necessary. Tighten any loose bolts or screws using the recommended tools, such as a 9/16 wrench. Refer to the manual for specific lubrication points and adjustment guidelines. Always unplug the unit before performing maintenance to avoid accidents. By following these routine tips, you can keep your Bowflex XTL in excellent condition and ensure safe, effective workouts. Proper care will also prevent common issues and extend the lifespan of your equipment.

4.2 Common Issues and Solutions

Common issues with the Bowflex XTL may include cable fraying, pulley misalignment, or resistance maladjustment. If cables show signs of wear, replace them immediately to avoid breakage. For pulley issues, check alignment and tighten bolts if necessary. Resistance levels may require recalibration; refer to the manual for proper adjustment steps. If bolts loosen over time, regularly inspect and tighten them using the recommended tools. For more complex problems, consult the troubleshooting section or contact customer support. Proper care and timely repairs can prevent further damage and ensure optimal performance. Always follow safety guidelines when addressing equipment issues to avoid injury or additional damage.

Additional Resources and Support

Access digital manuals, guides, and workout plans for your Bowflex XTL. Visit the official website or contact customer support for assistance and additional resources.

5.1 Accessing Digital Manuals and Guides

To access digital manuals and guides for your Bowflex XTL, visit the official Bowflex website or authorized retailers. Manuals are available in PDF format and require Adobe Reader for viewing. Ensure your device has the latest version of Adobe Reader installed to access the documents smoothly. The digital manual includes detailed assembly instructions, exercise routines, and maintenance tips. Additional resources, such as workout plans and troubleshooting guides, are also available for download. For convenience, manuals are provided in multiple languages, including Spanish and French. Always refer to the official sources to ensure you have the most up-to-date and accurate information for your Bowflex XTL.

5.2 Customer Service and Warranty Information

For any inquiries or issues with your Bowflex XTL, contact Bowflex customer service through their official website or phone support. The warranty information is outlined in your Owner’s Manual, covering parts and labor for a specified period. Register your product online to activate warranty benefits and access exclusive support. Troubleshooting assistance is also available through their website or by referring to the manual. Customer service is committed to helping you resolve issues promptly, ensuring your workout experience remains uninterrupted. Visit the official Bowflex website for detailed contact information and warranty terms.

Manuals

good manual cars for a first car

Manual cars offer first-time drivers a cost-effective, engaging, and fuel-efficient way to learn driving. They provide better control and are often cheaper to maintain than automatics.

Why Manual Cars Are a Great Choice for First-Time Drivers

Manual cars are cost-effective, fuel-efficient, and easier to maintain, making them ideal for first-time drivers. They offer better control and engagement, teaching drivers essential skills. With reliable models like the Honda Fit and Mazda3, they provide a perfect balance of affordability, practicality, and fun, ensuring a great learning experience.

Overview of the Article

This article explores the best manual cars for first-time drivers, focusing on ease of use, reliability, and budget-friendliness. Key factors like clutch smoothness, visibility, and fuel efficiency are discussed, along with popular models such as the Honda Fit and Mazda3. It also covers learning curves and maintenance tips for new drivers.

Key Factors to Consider When Choosing a First Manual Car

When selecting a first manual car, prioritize ease of use, smooth clutch feel, good visibility, fuel efficiency, and manageable size to ensure a smooth learning experience;

Clutch and Shifter Ease

A smooth and forgiving clutch is crucial for first-time drivers. Look for cars with a light pedal and a precise shifter, such as the Honda Fit or Ford Focus, which offer easy-to-master transmissions, reducing the frustration of learning to drive manually.

Visibility and Size

Compact cars like the Honda Fit and Mazda3 are ideal for first-time drivers, offering excellent visibility and manageable dimensions. Their smaller size makes them easier to maneuver and park, while maintaining a safe and confident driving experience, especially in urban environments.

Fuel Economy

Manual cars often excel in fuel efficiency, making them a cost-effective choice for first-time drivers. Models like the Honda Fit and Mazda3 deliver impressive mileage, reducing long-term expenses. Their efficient engines ensure lower fuel consumption, ideal for daily commutes and budget-conscious new drivers.

Reliability and Maintenance Costs

Reliable manual cars like the Honda Civic and Mazda3 are top choices for first-time drivers. They offer durable builds, low repair costs, and minimal maintenance needs. These models ensure long-term savings and peace of mind, making them practical and affordable options for new drivers.

Popular Manual Cars for First-Time Drivers

The Honda Fit, Mazda3, Ford Focus, and Subaru BRZ are popular choices for first-time drivers due to their ease of handling, affordability, and engaging driving experiences.

Honda Fit

The Honda Fit is a top choice for first-time drivers, offering a smooth manual transmission, excellent fuel economy, and a spacious interior. Its compact size makes it easy to maneuver, while its reliability ensures low maintenance costs. This practical car is both affordable and fun to drive.

Mazda3

The Mazda3 stands out as a stellar first car with a smooth, responsive manual transmission. Its zippy performance and excellent fuel efficiency make it a joy to drive. Boasting a reliable engine and affordable maintenance, the Mazda3 is a practical yet fun choice for new drivers seeking a balance of style and functionality.

Ford Focus/Fiesta

The Ford Focus and Fiesta are excellent choices for first-time manual drivers, offering smooth, forgiving transmissions. Their compact size and responsive handling make them easy to maneuver, while fuel efficiency and affordability add to their appeal. These models are ideal for learning the basics of manual driving without breaking the bank.

Subaru BRZ/Scion FR-S

The Subaru BRZ and Scion FR-S are sporty, lightweight options with precise manual transmissions. They offer excellent handling and a fun driving experience, making them ideal for learners who want to develop their skills. Their affordable price and good fuel economy make them a great choice for first-time drivers seeking a blend of performance and practicality.

Volkswagen Jetta

The Volkswagen Jetta offers a smooth and responsive manual transmission, making it easy for beginners to learn. Known for its reliability and affordability, the Jetta provides excellent fuel economy and a spacious interior, making it a practical and enjoyable choice for first-time drivers seeking a dependable vehicle.

Honda Civic

The Honda Civic is a top choice for first-time manual drivers, offering a smooth clutch and intuitive gearbox. Its excellent visibility, fuel efficiency, and low maintenance costs make it a reliable and affordable option. The Civic’s comfortable interior and forgiving transmission ensure an enjoyable learning experience for new drivers.

Budget-Friendly Manual Cars

Affordable options like the Honda CR-X and Mazda Miata offer reliable performance and lower costs, ideal for first-time buyers seeking a cost-effective, fuel-efficient manual driving experience.

Honda CR-X (1984-1991)

The Honda CR-X is a budget-friendly, reliable option for first-time manual drivers. Known for its fuel efficiency and low maintenance costs, this compact car offers a smooth driving experience. Its lightweight design and responsive handling make it ideal for learning manual transmission. A top choice for affordability and simplicity.

Mazda Miata (1998-2005)

The Mazda Miata is a fun and affordable sports car perfect for first-time manual drivers. Its lightweight design and smooth transmission make it easy to handle. With a focus on driving enjoyment, it offers a great balance of performance and reliability, making it a standout choice for learning manual driving skills.

Acura Integra (1994-2001)

The Acura Integra is a budget-friendly option with a smooth manual transmission, making it ideal for first-time drivers. Its sporty design and reliable performance offer a fun yet practical driving experience. With lower maintenance costs and a strong resale value, it remains a popular choice for learners seeking an affordable and durable first car.

Subaru BRZ/Scion FR-S (2013)

The Subaru BRZ and Scion FR-S are sporty, lightweight cars that offer a fun and engaging driving experience. With a smooth manual transmission and excellent handling, they are ideal for first-time drivers looking to master stick shift. Their affordable price and low maintenance costs make them a practical and enjoyable choice for learners.

Volkswagen Jetta (2018)

The 2018 Volkswagen Jetta offers a smooth manual transmission and excellent fuel economy, making it a practical choice for first-time drivers. Its compact size and responsive handling provide an engaging driving experience. With a 1.4-liter turbocharged engine producing 147 horsepower, it balances performance and efficiency while maintaining affordable maintenance costs.

Reliability and Durability

Manual cars like the Honda Fit and Mazda3 are known for their durability and low maintenance costs, making them ideal for first-time drivers seeking long-term reliability and affordability.

The Honda Civic is renowned for its reliability and durability, making it an excellent choice for first-time drivers. With a smooth clutch and easy-to-use gearbox, it offers a forgiving learning curve. Its fuel efficiency and low maintenance costs further enhance its appeal as a practical and affordable first car.

The Mazda3 is a standout choice for first-time drivers, offering a smooth and responsive manual transmission. Its excellent fuel economy, reliable performance, and affordable maintenance make it a practical option. Additionally, its engaging driving experience and modern design provide a fun yet responsible choice for new drivers learning to master manual driving.

Toyota Aygo X

The Toyota Aygo X is a compact, efficient car ideal for urban driving. Its low running costs, modern design, and ease of handling make it a great choice for first-time drivers. With a fuel-efficient engine and affordable maintenance, it offers practicality while remaining fun to drive in city environments.

Hyundai i10

The Hyundai i10 is a top choice for first-time drivers, offering a compact size, easy handling, and excellent fuel efficiency. Its modern design, affordable price, and low maintenance costs make it a practical option. With a smooth manual transmission and robust safety features, it’s ideal for navigating city streets and learning to drive confidently.

Driving Experience and Learning Curve

Manual cars provide a more engaging driving experience, enhancing control and connection with the vehicle. Their learning curve is manageable, making them ideal for first-time drivers to master stick-shift skills effectively.

Mazda MX-5 Miata

The Mazda MX-5 Miata is renowned for its smooth clutch and responsive handling, making it an excellent choice for first-time manual drivers. Its lightweight design and rear-wheel drive provide an engaging yet forgiving experience, allowing new drivers to build confidence and skills without feeling overwhelmed. Affordable, fuel-efficient, and fun, it’s a perfect blend of practicality and enjoyment.

Ford Focus

The Ford Focus offers a seamless manual driving experience with its smooth clutch and intuitive shifter. Its compact size and excellent visibility make it easy to maneuver, perfect for new drivers. The Focus also provides a balance of fuel efficiency and performance, making it both practical and enjoyable for first-time manual car owners.

The Honda Fit is a versatile and practical choice for first-time manual drivers. Its compact design offers excellent visibility, while the smooth clutch and lightweight shifter make learning easy. The Fit also boasts impressive fuel efficiency and a spacious interior, combining affordability with reliability for new drivers.

Maintenance and Cost Efficiency

Manual cars are a cost-effective choice for first-time drivers, offering cheaper replacement parts and better fuel efficiency, which lowers maintenance costs and reduces long-term expenses.

The Honda Fit is a practical and reliable choice for first-time drivers, featuring a fuel-efficient 1.5-liter engine and a spacious interior. Its smooth clutch and compact size make it ideal for learning manual transmission. With low maintenance costs and a reputation for durability, the Fit is a cost-effective and enjoyable option for new drivers.

The Mazda3 offers a perfect blend of performance and practicality, making it an excellent choice for first-time drivers. With a responsive manual transmission and a fuel-efficient engine, it delivers a fun yet economical driving experience. Its sleek design, reliability, and affordable maintenance costs make it a standout option for new car owners seeking a manual vehicle.

Subaru BRZ

The Subaru BRZ is a fun-to-drive, lightweight rear-wheel-drive sports car with a responsive manual transmission. Its sporty handling and affordable price make it a great choice for first-time drivers seeking an engaging yet practical vehicle. The BRZ offers a perfect balance of driving excitement and everyday usability, ideal for those mastering manual driving skills.

Learning to Drive a Manual Transmission

Learning to drive a manual transmission involves mastering the clutch, accelerator, and gear shifts. Start in a safe, open area and practice until it becomes second nature.

The Honda Civic is a top choice for first-time manual drivers. It features a smooth clutch, easy-to-use gearbox, and excellent visibility. Its compact size and comfortable interior make it ideal for learning. Reliable and fuel-efficient, the Civic offers a perfect blend of performance and practicality for new drivers.

Mazda Miata

The Mazda Miata is a lightweight, fun-to-drive roadster with a smooth manual transmission. Its compact size and rear-wheel drive make it easy to handle, offering a perfect balance of power and control. Ideal for beginners, the Miata provides an engaging and responsive driving experience, making it a great choice for learning manual driving.

The Ford Focus and Fiesta are excellent choices for first-time manual drivers, offering smooth and forgiving transmissions. Their compact sizes and responsive handling make them easy to maneuver. Both models are affordable, fuel-efficient, and reliable, providing a great balance of performance and practicality for new drivers learning to master manual driving skills.

Future-Proofing Your First Car Purchase

Choosing a reliable, fuel-efficient manual car with strong resale value ensures long-term savings and satisfaction; Prioritizing durability and upgradability helps maintain relevance as driving needs evolve over time.

Resale Value

Cars with strong resale value, like Honda Civics and Mazda3s, retain their worth due to reliability and demand. Manual transmissions often appeal to enthusiasts, boosting resale potential. Choosing a model with a reputation for durability ensures a higher return on investment when selling in the future.

Upgradability

Certain manual cars, such as the Mazda MX-5 Miata and Subaru BRZ, are popular for their upgradability. Enthusiasts often modify engines, suspensions, and interiors to enhance performance, making these models excellent choices for those who enjoy personalizing their vehicles over time. This feature adds long-term value and satisfaction for car owners.

Safety Features

Modern manual cars often include advanced safety features like airbags, ABS, and electronic stability control. Models such as the Honda Fit and Mazda3 are equipped with robust safety systems, ensuring protection while maintaining affordability and reliability. These features are essential for first-time drivers seeking a secure and dependable vehicle.

Choosing a good manual car as a first car offers affordability, reliability, and a fun driving experience. Models like the Honda Fit and Mazda3 are excellent choices for new drivers.

Final Thoughts on Choosing the Best Manual Car for a First Car

When selecting a manual car for your first vehicle, prioritize ease of use, fuel efficiency, and reliability. Models like the Honda Fit, Mazda3, and Ford Focus offer smooth transmissions and low maintenance costs, making them ideal for learning and daily driving. These cars provide a perfect balance of affordability and performance.

Additional Tips for First-Time Manual Car Owners

Practice in a safe, open area to master clutch control and shifting. Keep essential tools in the car and stay informed about maintenance schedules. Regularly check fluid levels and tire pressure to ensure optimal performance and longevity of your vehicle. Consistency and patience will enhance your driving experience.

PDF

honeywell th8321wf1001 installation manual pdf

The Honeywell TH8321WF1001 is a Wi-Fi-enabled, touchscreen smart thermostat designed for seamless home climate control․ It offers advanced scheduling, smart home integration, and compatibility with various HVAC systems, ensuring energy efficiency and comfort․

1․1 Key Features and Benefits

The Honeywell TH8321WF1001 offers a large touchscreen display for easy navigation, Wi-Fi connectivity for remote control via smartphones, and compatibility with various HVAC systems, including heat pumps and dual-fuel systems․ It supports advanced scheduling options, geofencing, and smart alerts for energy-saving opportunities․ The thermostat also features humidity control, system monitoring, and integration with smart home platforms․ Its energy-efficient design and intuitive interface make it a versatile choice for modern homes, ensuring optimal comfort while reducing energy consumption․

Pre-Installation Requirements and Considerations

Ensure compatibility with your HVAC system, verify wiring requirements, and gather necessary tools․ Turn off power to the system before starting installation to ensure safety and proper setup․

2․1 Necessary Tools and Preparation

To install the Honeywell TH8321WF1001 thermostat, gather essential tools: a screwdriver, pliers, wire strippers, and a drill․ Ensure the power to your HVAC system is turned off at the circuit breaker․ Verify system compatibility and wiring requirements beforehand․ Remove the old thermostat carefully to avoid damaging wires․ Clean the wallplate area and prepare mounting screws if needed․ Refer to the installation manual for specific guidelines and safety precautions to ensure a smooth setup process․ Proper preparation ensures a safe and efficient installation experience․

Understanding System Compatibility

The Honeywell TH8321WF1001 is compatible with 1- and 2-stage heating and cooling systems, including heat pumps․ Ensure proper wiring and system requirements for optimal performance․ Always verify compatibility before installation to avoid issues․

3․1 Supported HVAC Systems and Wiring Requirements

The Honeywell TH8321WF1001 supports 1- and 2-stage heating and cooling systems, including heat pumps․ It requires a 24VAC power supply and is compatible with systems that use R, C, G, Y, W, O, B, and L wires․ Proper wiring is essential for functionality, and the system must meet the specified voltage requirements․ Ensure compatibility with your HVAC system before installation to guarantee optimal performance and avoid potential issues․ Always refer to the installation manual for detailed wiring diagrams and specific requirements․ This ensures safe and correct installation․ Proper wiring is critical for system operation and safety․ Always verify compatibility and wiring requirements before proceeding with installation․ This ensures optimal performance and prevents potential hazards․ Refer to the manual for detailed instructions and guidelines․

Step-by-Step Installation Process

Separate the wallplate from the thermostat, mount it, and connect the wires according to the manual․ Attach the thermostat, secure it, and power on the system․

4․1 Detailed Installation Steps and Safety Precautions

Begin by turning off power to the HVAC system at the circuit breaker․ Separate the wallplate from the thermostat and mount it securely․ Connect the wires according to the manual, ensuring proper wiring to avoid damage․ Attach the thermostat to the wallplate and restore power․ Follow on-screen prompts to configure basic settings and connect to Wi-Fi․ Always handle wires carefully to prevent electrical shock․ Refer to the manual for specific wiring diagrams and safety guidelines to ensure a successful installation․

Initial Configuration and Setup

Power on the thermostat, then follow on-screen instructions to select language and Wi-Fi network․ Enter your password, then set basic options like date, time, and temperature units․

5․1 Connecting to Wi-Fi and Setting Up Basic Functions

Power on the thermostat and follow the on-screen instructions․ Select your preferred language and Wi-Fi network from the list․ Enter your Wi-Fi password to connect․ Once connected, set the date, time, and temperature units (Fahrenheit or Celsius)․ Choose your HVAC system type and configure basic operating settings․ Ensure the thermostat is set to “Heat” or “Cool” mode based on your system․ Finally, test the thermostat by adjusting the temperature to confirm proper operation․ This step ensures your thermostat is ready for advanced features and smart home integration․

Advanced Configuration Options

The Honeywell TH8321WF1001 offers advanced features like custom scheduling, geofencing, and smart sensor integration․ Users can also enable voice control through Amazon Alexa or Google Assistant․

6․1 Customizing Schedules, Sensors, and Smart Home Integration

The Honeywell TH8321WF1001 allows users to create personalized temperature schedules, ensuring comfort and energy efficiency․ The thermostat supports integration with external sensors to monitor different zones․ Additionally, it seamlessly connects with smart home systems like Amazon Alexa and Google Assistant, enabling voice commands for temperature adjustments․ The device also offers geofencing capabilities, automatically adjusting settings based on your location․ These advanced features enhance convenience and optimize energy usage, making it a versatile solution for modern homes․

Troubleshooting Common Issues

Common issues with the Honeywell TH8321WF1001 include connectivity problems, display malfunctions, and system operation errors․ Ensure the power switch is on and the furnace door is securely closed․

7․1 Solving Connectivity, Display, and System Operation Problems

For connectivity issues, ensure the thermostat is connected to the correct Wi-Fi network and the password is entered correctly․ Restart the router if necessary․ If the display is unresponsive, power cycle the thermostat by removing it from the wallplate and waiting 30 seconds before reconnecting․ For system operation problems, check that the HVAC system switch is in the “on” position and the furnace door is securely closed․ If issues persist, refer to the troubleshooting section in the Honeywell TH8321WF1001 installation manual for detailed solutions․

Maintenance and Upkeep Best Practices

Regularly clean the thermostat’s display and sensors to ensure accurate operation․ Check for firmware updates and install them promptly to maintain optimal performance and security․

8․1 Cleaning, Updating Firmware, and Regular Checks

Regular maintenance is crucial for optimal performance․ Lightly clean the thermostat’s display with a soft cloth to avoid dust buildup․ Check for firmware updates via the menu or Honeywell’s website and install them to ensure the latest features and security patches․ Perform periodic system checks to verify HVAC operation and sensor accuracy․ Replace batteries if applicable, and ensure all wiring connections are secure․ Schedule professional inspections annually to maintain efficiency and reliability․

Frequently Asked Questions

Q: How do I unlock the Honeywell TH8321WF1001 thermostat? A: Touch Menu, select Dealer Information, find the Date Code, and use it as the password in Installer Options․

9․1 Common Questions About Installation, Usage, and Troubleshooting

Users often ask about unlocking the thermostat, which requires the Date Code from Dealer Information as the password․ Installation involves separating the wallplate, mounting it, and connecting wires․ For troubleshooting, ensure the power switch is on, furnace doors are closed, and batteries are fresh․ Connectivity issues may require resetting the thermostat or checking Wi-Fi settings․ Refer to the installation manual for detailed steps and solutions․

The Honeywell TH8321WF1001 offers efficient climate control with easy installation and comprehensive features․ Its smart home integration and energy-saving capabilities make it a top choice for modern homes․

10․1 Summary of Key Points and Installation Success Tips

The Honeywell TH8321WF1001 installation process is streamlined for efficiency, ensuring compatibility with various HVAC systems․ Key steps include separating the wallplate, mounting, and connecting wires according to the manual․ Proper wiring and system compatibility checks are crucial․ Enable the thermostat by entering the date code password․ Post-installation, test all functions to ensure optimal performance․ Refer to the installation guide for specific configurations and troubleshooting tips․ Following these steps ensures a successful setup and optimal thermostat functionality for energy-saving and comfort․

Additional Resources and Documentation

The Honeywell TH8321WF1001 installation manual, user guide, and update manual are available as free PDF downloads, providing detailed instructions for setup, advanced features, and troubleshooting․

11․1 Links to Manuals, Guides, and Manufacturer Support

The Honeywell TH8321WF1001 thermostat manuals are available online in PDF format, including the installation manual, operation & user manual, and update manual․ These resources provide detailed guidance for installation, configuration, and troubleshooting․ Visit the official Honeywell website at yourhome․honeywell․com for direct access to these documents․ Additionally, Honeywell offers customer support at 1-855-733-5465 for any inquiries or assistance with the thermostat․ These resources ensure comprehensive support for installation, usage, and maintenance of the Honeywell TH8321WF1001 thermostat․

Warranty Information and Customer Support

Honeywell offers comprehensive warranty coverage and dedicated customer support for the TH8321WF1001 thermostat․ Contact Honeywell at 1-855-733-5465 or visit yourhome․honeywell․com for warranty details and assistance․

12․1 Understanding Warranty Terms and Contacting Honeywell Support

The Honeywell TH8321WF1001 thermostat comes with a comprehensive warranty covering parts and labor․ For warranty terms, visit yourhome․honeywell․com or contact Honeywell support at 1-855-733-5465․ Support is available for troubleshooting, technical assistance, and warranty claims․ Ensure to have your product serial number and purchase details ready for efficient service․ Honeywell’s customer support team is dedicated to resolving issues promptly, ensuring your thermostat operates effectively․ Refer to the warranty section in the manual for specific coverage details and exclusions․

PDF

release of all claims form pdf

The Release of All Claims Form is a legal document that settles and releases any existing or potential claims between parties. It is also known as a Release Agreement or Waiver of Claims, where one party agrees to waive their right to pursue legal action against the other party for any claims, demands, or causes of action.

Overview of the Release of All Claims Form

A Release of All Claims Form is a legal document designed to settle and release any existing or potential claims between two or more parties. It is often referred to as a Release Agreement or Waiver of Claims, where one party (the releasor) agrees to relinquish their right to pursue legal action against the other party (the releasee) for any claims, demands, or causes of action. This document is widely used in various situations, including employment disputes, personal injury settlements, and property damage cases, to avoid prolonged legal battles and financial burdens.

The form typically includes details such as the names of the parties involved, a description of the claims being released, and the terms under which the release is granted. It may also outline the consideration provided in exchange for the release, such as monetary compensation or other forms of settlement. The document is legally binding and serves as formal acknowledgment that all disputes have been resolved.

It is important to note that the Release of All Claims Form should be tailored to the specific circumstances of the case to ensure its validity and enforceability. Consulting with a legal professional is highly recommended to ensure the document meets all necessary legal standards and protects the interests of all parties involved.

Importance of Using a Release of All Claims Form

Using a Release of All Claims Form is essential for resolving disputes amicably and avoiding prolonged legal complications. This document ensures that all parties involved agree to relinquish their rights to pursue legal action, providing a clear and final resolution to conflicts. It saves time and resources by preventing costly lawsuits and lengthy court proceedings. Additionally, the form offers clarity and finality, ensuring that both parties understand their obligations and the terms of the release. It also protects individuals and organizations from future claims arising from the same incident, offering peace of mind. The form is widely recognized as a legally binding document, making it a reliable tool for settling disputes. Its availability in editable formats, such as PDF and MS Word, allows for easy customization to suit specific situations. Consulting a legal professional is crucial to ensure the document is enforceable and meets all legal requirements. This makes the Release of All Claims Form an indispensable tool for resolving disputes efficiently and effectively.

How to Create a Release of All Claims Form

To create a Release of All Claims Form, use online templates or legal software for customization. Ensure the document includes signatures, dates, and clear terms to make it legally binding and enforceable.

Using Templates for a Release of All Claims Form

Using templates is an efficient way to create a Release of All Claims Form. Numerous online platforms, such as DocHub, US Legal Forms, and TemplateLab, offer customizable templates that cater to various situations. These templates provide a structured format, ensuring all necessary clauses are included. They often come in editable formats like PDF or MS Word, allowing users to input specific details such as names, dates, and terms of the agreement. Templates are particularly useful for individuals without legal expertise, as they simplify the process of drafting a legally binding document. Many templates are state-specific, ensuring compliance with local laws. Additionally, platforms like TemplateLab offer free templates, making it cost-effective for users. Before finalizing, it’s advisable to consult a legal professional to ensure the document meets individual needs and adheres to legal standards. Overall, templates provide a practical and time-saving solution for creating a Release of All Claims Form.

Steps to Fill Out the Release of All Claims Form

Filling out a Release of All Claims Form involves several key steps to ensure the document is legally valid and comprehensive. First, obtain a template from a reliable source, such as DocHub, US Legal Forms, or TemplateLab. These templates are often available in PDF or MS Word formats for easy customization. Next, fill in the personal details of both the releasor and releasee, including names, addresses, and dates. Clearly describe the claims being released, whether they are related to employment, personal injury, or property damage. Specify the consideration, such as a payment or repair, that prompted the agreement. Include clauses outlining the release of liability, indemnification, and the binding nature of the agreement. Have both parties sign the document in the presence of witnesses or a notary, depending on legal requirements. Finally, distribute copies to all involved parties for their records. Ensure the final document meets legal standards and consult a legal professional if necessary.

Legal Implications of a Release of All Claims Form

A Release of All Claims Form is legally binding and enforceable, protecting parties from future claims. It ensures final settlement of disputes, with both parties agreeing to waive legal actions, making it a critical document for resolving conflicts.

Enforceability of the Release of All Claims Form

The enforceability of a Release of All Claims Form depends on its adherence to legal standards and mutual agreement between parties. It is legally binding and protects parties from future claims, ensuring disputes are resolved definitively.

For the form to be enforceable, it must be signed by both parties and meet state-specific legal requirements. The document must clearly outline the terms of the release, including the scope of claims being waived.

Courts typically uphold the release if it is executed in good faith and without coercion. However, certain exceptions may apply, such as fraud or misrepresentation, which could render the agreement unenforceable.

Additionally, the form must be in writing and acknowledged by both parties to ensure its validity. The terms of the release are generally considered severable, meaning even if one provision is deemed invalid, the rest remains enforceable.

Overall, the Release of All Claims Form is a powerful legal tool, but its enforceability hinges on proper execution and compliance with applicable laws. Consulting legal counsel is essential to ensure the document meets all necessary requirements.

Limitations and Exceptions to the Release of All Claims Form

The Release of All Claims Form, while legally binding, has specific limitations and exceptions. It cannot release claims arising from gross negligence or willful misconduct, as such exceptions are often against public policy. Additionally, the form cannot waive future claims that arise after its execution, unless explicitly stated.

Certain jurisdictions may limit the enforceability of the release in cases involving employment disputes or workers’ compensation claims. For example, claims for unpaid wages or workplace injuries may not be waived under state labor laws. Furthermore, if the release is found to be unconscionable or executed under duress, a court may deem it unenforceable.

Another key exception is that the release cannot bar claims that were not known or reasonably foreseeable at the time of signing. This protects individuals from unknowingly relinquishing rights to future claims. Finally, the form cannot release claims that are prohibited by statute, such as certain consumer protection or anti-discrimination laws.

Consulting legal counsel is essential to ensure the release complies with applicable laws and adequately addresses potential exceptions.

Common Use Cases for a Release of All Claims Form

A Release of All Claims Form is commonly used in employment agreements, personal injury settlements, and property damage disputes. It is also utilized in contractor agreements and insurance claims to finalize legal resolutions.

Employment and Contractor Agreements

In employment and contractor agreements, a Release of All Claims Form is often used to finalize separations or resolve disputes. Employers and employees or contractors mutually agree to release each other from potential legal claims. This form is particularly useful during employee termination, ensuring that both parties waive rights to pursue legal action related to the employment or contract. It protects employers from future claims arising from the employment relationship, such as wrongful termination or unpaid wages. Contractors may also use this form to settle disputes over payments or project deliverables. The release typically includes clauses that prevent either party from filing lawsuits or making demands beyond what is agreed upon. It is essential to tailor the form to the specific circumstances, ensuring it complies with local labor laws and clearly outlines the terms of the release. Legal advice is recommended to ensure the document is enforceable and meets the organization’s needs. Downloadable templates are available online for customization.

Personal Injury Settlements

A Release of All Claims Form is frequently used in personal injury settlements to finalize agreements between the injured party (the claimant) and the party liable for the injury (the defendant). This document ensures that once compensation is paid, the claimant releases the defendant from any further liability or legal claims related to the incident. It is a mutual agreement that prevents future lawsuits and provides closure for both parties. The form outlines the terms of the settlement, including the amount paid, the nature of the injury, and the release of all present and future claims. Legal counsel often reviews the document to ensure it is enforceable and fair. Downloadable templates are available online, allowing individuals to customize the form according to their specific case. Proper execution of this form is crucial to avoid potential disputes and ensure compliance with legal standards. Consulting with a lawyer is recommended to navigate the complexities of personal injury settlements effectively.

Property Damage and Insurance Claims

A Release of All Claims Form is commonly utilized in property damage and insurance claims to formally settle disputes and release liability. This document is often required by insurance companies to finalize claims, ensuring that once a settlement is reached, the claimant cannot pursue further legal action. It is typically used when compensation is provided for damages to property, such as vehicles, homes, or other assets. The form outlines the terms of the agreement, including the amount paid, the nature of the damage, and the release of all claims related to the incident. Insurance companies often provide templates for this purpose, but customizable versions are also available online. Legal review is recommended to ensure the form is enforceable and aligns with state laws. Proper execution of the Release of All Claims Form prevents future disputes and provides closure for all parties involved. It is a crucial step in resolving property damage claims efficiently and fairly.

Guide

the only study guide you’ll ever need

Discover the ultimate strategies to enhance your learning journey. This guide outlines proven techniques to optimize study sessions, ensuring efficiency and retention. Explore methods tailored to your unique learning style, helping you achieve academic success with minimal stress.

  • Active Learning: Engage deeply with material through techniques like teaching others or self-quizzing.
  • Time Management: Master tools like the Pomodoro Technique to balance productivity and relaxation.
  • Organized Resources: Create study guides and flashcards to streamline your revision process.

Adopt these methods to transform your study habits and unlock your full potential.

1.1 The Importance of Tailored Learning Styles

Everyone learns differently, making it crucial to identify your unique learning style. Tailored approaches enhance understanding, retention, and productivity. Whether you prefer visual, auditory, or hands-on methods, customizing your study techniques ensures better engagement and reduces stress. Recognizing individual preferences allows for more effective time management and resource allocation, leading to improved academic performance and personal satisfaction.

  • Visual Learners: Benefit from diagrams, videos, and concept maps.
  • Auditory Learners: Thrive with lectures, discussions, and audio resources.
  • Kinesthetic Learners: Excel through hands-on activities and practical exercises.

Adapting methods to your style fosters a more enjoyable and successful learning experience.

1.2 Overview of Proven Study Techniques

Explore scientifically-backed methods to maximize learning efficiency. Techniques like active recall, spaced repetition, and the Feynman Technique promote deeper understanding. Dual coding combines visual and verbal learning, while the SQ3R method enhances comprehension. These strategies, supported by research, help students retain information longer and study more effectively. This guide delves into each method, explaining their benefits and practical applications for academic success.

  • Active Recall: Test yourself to strengthen memory.
  • Spaced Repetition: Review material at optimal intervals.
  • Feynman Technique: Teach concepts to ensure understanding.

These techniques empower learners to achieve their goals with confidence and efficiency.

Time Management Strategies

Master effective scheduling and prioritization to maximize productivity. Techniques like the Pomodoro Method and spaced repetition help balance focused work with breaks, ensuring efficient learning and stress-free goal achievement.

2.1 The Pomodoro Technique: Work in Focused Intervals

Boost productivity with the Pomodoro Technique, which involves working in 25-minute focused intervals followed by 5-minute breaks. This method enhances concentration, reduces distractions, and promotes consistent progress by breaking tasks into manageable time blocks, making it easier to maintain momentum and achieve goals efficiently.

2.2 Spaced Repetition: Optimal Timing for Retention

Spaced repetition is a powerful strategy for long-term retention. By reviewing material at increasing intervals, you optimize memory consolidation. Use flashcards or digital tools to implement this method effectively, ensuring information moves from short-term to long-term memory. Consistency and timing are key to maximizing learning efficiency and minimizing study time.

Active Learning Techniques

Active Learning Techniques engage students through direct participation. Methods like the Feynman Technique and active recall foster deeper understanding by encouraging students to teach others or quiz themselves, enhancing retention and critical thinking skills effectively.

3.1 The Feynman Technique: Teaching to Understand

The Feynman Technique is a powerful method for deep understanding. It involves explaining complex concepts simply, as if teaching someone else. Start by selecting a topic and breaking it down into basic terms. Identify knowledge gaps and refine your explanation. This technique enhances retention, clarifies ideas, and builds confidence in your understanding. Regular practice ensures mastery of the subject matter effectively.

3.2 Active Recall: Quizzing for Better Retention

Active recall strengthens memory by actively retrieving information. Test yourself using flashcards or practice questions without notes. This method builds confidence and identifies weak areas. Regular quizzing improves long-term retention and reduces exam stress. Consistent practice helps solidify knowledge, making it easier to apply concepts during exams and real-world situations, ensuring lasting understanding and academic success. It’s a proven technique for effective learning.

Organizing Study Materials

Organize your notes and resources clearly to enhance learning efficiency. Use structured guides, concept maps, and summaries to make information accessible and easy to review, ensuring focused study sessions.

4.1 Creating Effective Study Guides

Develop clear, concise guides that prioritize key concepts and information. Break down topics into manageable sections, using headings and bullet points for easy navigation. Include summaries, diagrams, and practice questions to reinforce understanding. Avoid overwhelming pages with excessive text—focus on clarity and relevance to ensure your guide is a practical tool for exam preparation and quick reviews.

  • Summarize information in your own words.
  • Avoid over-highlighting; instead, use annotations strategically.
  • Review and update your guide regularly to reflect new insights.

4.2 Using Flashcards and Concept Maps

Flashcards and concept maps are powerful tools for organizing and retaining information. Flashcards help with active recall, while concept maps visually connect ideas, enhancing understanding. Use flashcards for key terms and definitions, and create concept maps to illustrate relationships between concepts. These tools make complex information digestible and support long-term retention.

  • Flashcards: Ideal for quick, frequent reviews.
  • Concept Maps: Visualize connections between ideas.

Mental and Physical Well-being

Mental and physical well-being are crucial for effective studying. Ensure adequate sleep, manage stress, and maintain a balanced diet to support cognitive function and focus.

  • Prioritize rest to enhance memory retention.
  • Practice relaxation techniques to reduce anxiety.

5.1 The Role of Sleep in Learning

Sleep is vital for cognitive function and memory consolidation. During sleep, the brain processes information, strengthens memory, and enhances clarity. Lack of sleep impairs focus, judgment, and retention, reducing academic performance. Prioritizing 7-9 hours of quality sleep ensures mental sharpness and emotional stability, making it a cornerstone of effective learning strategies for students.

5.2 Managing Exam Stress

Exam stress can hinder performance, but effective strategies can help alleviate it. Techniques like time management, active recall, and self-testing reduce anxiety. Staying organized, maintaining a positive mindset, and seeking support are key. Regular breaks, healthy habits, and stress-free environments also promote calmness. Prioritize tasks, focus on progress, and remind yourself of past successes to build confidence and tackle exams with clarity.

Personalized Learning

Customize your learning experience by leveraging AI for tailored study plans and adapting techniques to suit your preferences, ensuring a more engaging and effective study journey.

  • AI Integration: Utilize AI tools for personalized recommendations.
  • Adaptability: Adjust methods to align with individual learning styles.

6.1 Leveraging AI for Customized Study Plans

AI tailors study plans to individual needs, optimizing learning efficiency. It analyzes progress, suggesting strategies to enhance retention and understanding. AI balances academic demands with personal preferences, ensuring effective and stress-free study sessions.

6.2 Adapting Techniques to Individual Preferences

Customize your learning approach by identifying your unique preferences. Whether visual, auditory, or hands-on, adapt techniques like active recall or concept mapping to suit your style. This personalization enhances engagement and retention, ensuring you study more effectively and enjoy the process. Experiment to find the methods that resonate best with your learning style.

Common Challenges and Solutions

Overcome procrastination by setting clear goals and deadlines. Combat test anxiety through relaxation techniques and regular practice. Stay motivated with positive reinforcement and consistent progress tracking.

7.1 Overcoming Procrastination

Procrastination is a common obstacle that hinders academic progress. To overcome it, break tasks into smaller, manageable steps and set clear deadlines. Use the Pomodoro Technique to work in focused intervals, reducing overwhelm. Eliminate distractions by creating a dedicated study space. Celebrate small achievements to build momentum and maintain motivation. Consistency is key to developing better study habits and avoiding last-minute stress.

7.2 Combating Test Anxiety

Test anxiety can significantly hinder performance. To combat it, practice active learning techniques like teaching concepts to others or self-quizzing. Regularly review notes and use practice tests to build confidence. Incorporate mindfulness and relaxation exercises to manage stress. Create a calm study environment and maintain a consistent routine. These strategies help reduce anxiety, fostering a positive mindset for success.

Collaborative Learning

Engage in group study sessions to enhance understanding and retention. Collaborative learning fosters discussion, problem-solving, and shared insights, making complex concepts more accessible. Join study groups or teach others to deepen your knowledge and build confidence.

8.1 Study Groups: Enhancing Peer Learning

Study groups provide a dynamic environment for collaborative learning, fostering engagement and mutual understanding. By discussing concepts and solving problems together, students can clarify doubts and gain new perspectives. Peer learning encourages active participation, helping individuals retain information better. Regular group sessions also promote accountability, ensuring consistent progress and a deeper grasp of the material.

8.2 Explaining Concepts to Others

Explaining concepts to others is a powerful learning tool that reinforces understanding and retention. By teaching material, you identify knowledge gaps and solidify your own grasp. This method also enhances communication skills and encourages deeper thinking. Students who explain ideas to peers often perform better in exams, as it promotes active engagement and clarity of thought.

Review and Reflection

Regular review and reflection are crucial for long-term retention. Summarize key points, self-test, and reflect on study sessions to identify strengths and areas for improvement. This practice enhances understanding and ensures consistent progress.

9.1 Regular Self-Testing

Regular self-testing is a powerful tool for reinforcing memory and understanding. Use practice tests or flashcards to quiz yourself on key concepts. Set aside time daily to review and assess your knowledge. This method helps identify gaps in understanding and strengthens retention. Consistent self-testing also builds confidence and reduces exam anxiety, ensuring you’re well-prepared for assessments.

9.2 Reflecting on Study Sessions

Reflecting on your study sessions helps identify strengths, weaknesses, and areas needing improvement. Summarize key points in your own words and evaluate what worked well. Identify gaps in understanding and adjust your study plan accordingly. Regular reflection enhances learning efficiency and ensures you stay focused on your academic goals. It also fosters a growth mindset, encouraging continuous improvement and adaptation.

Advanced Techniques for Mastery

Explore scientifically-backed advanced methods to deepen understanding and retention. Techniques like SQ3R and Dual Coding help process complex information effectively, enhancing long-term mastery and academic success.

  • SQ3R Method: Survey, Question, Read, Recite, Review for comprehensive retention.
  • Dual Coding: Combine visual and verbal learning for enhanced comprehension.

10.1 The SQ3R Method: Survey, Question, Read, Recite, Review

The SQ3R method is a powerful strategy for engaging deeply with study material. Begin by surveying the text to identify key sections and headings. Formulate questions based on these headings to guide your focus. Read the material thoroughly, then recite the answers to your questions aloud. Finally, review the content regularly to reinforce retention and understanding.

  • Survey: Skim headings and summaries to grasp the structure.
  • Question: Develop questions from headings to actively engage with content.
  • Read: Carefully read sections while seeking answers to your questions.
  • Recite: Summarize key points aloud to solidify understanding.
  • Review: Regularly revisit material to ensure long-term retention.

This method enhances comprehension and retention, making complex topics manageable and memorable.

10.2 Dual Coding: Combining Visual and Verbal Learning

Dual Coding enhances learning by integrating visual and verbal information. This method engages both hemispheres of the brain, improving retention and comprehension. Use diagrams, flowcharts, or mind maps to supplement text-based notes. For example, pair written concepts with relevant images or create visual summaries. This approach helps encode information more effectively, making complex ideas easier to remember and recall.

  • Visual: Incorporate images, charts, or diagrams to illustrate key points.
  • Verbal: Pair visuals with written explanations or summaries.
  • Integration: Combine both elements to reinforce understanding and retention.

This technique is particularly effective for subjects like science, math, and history, where visual-verbally linked information enhances cognitive processing.

Mastering effective study methods transforms academic success. Stay consistent, adapt techniques to your needs, and leverage tools like flashcards or planners. Continuous improvement ensures long-term achievement and confidence.

11.1 Summarizing Key Strategies

Effective study methods include active learning, time management, and organized resources. Techniques like the Pomodoro Technique, spaced repetition, and the Feynman Technique enhance retention. Utilize study guides, flashcards, and concept maps for clarity. Regular self-testing and reflection ensure understanding. Adapt strategies to personal preferences and maintain consistency for sustained success. These approaches collectively foster a robust learning framework.

11.2 Encouraging Consistency and Adaptation

Consistency is key to long-term success, but adaptability ensures growth. Regularly review and adjust study strategies to suit evolving needs. Personalized learning, supported by AI tools, helps tailor methods to individual preferences. Experiment with techniques like spaced repetition or active recall to find what works best for you. Embrace change and remain committed to continuous improvement.

PDF

free dodge ram repair manual pdf

Free Dodge Ram repair manuals provide essential guidance for DIY enthusiasts and professionals, offering detailed instructions for diagnostics, repairs, and maintenance in a convenient PDF format․

1․1 Overview of the Importance of Repair Manuals

Repair manuals are indispensable for vehicle maintenance, offering detailed insights into diagnostics, repairs, and part replacements․ They empower both professionals and DIY enthusiasts to address issues efficiently, ensuring safety and cost-effectiveness․ Access to free PDF manuals enhances accessibility, providing comprehensive guides for troubleshooting and maintaining Dodge Ram models․ These resources cover essential procedures, from routine maintenance to complex overhauls, making them vital for preserving vehicle performance and longevity․

1․2 Benefits of Using Free PDF Manuals

Free PDF manuals offer significant advantages, including cost savings and convenience․ They provide instant access to detailed repair instructions, diagrams, and troubleshooting guides, enabling users to diagnose and fix issues without professional assistance․ These manuals are searchable, making information retrieval quick and efficient․ Additionally, they are environmentally friendly and easily shareable, ensuring that Dodge Ram owners can maintain their vehicles cost-effectively while preserving performance and extending lifespan․

Popular Dodge Ram Models and Their Manuals

Popular Dodge Ram models like the 1500, 2500, 3500, and 4th Gen (1996-1997) have repair manuals available free in PDF format, covering maintenance, repairs, diagnostics․

2․1 Dodge Ram 1500 Repair Manuals

Dodge Ram 1500 repair manuals are widely available as free PDF downloads, offering detailed instructions for diagnostics, maintenance, and repairs․ These manuals cover engine, transmission, electrical systems, and suspension․ Whether you’re a DIY enthusiast or a professional mechanic, they provide essential guidance for troubleshooting and fixing common issues․ The manuals include wiring diagrams, bolt torque specifications, and step-by-step procedures, making them an invaluable resource for keeping your Dodge Ram 1500 in optimal condition․

2․2 Dodge Ram 2500/3500 Repair Manuals

Free Dodge Ram 2500/3500 repair manuals are available for download in PDF format, covering models from 1996 to 2011․ These comprehensive guides include detailed instructions for engine maintenance, electrical system diagnostics, and suspension repairs․ They also provide bolt torque specifications and troubleshooting tips for common issues․ Whether you’re working on a diesel or gas-powered model, these manuals offer invaluable insights for DIY enthusiasts and professionals alike, ensuring your Dodge Ram 2500/3500 runs smoothly․

2․3 Dodge Ram 4th Gen (1996-1997) Service Manuals

Free Dodge Ram 4th Gen (1996-1997) service manuals are available in PDF, offering detailed insights into engine, transmission, and electrical systems․ These manuals cover troubleshooting and repairs, including bolt torque specifications and maintenance schedules․ They are ideal for both professional mechanics and DIY enthusiasts, ensuring your Dodge Ram operates efficiently․ The comprehensive guides provide step-by-step instructions, making it easier to diagnose and fix issues, keeping your vehicle in top condition without costly repairs․

Types of Repair Manuals Available

Free Dodge Ram repair manuals include factory service manuals, workshop guides, and electrical diagrams․ These resources provide detailed instructions, diagrams, and specifications for professional and DIY repairs․

3․1 Factory Service Manuals

Factory service manuals for Dodge Ram trucks are comprehensive resources created by the manufacturer․ They include detailed specifications, diagnostic procedures, and repair instructions for various systems such as engine, transmission, brakes, and electrical components․ These manuals are designed for professional technicians but are also accessible to experienced DIYers․ They often feature diagrams, part numbers, and torque specifications, ensuring accurate and efficient repairs․ Accessing these manuals for free in PDF format can significantly enhance maintenance and repair efforts, offering a reliable reference for troubleshooting and resolving issues effectively․

3․2 Workshop Manuals

Workshop Manuals are practical guides designed for hands-on repairs․ They include step-by-step instructions, images, and troubleshooting tips․ These manuals cover routine maintenance, diagnostics, and complex repairs, making them ideal for both DIY enthusiasts and professional mechanics․ They often focus on specific tasks, offering detailed, actionable information․ Accessing these manuals for free in PDF format allows users to efficiently address issues, ensuring their Dodge Ram operates at peak performance with ease․

3․4 Electrical Diagrams and Bolt Torque Specifications

Electrical diagrams provide intricate details of wiring systems, circuits, and components, aiding in diagnostics and repairs․ Bolt torque specifications ensure proper assembly and safety, preventing damage․ These resources are essential for accurate and efficient work, allowing users to tackle complex tasks confidently․ Accessing them in free PDF manuals enhances the repair experience, offering clarity and precision for both novice and experienced individuals working on their Dodge Ram vehicles․

Where to Download Free Dodge Ram Repair Manuals

Free Dodge Ram repair manuals can be downloaded from official Dodge websites, trusted third-party platforms, and community forums, offering easy access to essential repair guides and resources․

4․1 Official Dodge Ram Websites

Official Dodge Ram websites provide authentic and comprehensive repair manuals for free download․ These manuals are designed for specific models and years, ensuring accuracy and reliability․ They often include detailed instructions, diagrams, and technical specifications․ Users can search by vehicle make, model, and year to find the exact manual needed․ Additionally, these resources are regularly updated, making them a trustworthy source for both professionals and DIY enthusiasts․ Accessing these manuals is typically straightforward, requiring minimal registration or sign-up․

4․2 Trusted Third-Party Platforms

Trusted third-party platforms like ManualsLib, Autozone, and AllData offer free Dodge Ram repair manuals in PDF format․ These platforms are reliable sources for comprehensive guides, covering various models and years, including popular ones like the Ram 1500 and 2500․ They ensure accuracy and safety, making them ideal for both professionals and DIY enthusiasts․ Users can easily search and download the necessary manuals, benefiting from detailed instructions and diagrams tailored to their specific vehicle needs, ensuring efficient repairs․

4․3 Community Forums and Resources

Community forums and dedicated automotive platforms like Ram Forum, Dodge Talk, and Reddit offer free Dodge Ram repair manuals and resources․ These forums are rich with user-shared PDF manuals, DIY guides, and troubleshooting tips․ Members often upload service manuals for various Ram models, including older generations like the 4th Gen (1996-1997)․ These communities provide valuable insights, real-world repair experiences, and access to rare manuals, making them indispensable for enthusiasts and professionals alike․ Engaging with these forums can enhance your repair journey significantly, ensuring you have the right tools and knowledge at hand․ Additionally, many forums offer direct links to trusted sources, ensuring safe and reliable downloads․ This collaborative environment fosters a sense of camaraderie, with users often assisting each other in finding specific manuals or solving complex issues․ Overall, community-driven platforms are a goldmine for accessing free, high-quality Dodge Ram repair manuals and expert advice․ By leveraging these resources, you can save time and money while maintaining your vehicle effectively․ Moreover, the shared knowledge and experiences within these communities can help you avoid common pitfalls and ensure successful repairs․ Whether you’re a seasoned mechanic or a DIY novice, these forums are an invaluable resource for keeping your Dodge Ram in optimal condition․ They not only provide free access to manuals but also create a supportive ecosystem for learning and growth․ In conclusion, community forums and resources are a cornerstone for anyone seeking free Dodge Ram repair manuals and expert guidance, offering a wealth of information and support that goes beyond traditional repair guides․

Troubleshooting Common Issues

Free Dodge Ram repair manuals guide users through diagnosing engine, transmission, and electrical issues, offering step-by-step solutions and practical advice for common repairs and maintenance tasks effectively․

5․1 Engine and Transmission Problems

Engine and transmission issues are common in Dodge Ram trucks, often requiring detailed diagnostics․ Free repair manuals provide step-by-step solutions for troubleshooting engine stalling, rough idling, or transmission slipping․ They include torque specifications for critical bolts and electrical diagrams to trace faults․ These resources also cover fluid leaks, sensor failures, and clutch problems, ensuring drivers can address issues efficiently․ Community forums often complement these manuals, offering real-world advice and repair experiences, making them indispensable for owners seeking to resolve mechanical challenges effectively․

5․2 Electrical System Diagnostics

Free Dodge Ram repair manuals offer comprehensive guides for diagnosing electrical system issues, such as faulty wiring, malfunctioning sensors, or battery drain problems․ They include detailed electrical diagrams, test procedures, and troubleshooting steps․ These resources help identify issues like blown fuses, faulty alternators, or defective ECU components․ Manuals also provide instructions for testing circuits and connectors, ensuring accurate diagnoses․ With clear, step-by-step instructions, users can resolve electrical faults efficiently, reducing repair costs and downtime for their vehicles․

5․3 Suspension and Brake Repairs

Free Dodge Ram repair manuals offer detailed guidance for suspension and brake repairs, including step-by-step instructions for replacing shocks, struts, and brake pads․ They provide torque specifications for bolts and alignments, ensuring precise repairs․ Manuals also cover troubleshooting common issues like uneven tire wear or spongy brakes․ With diagrams and procedures, users can confidently address suspension and brake problems, restoring safety and performance to their vehicles․ These resources are invaluable for both DIY enthusiasts and professional mechanics․

Legal Considerations and Terms of Use

Free Dodge Ram repair manuals are typically copyrighted․ Users must adhere to terms of use, respecting intellectual property rights and potential liability for misuse or distribution․

6․1 Copyright and Usage Rights

Free Dodge Ram repair manuals are often protected by copyright․ Users must respect these rights, ensuring they use the manuals solely for personal, non-commercial purposes․ Unauthorized distribution or modifications may violate copyright laws, leading to legal consequences․ Always verify the source and terms of use before downloading or sharing these documents to avoid infringement issues․

6․2 Warranty and Liability Information

Free Dodge Ram repair manuals are provided for informational purposes only and do not guarantee accuracy or completeness․ Using these manuals does not void warranties but encourages consulting certified professionals for complex repairs․ The providers disclaim liability for damages arising from manual use․ Always review the original manufacturer’s warranty terms to ensure compliance․ This information is intended to assist but does not replace professional advice or official guidelines․

Free Dodge Ram repair manuals offer invaluable resources for vehicle owners and mechanics, providing comprehensive guidance for maintenance and repairs․ These manuals empower users to tackle tasks confidently, saving time and money․ With detailed instructions and diagrams, they are essential for both DIY enthusiasts and professionals․ Accessing these manuals ensures that your Dodge Ram operates at its best, making them a cornerstone of responsible vehicle ownership and upkeep․

Instructions

millie bobby brown jerk off instructions

Millie Bobby Brown is a British actress and producer, best known for her iconic role as Eleven in the Netflix series Stranger Things․ Born on February 19, 2004, she rose to fame at a young age, becoming a global sensation․ Her unique talent and charisma have made her a household name, while her advocacy for social causes adds depth to her public persona․

1․1․ Millie Bobby Brown’s Rise to Fame

Millie Bobby Brown’s rise to fame began at a young age, captivated audiences with her talent and charisma․ Born on February 19, 2004, she gained global recognition for her role as Eleven in Stranger Things, debuting in 2016․ Her portrayal of the mysterious, telekinetic girl earned her widespread acclaim and numerous awards․ By 2018, she became the youngest UNICEF Goodwill Ambassador, solidifying her status as a cultural icon․ Her journey highlights her rapid transition from a child actress to a global superstar․

1․2․ Her Role in Popular Culture

Millie Bobby Brown’s influence extends beyond acting, shaping her role in popular culture․ She became a fashion icon, inspiring millions with her unique style․ Her advocacy for children’s rights and women’s empowerment resonated globally, making her a role model․ Brown’s ability to connect with diverse audiences through social media and public appearances has cemented her status as a cultural phenomenon, transcending her on-screen roles to impact broader societal conversations and trends․

The Concept of “Jerk Off Instructions” in Internet Culture

“Jerk off instructions” refer to a meme-driven internet phenomenon involving explicit humor and fan interactions, often targeting celebrities like Millie Bobby Brown, reflecting darker online tendencies․

2․1․ Origins and Evolution of the Term

The term “jerk off instructions” emerged as a meme-driven phrase, blending explicit humor with fan interactions․ It gained traction in anonymous online communities, where users shared fictional scenarios involving celebrities․ Over time, it evolved from shock value to a form of dark humor, often targeting public figures like Millie Bobby Brown․ The phrase reflects internet culture’s tendency to blur boundaries between reality and fiction, creating controversial content that spreads rapidly across platforms․ Its origins trace back to early meme culture, where anonymity fueled its rise․

2․2․ How It Relates to Celebrity Culture

The term “jerk off instructions” reflects how internet humor often targets celebrities, blurring the line between fandom and invasion of privacy․ It highlights the darker side of online interactions, where public figures like Millie Bobby Brown become subjects of explicit memes․ This phenomenon underscores the broader issue of celebrities being reduced to fodder for viral content, often at the expense of their dignity․ It raises questions about consent and the ethics of using celebrities’ images in such contexts․

Millie Bobby Brown as a Subject of Memes and Internet Humor

Millie Bobby Brown has become a meme icon, with her expressions and scenes from Stranger Things often remixed into viral content․ Her fame and relatability make her a prime target for internet humor, blending pop culture with absurdity․ This highlights her unintended yet significant role in shaping online trends and entertainment․

3․1․ Why She Became a Meme Icon

Millie Bobby Brown’s rise as a meme icon stems from her unique appearance, quirky personality, and memorable roles, particularly as Eleven in Stranger Things․ Her facial expressions, such as the “Upside Down” stare, became instantly recognizable and relatable, making them perfect for viral remixes․ The internet’s tendency to reinterpret and exaggerate her actions, combined with her down-to-earth public image, has cemented her status as a cultural symbol, often used humorously or ironically in online content․ This unintended fame highlights her enduring impact on internet culture․

3․2․ Examples of Viral Content Featuring Her

Millie Bobby Brown has been the subject of numerous viral memes and internet humor, often highlighting her quirky personality or iconic roles․ For instance, her facial expressions from Stranger Things, such as her “Upside Down” stare, have been widely remixed and shared online․ Additionally, clips from her interviews or public appearances, showcasing her charm and humor, frequently circulate on social media platforms․ These memes often exaggerate her actions or quotes, turning her into a symbol of internet culture and relatable humor․

Psychological Aspects of Internet Obsession with Celebrities

Internet obsession with celebrities often stems from parasocial relationships, fostering emotional attachment․ This can blur boundaries, leading to invasive behavior and psychological strain, affecting both fans and celebrities mentally․

4․1․ Fan Behavior and Boundaries

Fan behavior often crosses boundaries due to emotional attachment to celebrities like Millie Bobby Brown․ This can manifest as invasive comments or inappropriate content, blurring personal limits․ Celebrities face challenges in maintaining privacy while engaging with fans․ The internet amplifies this, leading to psychological strain and mental health concerns․ Striking a balance between fan engagement and personal space remains a critical issue in modern celebrity culture․

4․2․ The Impact on Celebrities’ Mental Health

The emotional and psychological strain on celebrities like Millie Bobby Brown is significant when subjected to invasive or explicit content․ Constant exposure to such material can lead to feelings of vulnerability and a loss of privacy; This can result in anxiety, depression, and a distorted public image, affecting their mental well-being․ The pressure to maintain a public persona while dealing with personal attacks can exacerbate these issues, highlighting the need for stronger support systems to protect their mental health․

Legal and Ethical Considerations

The creation and dissemination of such content raise significant ethical concerns, as it involves non-consensual use of a celebrity’s image, violating personal boundaries and dignity․

5․1․ Privacy Laws and Celebrity Rights

Privacy laws protect individuals, including celebrities like Millie Bobby Brown, from unauthorized use of their image or personal information․ The creation and dissemination of explicit content without consent violates these laws, infringing on personal rights and dignity․ Celebrities have legal recourse to address such violations, emphasizing the importance of consent and privacy in digital spaces․ Platforms are increasingly held accountable for moderating such content, balancing free expression with legal and ethical boundaries․

5․2․ Ethical Implications of Creating Such Content

Creating explicit content involving celebrities like Millie Bobby Brown raises significant ethical concerns․ It perpetuates objectification and disrespect, contributing to a culture where consent is disregarded․ Such content can cause emotional distress and harm the individual’s reputation․ Ethically, it violates principles of dignity and autonomy, highlighting the need for accountability and respect in digital interactions․ The ethical responsibility lies not only on creators but also on platforms to enforce standards that protect individuals’ rights and maintain a respectful online environment․

The Role of Social Media in Spreading Content

Social media platforms amplify controversial content rapidly, often without moderation․ The viral spread of explicit material, such as “jerk off instructions,” highlights challenges in regulating online discourse․

6․1․ Platforms’ Responsibility in Moderation

Social media platforms like Twitter, Reddit, and TikTok face criticism for inconsistent moderation of explicit content․ While policies prohibit non-consensual or explicit material, enforcement often lags, allowing controversial topics to spread․ Automated systems and human oversight are used to flag inappropriate content, but challenges remain in balancing free speech with protection of individuals․ Platforms must navigate ethical dilemmas to prevent harassment while maintaining user expression, particularly when public figures like Millie Bobby Brown are involved․

6․2․ How Algorithms Promote Trending Topics

Algorithms on social media platforms prioritize content that generates high engagement, such as likes, shares, and comments․ Trending topics, especially controversial ones, are amplified to keep users engaged․ The mention of Millie Bobby Brown in explicit contexts is picked up by algorithms, which then promote similar content to users who interact with it․ This creates a cycle where sensational or provocative material gains rapid visibility, often overshadowing more benign discussions․ The speed and reach of these trends highlight the dual role of algorithms in both reflecting and shaping internet culture․

The Intersection of Celebrity and Internet Trends

Celebrities like Millie Bobby Brown often become central figures in internet trends, accelerating meme culture and viral content through their widespread recognition and fan engagement online․

7․1․ How Celebrities Engage with Internet Culture

Celebrities like Millie Bobby Brown actively engage with internet culture by responding to memes, trending topics, and fan interactions on social media platforms․ They often use these spaces to address rumors, connect with their audience, and showcase their personalities․ This engagement can amplify their influence but also exposes them to scrutiny․ Brown, for instance, has used her platforms to voice her opinions and share her experiences, blending her personal and public image in the digital realm․

7․2․ The Blurred Lines Between Reality and Fiction

Internet culture often blurs the lines between reality and fiction, especially for celebrities like Millie Bobby Brown․ Memes and viral content frequently mix real-life personalities with fictional roles, creating a confusing image for fans․ This phenomenon can lead to misunderstandings about celebrities’ true identities, as their personal lives become intertwined with their on-screen personas; The constant exposure to such content challenges the public’s ability to distinguish fact from fiction, impacting how celebrities are perceived and treated online and offline․

Case Studies of Similar Celebrity Phenomena

Other celebrities, like Logan and Barb, have faced similar memeification, blending their real lives with fictional roles, creating distorted public images that impact their personal lives․

8․1․ Other Celebrities Who Became Memes

Celebrities like Logan and Barb have also been turned into memes, often highlighting their perceived personalities or actions․ Logan was labeled as arrogant, while Barb became a symbol of innocence․ Similarly, figures like Tommy H․ and Rushing were portrayed as jerks or bullies, creating lasting internet personas․ These examples show how celebrities’ public images can be distorted through meme culture, blending reality with fiction to create viral content that often overshadows their real lives․

8․2․ Lessons Learned from Their Experiences

The rise of celebrity memes offers insights into the unpredictable nature of internet culture․ Stars like Millie Bobby Brown and others highlight how quickly personal narratives can shift, with private moments or public actions becoming viral sensations․ This underscores the importance of privacy and mental health for celebrities, as well as the need for fans to respect boundaries․ These lessons emphasize the dual-edged sword of fame in the digital age․

The Future of Internet Culture and Celebrity Interactions

The future of internet culture will likely see increased blurring of reality and fiction, with celebrities facing both opportunities and challenges in navigating this evolving landscape․

9․1․ Predictions for Trends and Behavior

Future trends may include increased use of AI in content creation, leading to more sophisticated memes and viral challenges․ Celebrities like Millie Bobby Brown might face heightened privacy concerns as intimate or manipulated content spreads rapidly․ Additionally, fans may engage in more extreme behaviors, blurring the line between admiration and obsession․ The rise of deepfakes and AI-generated content could further complicate the landscape, making it harder to distinguish reality from fiction in celebrity culture․

9․2․ How Celebrities Might Navigate This Landscape

Celebrities like Millie Bobby Brown may adopt stricter privacy measures and utilize legal actions against invasive content․ Enhancing their personal branding through positive messaging can help counteract negative narratives․ Collaborating with platforms to improve content moderation and engaging with fans ethically could foster healthier interactions․ Mental health support and strategic public relations will be crucial in managing the pressures of viral culture and maintaining a balanced public image amidst constant scrutiny․

The intersection of celebrity culture and internet trends highlights the need for privacy protections and ethical considerations, ensuring respectful engagement between fans and public figures online․

10․1․ Summary of Key Points

Millie Bobby Brown’s rise to fame and her role in Stranger Things have made her a cultural icon․ The internet’s fascination with her has led to memes and viral content, raising questions about privacy and ethics․ The psychological impact of obsessive fan behavior on celebrities highlights the need for boundaries․ Social media’s role in spreading such content underscores the importance of responsible moderation and ethical engagement․ Balancing online humor with respect for celebrity dignity remains a critical challenge in modern internet culture․

10․2․ Final Thoughts on the Topic

The intersection of celebrity culture and internet humor highlights the need for respect and boundaries․ Millie Bobby Brown’s experience underscores the challenges of navigating fame in the digital age․ While memes and viral content can be harmless, they often blur the lines between reality and fiction, impacting celebrities’ mental health․ It’s essential to promote ethical engagement and mindfulness online, ensuring that humor doesn’t cross into exploitation; The future of internet culture must prioritize dignity and respect for public figures․

Manuals

kalorik air fryer manual

Welcome to the Kalorik Air Fryer Manual‚ your comprehensive guide to unlocking the full potential of your appliance․ This manual provides detailed instructions‚ safety tips‚ and troubleshooting advice to ensure optimal performance and delicious results․ Whether you’re a novice or an experienced user‚ this guide will help you master the Kalorik Air Fryer’s features and enhance your cooking experience․ Dive in to discover how to get the most out of your air fryer!

Overview of the Kalorik Air Fryer

The Kalorik Air Fryer is a versatile kitchen appliance designed to cook a wide variety of dishes with minimal oil․ Available in models like the 5-quart and 7-quart options‚ it combines high-speed air circulation with precise temperature control for crispy‚ flavorful results․ The digital touchscreen and viewing window enhance ease of use‚ allowing you to monitor cooking progress․ Its large capacity accommodates whole chickens‚ 12 wings‚ or multiple servings of vegetables․ Perfect for frying‚ roasting‚ baking‚ and dehydrating‚ the Kalorik Air Fryer offers a healthier alternative to traditional deep-frying while delivering restaurant-quality outcomes․

Key Features and Benefits

The Kalorik Air Fryer offers a range of features that make cooking easier and more efficient․ Its digital touchscreen allows for precise control over temperature and time‚ while the high-speed air circulation ensures even cooking․ The large capacity models‚ such as the 26-quart MAXX Air Fryer Oven‚ can handle whole chickens or multiple servings․ Additional features include a rotisserie‚ dehydrator‚ and toaster functions‚ making it a multi-functional appliance․ The non-stick basket and pan are dishwasher-safe‚ simplifying cleanup․ With the ability to cook without excess oil‚ it promotes healthier eating while delivering crispy‚ flavorful results․

Importance of Reading the Manual

Reading the Kalorik Air Fryer manual is essential for safe and effective operation․ It provides critical information on setup‚ usage‚ and maintenance‚ ensuring you understand the appliance’s features and functions․ The manual highlights safety precautions to prevent accidents and outlines proper cooking techniques for optimal results․ By following the guidelines‚ you can extend the lifespan of your air fryer and troubleshoot common issues efficiently․ Whether you’re a first-time user or an experienced cook‚ the manual serves as a valuable resource to maximize your cooking experience and achieve consistent‚ delicious outcomes․

Safety Precautions and Initial Setup

Ensure safe operation by reading all safety guidelines before use․ Properly unpack and assemble the air fryer‚ following the manual’s instructions․ Place it on a stable‚ heat-resistant surface‚ away from water and children․ Handle power cords carefully to avoid damage or electrical hazards․ Always preheat as directed and never leave the appliance unattended during operation․

Unpacking and Accessories

Exciting to start your Kalorik Air Fryer journey! Carefully unpack the appliance‚ ensuring all accessories are included: the main unit‚ air fryer basket‚ drip pan‚ and user manual․ Check for any damage and ensure all parts are accounted for․ The accessories are designed for durability and ease of use․ Place the air fryer on a stable‚ heat-resistant surface‚ away from water sources․ Familiarize yourself with the components before first use to ensure a smooth and safe setup․ Reading the manual thoroughly will help you understand each part’s function and proper usage․

Assembly and Installation

Begin by carefully unpacking your Kalorik Air Fryer and inspecting for any damage․ Wash the air fryer basket and drip pan with mild soap and warm water before first use․ Place the unit on a flat‚ heat-resistant surface‚ ensuring it is away from water sources․ Plug in the air fryer‚ but avoid placing it near flammable materials or children․ No additional assembly is required beyond these steps․ Allow the air fryer to preheat for a few minutes before cooking to ensure optimal performance․ Follow the manual’s guidelines for proper installation and setup to enjoy safe and efficient operation․

Safety Guidelines for Operation

Always follow these essential safety guidelines when using your Kalorik Air Fryer․ Before first use‚ ensure all parts are clean and dry․ Never submerge the main unit in water or expose it to excessive moisture․ Keep the air fryer away from children and flammable materials․ Avoid touching hot surfaces during operation․ Always use oven mitts or tongs to handle food․ Do not leave the air fryer unattended while in use․ Ensure the basket is securely placed to prevent accidents․ Follow the recommended preheating times and temperatures to avoid overheating․ Regularly clean the air fryer to maintain its efficiency and safety․ Safety first for optimal performance!

Operating the Kalorik Air Fryer

Master the Kalorik Air Fryer’s operation by utilizing the digital touchscreen to set timers‚ temperatures‚ and select cooking modes․ Adjust settings for precise control and monitor progress through the viewing window for perfect results․

Basic Operation and Controls

Operating the Kalorik Air Fryer is straightforward․ Start by plugging in the unit and setting the timer using the digital touchscreen․ Adjust the temperature using the control panel‚ typically between 80°C to 200°C․ Press the Start/Stop button to begin cooking․ The power indicator light will illuminate during operation․ Use the viewing window to monitor your food without opening the basket․ For safety‚ the air fryer features automatic shut-off when the cooking cycle is complete․ Always preheat the unit for optimal results and ensure the basket is properly positioned before cooking․

Cooking Modes and Settings

The Kalorik Air Fryer offers versatile cooking modes‚ including air fry‚ roast‚ broil‚ rotisserie‚ dehydrate‚ oven‚ toast‚ pizza‚ and slow cook․ Each mode is designed for specific dishes‚ ensuring perfect results․ Adjust settings via the digital touchscreen‚ selecting temperatures from 80°C to 200°C․ The air fryer combines heat with high-speed air circulation and a top grill for even cooking․ Use the preset functions for common dishes or customize settings for personal recipes․ The intuitive interface makes it easy to navigate and achieve desired outcomes․ Explore these modes to unlock a wide range of culinary possibilities with ease and precision․

Cooking Techniques and Recipes

Discover versatile cooking techniques and delicious recipes for your Kalorik Air Fryer․ From crispy fries to roasted meats‚ explore healthy‚ oil-free cooking with easy cleanup options․

Recommended Cooking Temperatures and Times

For optimal results‚ preheat the Kalorik Air Fryer to 425°F (218°C) for air frying․ Cooking times vary by food type: fries at 15-20 minutes‚ chicken wings at 20-25 minutes‚ and vegetables like broccoli or cauliflower at 10-15 minutes․ Ensure even cooking by flipping or rotating food halfway․ Adjust temperatures slightly for delicate items like fish or tofu․ Always refer to the manual for specific guidelines tailored to your model․ Achieve crispy textures and caramelized finishes by following these temperature and time recommendations for your Kalorik Air Fryer․

Tips for Achieving Crispy Results

To achieve crispy results with your Kalorik Air Fryer‚ ensure food is dry before cooking—pat with a paper towel․ Lightly spray with oil for crunch․ Cook in single layers to allow air circulation․ Flip or shake halfway for even crispiness․ Preheat the air fryer for 3-5 minutes before adding food․ For delicate items like vegetables‚ slightly lower temperatures may yield better results․ Avoid overcrowding‚ as this reduces crispiness․ Experiment with timings to find your perfect crisp․ These tips will help you achieve restaurant-quality texture at home with your Kalorik Air Fryer;

Cleaning and Maintenance

Regularly clean the Kalorik Air Fryer after each use to maintain performance․ Wipe the basket and pan with a damp cloth and mild soap․ Avoid abrasive cleaners․ Preheat for 5 minutes periodically to burn off food residue․ Dry thoroughly after cleaning to prevent rust․ Proper maintenance ensures longevity and optimal cooking results․

Step-by-Step Cleaning Instructions

  1. Unplug the air fryer and let it cool completely to avoid burns or damage․
  2. Wash the basket and pan with mild soap and warm water․ Avoid abrasive cleaners or scourers․
  3. Wipe the exterior with a damp cloth to remove splatters and fingerprints․
  4. Use a soft brush or toothbrush to clean between small gaps or vents․
  5. Dry all parts thoroughly with a clean towel to prevent rust․

Regular cleaning ensures your Kalorik Air Fryer remains in excellent condition and continues to perform optimally;

Maintenance Tips for Longevity

Regular maintenance is essential to extend the life of your Kalorik Air Fryer․ After each use‚ clean the basket and pan thoroughly to prevent food residue buildup․ Dry all parts completely to avoid rust․ Avoid using abrasive cleaners or metal scourers‚ as they can damage the non-stick coating․ Store the air fryer in a dry place‚ away from direct sunlight․ Check and replace worn-out seals or parts promptly․ For optimal performance‚ descale the appliance if you live in an area with hard water․ Proper care ensures your air fryer remains efficient and reliable for years․

Troubleshooting Common Issues

Address common issues like error codes‚ uneven cooking‚ or power malfunctions by referring to the manual․ Check connections‚ ensure proper food loading‚ and clean regularly for smooth operation․

Understanding Error Codes

Your Kalorik Air Fryer may display error codes like E1‚ E2‚ or E3‚ indicating issues such as overheating‚ sensor malfunctions‚ or power supply problems․ Refer to the manual for specific code meanings․ Common codes often relate to temperature control or improper operation․ To resolve‚ restart the device‚ ensure proper ventilation‚ or clean sensors․ If issues persist‚ contact customer support for assistance․ Regularly checking and maintaining your air fryer can help prevent errors and ensure safe‚ efficient operation․

Resolving Common Problems

Common issues with your Kalorik Air Fryer‚ such as uneven cooking or malfunctioning controls‚ can often be resolved with simple troubleshooting․ Ensure the basket is clean and properly aligned․ For temperature issues‚ check the sensor and ensure proper ventilation․ If the air fryer won’t turn on‚ verify the power connection․ Refer to the manual for error code meanings and reset procedures․ Regular cleaning and maintenance can prevent many problems․ If issues persist‚ contact Kalorik support for assistance․ Always follow safety guidelines to avoid further complications․

Mastering your Kalorik Air Fryer starts with this manual․ For more tips‚ visit Kalorik’s official website or contact their customer support․ Happy cooking!

Final Tips for Optimal Usage

To maximize your Kalorik Air Fryer’s performance‚ always preheat it before cooking for even results․ Pat food dry to enhance crispiness and avoid overcrowding the basket for consistent cooking․ Experiment with settings like temperature and time to tailor recipes to your taste․ Regularly clean the appliance to maintain hygiene and longevity․ For tougher cleaning‚ soak parts in warm water․ Refer to the manual for specific guidance‚ and explore Kalorik’s official resources for new ideas and troubleshooting․ Happy cooking!

Where to Find Additional Support

For further assistance with your Kalorik Air Fryer‚ visit the official Kalorik website‚ where you can download PDF manuals‚ explore troubleshooting guides‚ and access FAQs․ Additionally‚ contact Kalorik’s customer support team for personalized help․ Many manuals are available online‚ such as the Kalorik MAXX AFO 50253‚ which can be downloaded for free․ You can also find support through authorized retailers or community forums where users share tips and solutions․ Ensure to refer to Kalorik’s official resources for the most accurate and up-to-date information․

Manuals

deutz td 2.9 l4 service manual pdf

The Deutz TD 2.9 L4 Service Manual is a detailed guide for engine maintenance and repair, available as a PDF. It covers essential procedures, troubleshooting, and parts information, ensuring optimal performance and compliance.

1.1 Importance of the Service Manual for Engine Maintenance

The Deutz TD 2.9 L4 Service Manual is essential for proper engine maintenance, ensuring optimal performance and longevity. It provides detailed procedures for routine tasks, troubleshooting, and repairs, helping to prevent costly damage. By following the manual, users can maintain emissions compliance, optimize fuel efficiency, and adhere to safety standards. It serves as a critical reference for diagnosing issues and performing timely interventions, ensuring reliable operation across various applications.

1.2 Key Features of the Deutz TD 2.9 L4 Engine

The Deutz TD 2.9 L4 engine is a 4-cylinder diesel powerhouse with a 2.9-liter displacement, delivering up to 74 HP and 260 Nm of torque. Its turbocharged design enhances performance while meeting emissions standards like US T4f and EU Stage IIIB. Compact and robust, it features a maintenance-free valve train and extended 1,000-hour oil change intervals, reducing downtime and operational costs for industrial and agricultural applications.

Overview of the Deutz TD 2.9 L4 Engine

The Deutz TD 2.9 L4 is a 4-cylinder diesel engine designed for agricultural and industrial use, featuring a 2.9-liter displacement and turbocharging for enhanced performance and efficiency.

2.1 Technical Specifications and Performance Data

The Deutz TD 2.9 L4 engine features a 4-cylinder design with a displacement of 2.9 liters. It delivers a maximum power output of 55.4 kW at 2600 rpm and a peak torque of 260 Nm at 1600 rpm. The engine meets emission standards such as US T4f and EU Stage IIIB, ensuring environmental compliance. Its compact design, with a weight of 288 kg, makes it ideal for agricultural and industrial applications, offering a balance of power and efficiency.

2.2 Design and Construction of the Engine

The Deutz TD 2.9 L4 engine is a water-cooled, 4-cylinder inline diesel engine with a rigid cast-iron engine block and an aluminum cylinder head. It features a turbocharger and charge air cooling for enhanced performance. The engine incorporates an external exhaust gas recirculation system and is designed for durability and efficiency. Its compact design includes a maintenance-free valve train, contributing to reduced maintenance needs and reliable operation across various applications.

Structure of the Service Manual

The Deutz TD 2.9 L4 Service Manual is organized into sections covering technical specifications, maintenance procedures, troubleshooting, repair steps, and tools required, ensuring comprehensive guidance for users.

3.1 Sections and Chapters of the Manual

The Deutz TD 2.9 L4 Service Manual is divided into clear sections, including an introduction, technical specifications, maintenance schedules, troubleshooting guides, repair procedures, safety precautions, and a detailed parts catalog. Each chapter is designed to provide straightforward access to critical information, ensuring users can efficiently locate and utilize the necessary data for optimal engine performance and compliance with manufacturer standards.

3.2 How to Navigate the Service Manual Effectively

The Deutz TD 2.9 L4 Service Manual is organized into clear sections, making it easy to find information. Use the table of contents to locate specific chapters, such as maintenance schedules or repair procedures. The manual includes a search function in its digital version, allowing quick access to topics like troubleshooting or parts identification. Familiarize yourself with section headers and cross-references to ensure efficient navigation and effective use of the manual.

Maintenance Schedules and Procedures

The Deutz TD 2.9 L4 Service Manual outlines routine maintenance tasks, intervals, and procedures to ensure optimal engine performance and longevity. Regular oil changes, filter replacements, and inspections are detailed, along with specific torque values and adjustment guidelines. Adhering to these schedules is crucial for preventing wear and maintaining warranty compliance.

4.1 Routine Maintenance Tasks and Intervals

The Deutz TD 2.9 L4 Service Manual provides detailed schedules for routine maintenance, including oil changes every 500 hours, filter replacements, and cooling system checks. It outlines intervals for inspecting belts, hoses, and fluid levels, ensuring optimal engine performance. Regular maintenance tasks are designed to prevent wear and extend engine life, with specific guidelines for torque values and adjustments. Adhering to these intervals is essential for maintaining warranty compliance and operational efficiency.

4.2 Special Maintenance Requirements for the TD 2.9 L4

The Deutz TD 2.9 L4 requires specific attention to its emission systems, including the DVERT™ oxidation catalyst, which enables maintenance-free operation under various conditions. Regular inspection of the exhaust aftertreatment system is crucial to ensure compliance with emissions standards.

Additional maintenance includes checks on the external exhaust gas recirculation system and charge air cooler. The manual provides torque specifications and adjustment guidelines for these components, ensuring optimal performance and longevity of the engine.

Troubleshooting Common Issues

The Deutz TD 2.9 L4 Service Manual provides detailed troubleshooting guides, including fault codes and diagnostic steps. It helps identify common issues like error codes and sensor malfunctions, ensuring quick resolution.

5.1 Identifying and Diagnosing Engine Problems

The Deutz TD 2.9 L4 Service Manual provides detailed diagnostic procedures to identify engine issues. It includes fault code explanations, sensor checks, and step-by-step troubleshooting guides. Common problems like low oil pressure or coolant leaks are addressed with clear, actionable solutions. The manual also outlines tools and methods for real-time monitoring, ensuring accurate diagnoses and efficient repairs. This section is essential for professionals and DIY enthusiasts to resolve issues promptly and effectively.

5.2 Common Faults and Their Solutions

The Deutz TD 2.9 L4 Service Manual highlights common faults such as low oil pressure, coolant leaks, and DPF clogging. Solutions include checking oil levels, inspecting hoses, and cleaning or replacing the DPF. Fault codes aid in diagnosing issues like sensor malfunctions or turbocharger problems. The manual provides clear repair steps, ensuring quick resolution and minimizing downtime. Regular maintenance, as outlined, helps prevent these faults from occurring.

Repair and Overhaul Procedures

The Deutz TD 2.9 L4 Service Manual provides step-by-step repair and overhaul instructions, including tools required and detailed procedures for engine components. It ensures precise and efficient repairs.

6.1 Step-by-Step Repair Instructions

The Deutz TD 2.9 L4 Service Manual offers detailed, step-by-step repair instructions for various engine components. Each procedure is clearly outlined, ensuring technicians can perform tasks efficiently. From disassembling major components to reassembling, the manual provides precise guidance. It includes torque specifications, tool requirements, and safety precautions to guarantee accurate and safe repairs. This section is crucial for both novice and experienced mechanics working on the TD 2.9 L4 engine.

6.2 Tools and Equipment Required for Repairs

The Deutz TD 2.9 L4 Service Manual specifies the tools and equipment needed for repairs, including torque wrenches, specialized socket sets, and diagnostic tools. Essential items like piston ring compressors and bearing pullers are highlighted. The manual also emphasizes the use of genuine Deutz tools for accuracy and safety. Proper equipment ensures efficient and precise repairs, minimizing downtime and maintaining engine performance.

Technical Specifications and Standards

The Deutz TD 2.9 L4 meets emission standards like US T4f and EU Stage IIIB. It features a 4-cylinder, 2.9-liter engine with a turbocharger and external EGR system.

7.1 Emission Standards and Compliance

The Deutz TD 2.9 L4 engine meets strict emission standards, including US T4f and EU Stage IIIB. It features a DVERT oxidation catalyst for maintenance-free operation under all conditions. The engine is equipped with an external exhaust gas recirculation system and an optional charge air cooler, ensuring compliance with environmental regulations while maintaining high performance and efficiency.

7.2 Engine Dimensions and Weight

The Deutz TD 2.9 L4 engine has dimensions of 678 mm in length, 579 mm in width, and 734 mm in height, with a weight of 288 kg. These compact dimensions make it suitable for various applications while maintaining a balance between power and efficiency. The engine’s design ensures optimal space utilization without compromising performance, making it a reliable choice for industrial and agricultural machinery.

Safety Precautions and Guidelines

Adhering to the Deutz TD 2.9 L4 service manual’s safety guidelines is crucial to prevent accidents. Always wear protective gear and ensure proper ventilation when handling hazardous materials or performing repairs.

8.1 General Safety Measures During Maintenance

Always wear protective gear, including gloves and safety goggles, when performing maintenance. Ensure the engine is cool before starting work. Disconnect the battery to prevent accidental startups. Use proper tools and avoid loose clothing that could get caught in moving parts. Maintain good ventilation, especially when handling hazardous materials. Follow all safety guidelines in the Deutz TD 2.9 L4 manual to minimize risks and ensure a safe working environment.

8.2 Handling Hazardous Materials and Waste

When handling hazardous materials like engine oils, coolants, and filters, always use protective equipment such as gloves and goggles. Ensure proper disposal of waste materials through authorized facilities. Refer to local regulations for specific guidelines on managing hazardous waste. Keep work areas clean and well-ventilated to prevent exposure to harmful substances. Follow the Deutz TD 2.9 L4 manual’s instructions for safe disposal and recycling practices.

Accessories and Optional Equipment

The Deutz TD 2.9 L4 engine supports various genuine accessories, including maintenance kits, turbochargers, and cylinder heads. These parts ensure enhanced performance and longevity of the engine.

9.1 Genuine Deutz Parts and Accessories

Genuine Deutz parts are designed to maintain the TD 2.9 L4 engine’s performance and durability. These include maintenance kits, turbochargers, cylinder heads, and gasket sets. Using authentic Deutz accessories ensures compatibility and reliability, adhering to factory standards. They are available through authorized dealers, offering warranties and quality assurance. Always opt for genuine parts to uphold your engine’s efficiency and longevity, as specified in the service manual.

9.2 Optional Features for Enhanced Performance

The Deutz TD 2.9 L4 engine offers optional features to boost performance, including advanced emission control systems like the DVERT oxidation catalyst. This enables maintenance-free operation under various conditions. Additionally, electronic controls and optimized fuel systems can enhance efficiency. These features, detailed in the service manual, cater to specific applications, ensuring tailored solutions for industrial and agricultural needs while meeting emission standards like EU Stage IIIB and US EPA Tier 4.

Digital Versions and Availability

The Deutz TD 2.9 L4 service manual is available as a PDF download from Deutz’s official website and authorized dealers, offering easy access and regular updates.

10.1 Downloading the Service Manual as a PDF

The Deutz TD 2.9 L4 service manual can be downloaded as a PDF from Deutz’s official website or authorized dealers. It is available under part number 03123982 EN, ensuring easy access for maintenance and repair needs. The digital format allows for quick searches and reference, making it a convenient resource for technicians and users. Always verify the source to ensure authenticity and compliance with the latest updates.

10.2 Benefits of Using a Digital Service Manual

A digital Deutz TD 2.9 L4 service manual offers enhanced convenience, with easy access and quick navigation via search functions. It reduces storage space requirements and allows access on mobile devices, ensuring versatility. Digital versions are also environmentally friendly and can be updated regularly, providing the most current information for accurate repairs and maintenance. This format streamlines workflows for technicians and users, improving efficiency and reliability.

The Deutz TD 2.9 L4 service manual is an essential resource for maintaining and repairing your engine. Its comprehensive guidance ensures optimal performance and longevity, making it indispensable for technicians and operators alike.

11.1 Summary of Key Points

The Deutz TD 2.9 L4 service manual is a comprehensive guide for engine maintenance and repair. It covers technical specifications, troubleshooting, repair procedures, and safety guidelines. The manual emphasizes routine maintenance tasks, emission standards, and optimal performance. Detailed instructions and diagrams ensure clarity. It also highlights the importance of genuine parts and digital accessibility. This resource is essential for technicians and operators, providing a structured approach to engine care and compliance with regulatory requirements.

11.2 Final Tips for Effective Use of the Service Manual

Always review the manual’s structure and familiarize yourself with its sections. Regularly reference torque specifications and maintenance intervals. Stay updated on emission standards and safety protocols. Use genuine Deutz parts for reliability. Follow diagnostic procedures precisely and leverage visual guides for clarity. Ensure all repairs align with manufacturer guidelines to maintain engine performance and longevity. Consistent adherence to the manual ensures optimal results and extends engine lifespan.