tennant t7 parts manual
Tennant T7 Parts Manual: A Comprehensive Guide
This manual details ordering parts, emphasizing Tennant Company-supplied or equivalent components. Parts and supplies are conveniently available through online platforms, as illustrated in diagrams.
The Tennant T7 is a robust and reliable industrial floor scrubber, widely utilized in diverse settings – from warehouses and manufacturing facilities to retail spaces and distribution centers. Its effectiveness stems from a carefully engineered system of components, each playing a crucial role in delivering superior cleaning performance. However, even the most durable machines require periodic maintenance and, inevitably, parts replacement to ensure continued optimal operation.
Understanding the intricacies of the T7’s design and having access to a comprehensive parts manual is paramount for efficient upkeep. This guide serves as an invaluable resource for owners, maintenance personnel, and technicians responsible for servicing these machines. It provides detailed information on identifying, locating, and ordering the correct replacement parts, minimizing downtime and maximizing the lifespan of your Tennant T7 investment. Proper part selection, utilizing Tennant-supplied or equivalent components, is consistently emphasized for maintaining machine integrity and performance.
Understanding the Importance of a Parts Manual
A dedicated parts manual for the Tennant T7 isn’t merely a convenience; it’s a necessity for effective maintenance and repair. Without it, identifying the correct replacement components becomes a frustrating and potentially costly endeavor. Incorrect parts can lead to improper machine function, further damage, and increased downtime – significantly impacting operational efficiency.
The manual provides detailed diagrams and part numbers, ensuring accurate ordering and minimizing the risk of compatibility issues. It streamlines the repair process, allowing technicians to quickly diagnose problems and implement solutions. Furthermore, adhering to the manual’s recommendations regarding part selection – prioritizing Tennant Company-supplied or equivalent options – safeguards the machine’s original performance standards and warranty validity. A well-utilized parts manual translates directly into reduced maintenance costs, extended machine life, and consistent cleaning results.
Locating and Ordering Tennant T7 Parts
Parts can be sourced from official Tennant suppliers or conveniently ordered online. Diagrams are crucial for identification, ensuring you obtain the correct components for your T7.
Official Tennant Parts Suppliers
Securing genuine Tennant T7 parts directly from authorized suppliers guarantees optimal performance and longevity for your machine. These suppliers maintain extensive inventories, offering a comprehensive selection of components, from routine maintenance items like filters and brushes to more complex parts such as pumps and motors.
Benefits of choosing official suppliers include expert advice from knowledgeable staff who can assist with part identification and compatibility. They can also provide guidance on proper installation techniques, ensuring safe and effective repairs. Furthermore, genuine Tennant parts are backed by a manufacturer’s warranty, offering peace of mind and protection against defects.
To locate an official Tennant parts supplier in your region, utilize the Tennant Company website’s dealer locator tool. This resource provides contact information, addresses, and service capabilities for authorized distributors. Prioritizing official suppliers safeguards the integrity of your Tennant T7 and maintains its operational efficiency.
Online Parts Ordering Platforms
Numerous online platforms facilitate the convenient procurement of Tennant T7 parts, offering a streamlined alternative to traditional ordering methods. These platforms often feature detailed parts diagrams, allowing users to visually identify the required components and their corresponding part numbers. Many sites boast extensive catalogs, encompassing a wide range of parts for various Tennant models, including the T7.
When utilizing online platforms, prioritize reputable vendors with established track records and positive customer reviews. Verify the authenticity of the parts offered and ensure compatibility with your specific Tennant T7 model. Carefully review shipping policies, return procedures, and warranty information before finalizing your purchase.
Several platforms specialize in industrial cleaning equipment parts, providing dedicated support and expertise. Comparing prices across multiple vendors can help secure the most competitive rates. Remember to have your machine’s serial number readily available to ensure accurate part selection and ordering, maximizing efficiency and minimizing errors.
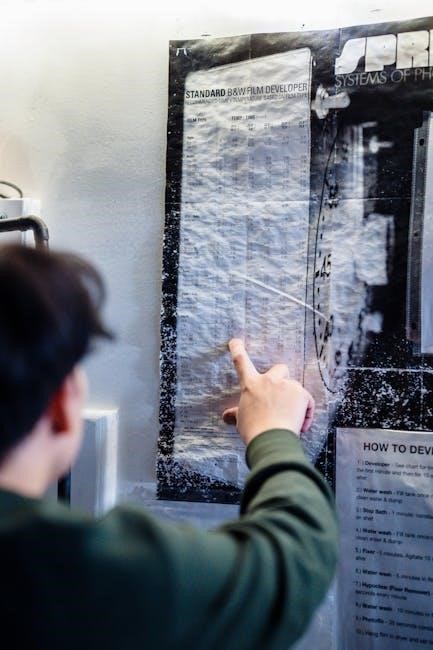
Using the Parts Diagram
The Tennant T7 parts diagram is an invaluable resource for identifying and ordering replacement components. These diagrams, often found within the official parts manual or on online platforms, provide a visual representation of the machine’s assembly, showcasing each part’s location and relationship to others.
Each component within the diagram is typically labeled with a unique reference number, corresponding to a specific part number listed in the accompanying parts list. Carefully study the diagram to pinpoint the exact part requiring replacement, paying close attention to variations within sub-assemblies.
Utilize the diagram in conjunction with the parts list to accurately identify the correct part number, description, and quantity needed. Cross-referencing these resources minimizes the risk of ordering incorrect or incompatible parts. Understanding the diagram’s conventions, such as exploded views and sectional breakdowns, enhances its usability and ensures efficient parts procurement.
Key Components and Their Parts
Essential systems—brush, solution delivery, and vacuum—require specific parts for optimal performance. Maintaining these components ensures the Tennant T7 operates efficiently and effectively.
Brush System Parts
The brush system is critical for effective cleaning, and maintaining its components is paramount. This section details the various parts required for optimal brush performance on your Tennant T7. Key components include the brush heads themselves, available in different bristle types – polyurethane, nylon, or wire – to suit various floor surfaces and cleaning needs. Regular inspection and replacement of brush heads are essential to prevent damage to the floor and ensure consistent cleaning results.
Beyond the brush heads, the brush system incorporates several supporting parts. These include brush motors, responsible for powering the rotation, and brush drive belts, which transmit power from the motor to the brushes. Worn or damaged belts will result in reduced brush speed and cleaning effectiveness. Additionally, brush skirts or side brushes help contain the cleaning solution and debris, directing them towards the vacuum system. Finally, brush bearings ensure smooth rotation and longevity of the brush assembly. Always refer to the parts diagram to identify the correct part numbers for your specific Tennant T7 model.
Solution Delivery System Parts
The solution delivery system is responsible for dispensing cleaning solution onto the floor surface, a vital function for effective scrubbing. This section outlines the key components and replacement parts for maintaining this system on your Tennant T7. Central to this system is the solution tank, which holds the diluted cleaning solution. Inspect the tank regularly for cracks or leaks, and ensure it’s properly sealed. The solution pump is crucial for delivering the solution at the correct pressure and flow rate; a failing pump will significantly reduce cleaning performance.
Furthermore, the system includes solution hoses and nozzles, which distribute the solution evenly across the floor. These components are prone to clogging or damage and should be inspected and replaced as needed. Filters within the system prevent debris from entering and damaging the pump and nozzles. Regularly scheduled filter replacement is essential for preventing costly repairs. Solenoid valves control the flow of solution, and spray bars ensure even distribution. Always consult the parts diagram to ensure you order the correct replacement parts for your Tennant T7 model.
Vacuum System Parts
The vacuum system on the Tennant T7 is critical for removing dirty water and debris from the floor after scrubbing, leaving a clean and dry surface. Maintaining this system requires regular inspection and replacement of key components. The vacuum motor generates the suction necessary for effective pickup; a weakening motor indicates a need for replacement. The vacuum assembly houses the motor and directs airflow. Inspect for cracks or damage that could reduce suction power.
Essential to the system are the vacuum hoses, which transport the dirty water to the recovery tank. Check hoses for blockages or leaks, as these significantly impact performance. The squeegee, while technically part of the recovery system, directly impacts vacuum efficiency by controlling water flow. The recovery tank stores the dirty water collected during scrubbing; ensure it’s emptied and cleaned regularly. Filters within the vacuum system prevent debris from reaching the motor, extending its lifespan. Replacement of these filters should follow a scheduled maintenance plan. Always refer to the parts diagram for accurate component identification when ordering replacements.
Maintenance and Replacement Parts
Regular upkeep demands timely filter, brush, and squeegee blade replacements. Adhering to a schedule ensures optimal performance and extends the lifespan of your Tennant T7.
Filter Replacement Schedule
Maintaining optimal performance of your Tennant T7 relies heavily on a consistent filter replacement schedule. Different filter types require varying frequencies based on usage and environmental conditions. For the primary dust filter, a monthly inspection is recommended, with replacement every 50-100 operating hours in typical environments.
The pre-filter, designed to capture larger debris, should be checked daily and replaced as needed – often coinciding with primary filter changes. Solution filters, crucial for water quality, generally require replacement every 200-300 operating hours, or quarterly if usage is low. Neglecting filter maintenance can lead to reduced cleaning efficiency, increased wear on other components, and potential damage to the vacuum system.
Always refer to the Tennant T7 parts manual for specific filter part numbers and detailed replacement instructions. Using genuine Tennant filters ensures compatibility and maintains the machine’s warranty. Keep a log of filter replacements to track maintenance intervals and proactively address potential issues.
Brush Wear and Replacement
Regularly assessing brush wear is vital for maintaining the Tennant T7’s cleaning effectiveness. Brush lifespan is significantly impacted by the surfaces cleaned and the presence of abrasive materials. Inspect brushes after each shift, looking for worn bristles, uneven wear patterns, or damage. Replace brushes when bristle length falls below the manufacturer’s recommended minimum – typically around 1 inch.
Uneven wear often indicates improper machine setup or uneven floor surfaces. Rotating brushes periodically can help distribute wear more evenly, extending their overall lifespan. When replacing brushes, always use genuine Tennant brushes or approved equivalents to ensure proper fit and performance. Incorrect brush types can damage the floor surface or reduce cleaning efficiency.
Consult the Tennant T7 parts manual for the correct brush specifications and replacement procedures. Maintaining proper brush pressure and alignment is also crucial for optimal cleaning and minimizing brush wear. Keep records of brush replacements for proactive maintenance scheduling.
Squeegee Blade Maintenance and Parts
Maintaining the squeegee blade is crucial for a streak-free and dry floor surface on your Tennant T7. Regularly inspect the blade for wear, tears, hardening, or debris buildup. Even minor damage can lead to water streaking and reduced cleaning effectiveness. Clean the blade after each use with a mild detergent and water to remove any accumulated cleaning solution or contaminants.
Replace the squeegee blade when it no longer conforms to the floor surface or exhibits significant wear. A worn blade will leave a film of water behind, creating a slipping hazard. When replacing, ensure you use the correct blade type and length specified in the Tennant T7 parts manual. Incorrect blades can damage the floor or the squeegee assembly.
Proper tensioning of the squeegee blade is also essential. Too little tension results in streaking, while too much can cause premature wear. Refer to the manual for recommended tension settings. Regularly check and adjust the tension as needed. Keep a supply of replacement blades on hand for quick replacements and minimal downtime.
Troubleshooting with the Parts Manual
Utilize part numbers for accurate replacements when identifying faulty components. The manual’s diagrams assist in pinpointing issues and ensuring correct part ordering for repairs.
Identifying Faulty Components
Successfully troubleshooting your Tennant T7 relies heavily on accurately pinpointing the source of the problem. Begin by carefully observing the machine’s performance and noting any unusual sounds, smells, or operational deficiencies. Consult the parts manual’s detailed diagrams to visually trace the system related to the observed issue.
For example, if the brush system isn’t functioning correctly, examine the brushes themselves for wear, damage, or obstructions. Check the drive components and motors associated with the brush system. If the solution delivery system is malfunctioning, inspect the nozzles, hoses, and pump for clogs or leaks.
The parts manual is invaluable here, providing exploded views that allow you to isolate specific components. Cross-reference the symptoms with the diagram to narrow down potential culprits. Remember to always prioritize safety and disconnect the power source before inspecting any internal components. A systematic approach, combined with the manual’s guidance, will significantly expedite the diagnostic process.
Using Part Numbers for Accurate Replacement
The Tennant T7 parts manual utilizes a precise numbering system crucial for ordering the correct replacement components. Each part is assigned a unique identifier, ensuring compatibility and preventing errors during the procurement process. Never rely on visual identification alone, as subtle variations can exist between seemingly similar parts.
When ordering, always provide the complete part number as listed in the manual. This number typically appears directly adjacent to the part in the exploded diagrams. Double-check the number before submitting your order to avoid delays and potential issues with fitment.
Official Tennant suppliers and online platforms require these part numbers for accurate fulfillment. Utilizing the correct part number guarantees you receive the exact component designed for your specific Tennant T7 model, maintaining optimal performance and extending the machine’s lifespan. Incorrect parts can lead to further damage and costly repairs, so precision is paramount.
Safety Precautions When Replacing Parts
Prioritizing safety is paramount when performing any maintenance or repair on your Tennant T7. Always disconnect the machine from its power source – both electrical and battery – before commencing any work. This prevents accidental activation and potential injury.
Wear appropriate personal protective equipment (PPE), including safety glasses, gloves, and sturdy footwear. Some parts may have sharp edges or contain hazardous materials. Ensure the work area is well-ventilated, especially when dealing with fluids or chemicals.
If replacing hydraulic components, relieve all pressure before disconnecting lines. Properly support the machine if lifting is required to access parts. Consult the Tennant T7 parts manual for specific safety warnings related to each component. Never attempt repairs beyond your skill level; seek professional assistance when needed. Following these precautions will ensure a safe and efficient repair process.