wow dragonflight blacksmithing guide
Dragonflight Blacksmithing is a versatile profession allowing players to craft powerful weapons, armor, and equipment. It plays a crucial role in both PvE and PvP, offering unique gear customization options.
What is Blacksmithing in Dragonflight?
Blacksmithing in Dragonflight enables players to craft durable weapons, armor, and equipment using ores and metals. It’s a core profession for gear progression, allowing players to create items essential for both combat and the in-game economy. The quality of crafted items depends on materials and crafting skills, making it a vital skill for any aspiring warrior or crafter.
Why Choose Blacksmithing as Your Profession?
Blacksmithing is ideal for crafting powerful weapons and armor, essential for both PvE and PvP. It offers high customization options, allowing players to create gear tailored to their playstyle. Additionally, it provides a lucrative way to earn gold by crafting and selling items on the Auction House, making it a valuable profession for any player.
Key Changes in Dragonflight Blacksmithing
Dragonflight introduces quality ranks for crafted items, enhancing gear customization. The inspiration system allows for random crafting boosts, adding unpredictability to outcomes. Material quality now directly impacts results, with higher-tier materials guaranteeing better products. These changes emphasize precision and resource management, making Blacksmithing more strategic and rewarding than ever before.

Getting Started with Blacksmithing
Begin by learning the Blacksmithing profession, setting up essential tools, and choosing a specialization. Gather materials and familiarize yourself with crafting basics to progress effectively.
How to Learn Blacksmithing in Dragonflight
To learn Blacksmithing in Dragonflight, seek out a Blacksmithing trainer in major cities like Orgrimmar or Stormwind. They will teach you the basics, starting you at skill level 1. Begin crafting simple items to progress and unlock more complex recipes. Gathering materials from the Auction House or farming will be essential for leveling up efficiently.
Initial Setup and Tools
To begin Blacksmithing in Dragonflight, you’ll need a Blacksmith Hammer and access to an Anvil. These tools are essential for crafting. Start by gathering base materials like ores and metals, which can be obtained through mining or purchased from the Auction House. Ensure you have sufficient bag space for your materials and tools to stay organized and efficient.
Understanding Blacksmithing Specializations
In Dragonflight, Blacksmithing offers two primary specializations: Weaponsmithing and Armorsmithing. Weaponsmithing focuses on crafting weapons like swords and axes, while Armorsmithing specializes in creating armor pieces. Each specialization requires unique recipes and materials, allowing players to tailor their crafting to their preferred playstyle or market demand. Understanding these paths is crucial for mastering the profession effectively.

Leveling Your Blacksmithing Skill
Leveling Blacksmithing from 1-100 in Dragonflight is straightforward, with optimal paths and reagent strategies; The transition from 50-60 requires Primal Molten Alloy, a yellow recipe. Using renown or Knowledge points can help max out your skill to 100 efficiently, ensuring you craft high-quality gear effectively.
Blacksmithing Leveling Guide: 1-50
Begin by crafting basic items like Copper Bolts and Rough Bludgeons to reach level 20. Progress to Iron Weapons and Light Armor, using Iron Ore and Cloth. At level 30, switch to Steel Bars for higher-tier recipes. Utilize yellow recipes for efficient skill gains and manage materials wisely to maintain steady progression up to level 50.
Blacksmithing Leveling Guide: 50-100
From 50 to 100, focus on crafting high-demand items like Primal Molten Alloy gear and epic weapons. Use yellow recipes for consistent skill gains and optimize reagent usage. At higher levels, Primal Chaos and rare materials become essential. Utilize profession knowledge to unlock advanced recipes, ensuring efficient progression to max skill level.
Optimal Reagent Farming and Crafting Strategies
Focus on farming key ores like Primal Chaos and Elethium for high-end crafting. Prioritize bulk crafting of in-demand items to minimize material waste. Use Inspiration strategically to enhance craft quality, ensuring optimal resource utilization. Efficient inventory management and farming routes will streamline progression, reducing downtime and boosting productivity.

Crafting High-Quality Gear in Dragonflight
Crafting high-quality gear in Dragonflight requires premium materials and strategic use of Inspiration. Higher material quality guarantees better results, while Inspiration offers a chance to exceed expectations.
Understanding Gear Quality and Ranks
In Dragonflight, gear quality is determined by material rank and crafting skill. Higher-ranked materials ensure better outcomes, while Inspiration offers a chance to boost quality further. Crafting with premium resources guarantees higher-tier items, making material selection and Inspiration crucial for creating exceptional gear;
How to Craft the Best Weapons and Armor
To craft exceptional weapons and armor, focus on mastering high-ranking recipes and using premium materials. Specialize in Weaponsmithing or Armorsmithing for expertise, and ensure your workshop is well-upgraded. Utilize Inspiration to enhance crafting outcomes and experiment with reagents for optimal results, ensuring your gear stands out in both quality and performance.
Using Inspiration to Boost Crafting Results
Inspiration is a powerful mechanic in Dragonflight Blacksmithing that enhances crafting outcomes. By filling the Inspiration bar during crafting, you can boost the quality or rarity of your items. Higher-quality materials increase the chance of success, while fully filling the bar guarantees improved results, making it a key tool for crafting exceptional gear.

Blacksmithing Specializations Explained
Blacksmithing Specializations in Dragonflight allow players to focus on crafting weapons or armor, tailoring their progression and strategy to suit their playstyle and crafting goals effectively.
Weaponsmithing Specialization
The Weaponsmithing Specialization focuses on crafting powerful weapons, including one-handed and two-handed options. It emphasizes resource efficiency and unlocks high-demand recipes, making it ideal for players prioritizing weapon crafting for PvE or PvP purposes.
Armorsmithing Specialization
The Armorsmithing Specialization enables players to craft plate armor, enhancing defensive capabilities. It focuses on creating gear with unique properties, making it ideal for players seeking to improve their character’s survivability or craft in-demand armor for the marketplace, ensuring efficiency and profitability in Dragonflight’s economy.
How to Choose the Right Specialization
Choosing the right specialization in Dragonflight Blacksmithing depends on your playstyle and goals. Weaponsmithing is ideal for crafting powerful weapons, while Armorsmithing focuses on creating durable armor. Consider your character’s needs, the demand in the market, and your long-term objectives to decide which path aligns best with your progression and profitability goals in the game.

Materials and Farming for Blacksmithing
Dragonflight Blacksmithing relies heavily on ores like Draconium and other metals. Efficient farming routes and resource management are crucial for crafting high-quality gear effectively.
Essential Materials for Blacksmithing
Draconium Ore and Primal Molten Alloy are core materials for crafting high-quality gear. Additional reagents like Ogre Tannin and elemental metals enhance crafting results. Efficiently gathering these resources ensures optimal progress in creating powerful weapons and armor, making them indispensable for mastering the profession.
Best Farming Routes for Ores and Resources
Optimal ore farming routes include traversing the Dragon Isles, focusing on zones like the Waking Shores and Ohn’ahran Plains. Draconium Ore is abundant in volcanic regions, while Primal Molten Alloy can be found near molten veins. Efficient routes minimize travel time, ensuring consistent resource gathering to fuel your crafting progress.
Efficient Material Management
Effective material management is crucial for crafting efficiency. Organize your inventory, bank space, and use vendor options to prevent clutter. Prioritize high-demand ores and alloys, ensuring you have ample supplies for crafting. Regularly check market demand to adjust your stockpile, optimizing resources for both progression and profit in Dragonflight Blacksmithing.
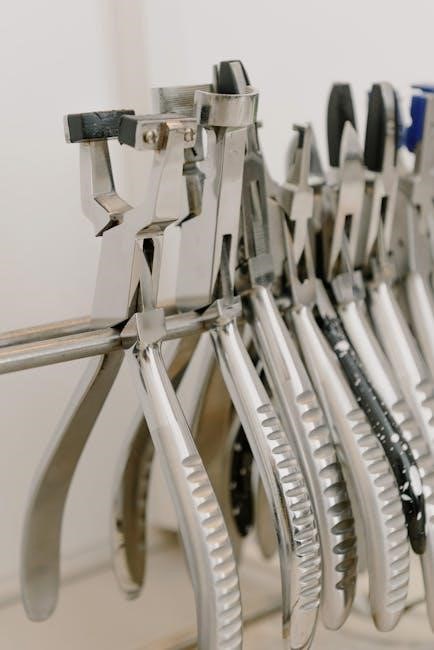
Blacksmithing Equipment and Tools
Blacksmithing equipment includes hammers, anvils, and specialized tools that enhance crafting efficiency. These items visually transform your character, emphasizing their role as a master blacksmith in Dragonflight.
Importance of Blacksmithing Gear
Blacksmithing gear, such as hammers and anvils, enhances crafting efficiency and precision. In Dragonflight, these tools visually transform your character, emphasizing their blacksmithing role. Quality equipment improves crafting speed and consistency, making it essential for producing high-grade weapons and armor. Proper gear ensures optimal results, linking directly to the quality of crafted items.
Best Tools for Crafting and Efficiency
The Blacksmithing Hammer and Anvil are essential tools, enhancing crafting speed and precision. Upgrading these tools improves efficiency, allowing for quicker crafting sessions. Additional tools like the Portable Anvil provide convenience, enabling crafting on the go. High-quality materials and proper equipment ensure optimal results, making these tools indispensable for mastering Dragonflight Blacksmithing.
Upgrading Your Workshop
Upgrading your workshop enhances efficiency and unlocks advanced crafting options. Invest in better tools and expansions to improve crafting speed and quality. A well-equipped workshop allows for more complex recipes and higher-tier items, making it a valuable investment for both crafting and selling gear in Dragonflight.
Blacksmithing and the Economy
Blacksmithing heavily impacts the in-game economy, as crafted gear is upgradeable over time, creating consistent demand. Supply and demand dynamics, paired with Auction House strategies, enable profitable gold-making opportunities for skilled blacksmiths in Dragonflight.
How to Make Gold with Blacksmithing
Crafting high-demand gear and selling it on the Auction House is a reliable way to make gold. Focus on weapons and armor with high stat budgets, as these are sought after by raiders and PvPers. Monitor supply and demand, and time your sales during progression phases when players are gearing up. Additionally, crafting upgradeable gear ensures long-term demand, allowing you to capitalize on the expansion’s progression cycle.
Understanding Supply and Demand
Understanding supply and demand is crucial for maximizing profits in Dragonflight Blacksmithing. High-demand items like weapons and armor with strong stat budgets are sought after by raiders and PvPers. Use the Auction House to identify gaps in supply and capitalize on them. Timing sales during progression phases, when players are gearing up, can significantly boost profits and ensure consistent demand for your crafted items.
Using the Auction House Effectively
The Auction House is a powerful tool for Dragonflight Blacksmithing profits. Check demand for crafted gear, weapons, and materials. Post items during off-peak hours to avoid competition. Set competitive prices based on current listings and market trends. Use addons like Auctionator or TSM to automate postings and maximize efficiency in buying and selling resources or crafted items.
Reputation and Blacksmithing
Reputation plays a key role in Dragonflight Blacksmithing, unlocking exclusive recipes and patterns. Building reputation with factions grants access to rare crafting materials and high-demand items, enhancing your profession’s potential and profitability through reputation-based rewards.
Reputation Requirements for Recipes
Reputation with key factions like the Valdrakken Accord is essential for unlocking high-end Blacksmithing recipes in Dragonflight. Certain recipes require specific reputation levels to become available, ensuring players must engage in faction-related activities to access premium crafting options. Building reputation not only unlocks rare patterns but also enhances your ability to craft high-demand items, boosting your profession’s efficiency and profitability.
How to Grind Reputation for Blacksmithing
Reputation grinding for Blacksmithing in Dragonflight requires consistent effort and time. Farming ores, completing quests, and crafting items for specific factions are effective methods. Utilizing profession-related activities and bonuses can accelerate reputation gains. Building strong faction ties is crucial for accessing premium recipes, enhancing your crafting efficiency and profitability in the game economy.
Unlocking Rare Recipes
Unlocking rare Blacksmithing recipes in Dragonflight requires high reputation with specific factions, such as the Artisans’ Consortium or the Dragonscale Expedition. Crafting high-quality items and using premium reagents increases your chances of discovering rare patterns. Some recipes are exclusive to certain factions or drops, making dedication and strategic crafting essential to acquire them.

Future of Blacksmithing in Dragonflight
Dragonflight Blacksmithing continues to evolve with new patches, introducing upgradeable gear and fresh crafting opportunities. The upcoming 10.1 patch promises exciting changes, ensuring the profession remains relevant and dynamic for long-term engagement.
Upcoming Changes and Patches
The Dragonflight 10.1 patch is expected to introduce significant updates, including upgradeable crafted gear. This change will allow players to enhance their equipment as the expansion progresses, keeping Blacksmithing relevant and dynamic. The patch is anticipated to release later this year, bringing new opportunities for crafters to create high-tier items and adapt to emerging meta demands.
How to Prepare for New Content
To prepare for new Dragonflight content, stockpile rare materials and level your Blacksmithing skill to 100. Focus on understanding upcoming gear changes and required reagents. Stay updated on patch notes and plan crafting strategies. Maximize your profession’s potential by unlocking specializations and efficiently managing resources. This ensures readiness for new crafting demands and updates.
Long-Term Goals for Blacksmithing
Long-term goals include mastering high-level crafting, staying updated with patch changes, and maximizing efficiency. Aim to unlock rare recipes, craft top-tier gear, and become a leading crafter. Focus on building a strong economy by producing high-demand items and optimizing resource use to achieve long-term success in Dragonflight Blacksmithing.