Manuals

th8320u1008 manual

The Honeywell TH8320U1008 is a 7-Day VisionPRO 8000 Touchscreen Programmable Thermostat‚ designed for precise temperature control and energy efficiency․ Its intuitive interface and advanced features make it ideal for modern home comfort management․

1․1 Overview of the Honeywell TH8320U1008 Model

The Honeywell TH8320U1008 is a 7-Day VisionPRO 8000 Touchscreen Programmable Thermostat‚ featuring an 8․8-square-inch blue backlit touchscreen display․ Designed for compatibility with various HVAC systems‚ it offers precise temperature control and energy-saving capabilities․ Its sleek design and user-friendly interface make it a popular choice for modern smart home integration․ The thermostat supports up to 3 Heat/2 Cool stages and includes options for humidity control and automatic/manual changeover․ It is ideal for homeowners seeking advanced climate control with intuitive programming options․

1․2 Key Features of the VisionPRO 8000 Touchscreen Thermostat

The VisionPRO 8000 offers a large‚ 8․8-square-inch blue backlit touchscreen display‚ providing clear visibility and ease of use․ It features menu-driven programming for effortless setup and scheduling․ The thermostat supports up to 3 Heat/2 Cool stages and includes humidity control options․ Users can manually override schedules or activate the HOLD function for constant temperature settings․ Energy-saving modes and programmable strategies help reduce energy consumption․ The device also supports automatic or manual changeover for heating and cooling systems‚ ensuring flexibility and efficiency in climate control․

Installation Instructions for the TH8320U1008

Ensure compatibility with your HVAC system and follow safety precautions․ Refer to the manual for step-by-step wiring and mounting instructions․ Complete post-installation setup for optimal performance․

2․1 Pre-Installation Requirements and Safety Precautions

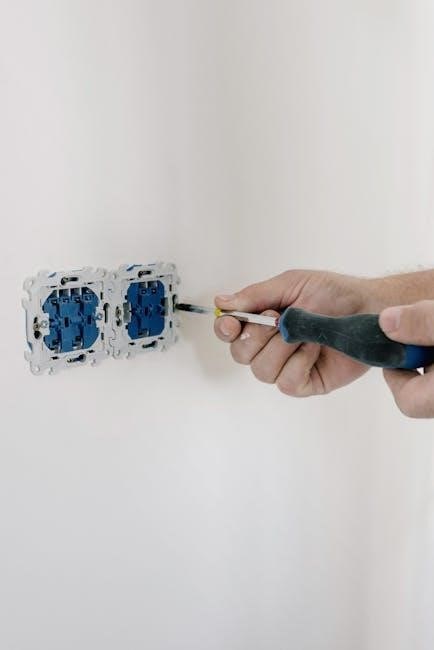
Ensure the installer is a trained technician․ Turn off power to the HVAC system before starting․ Verify system compatibility with the thermostat․ Read and follow all safety guidelines in the manual to avoid hazards․ Use appropriate tools for wiring and mounting․ Ensure proper grounding and check local electrical codes․ Familiarize yourself with the installation process outlined in the manual․ Take necessary precautions to prevent damage to the thermostat or HVAC system․ Proper preparation ensures a safe and successful installation․ Always refer to the manual for specific instructions and safety measures․

2․2 Step-by-Step Installation Guide

Turn off power to the HVAC system at the circuit breaker․

Remove the old thermostat and label the wires according to the manual․

Mount the wall plate and connect wires as per the wiring diagram․

Install the thermostat faceplate and ensure proper alignment․

Turn the power back on and test the thermostat functionality․

Follow the on-screen prompts to configure basic settings․

Program schedules and preferences as desired․

Verify all systems operate correctly before finalizing the installation․

2․3 Post-Installation Setup and Configuration

After installation‚ set the time and date on the thermostat․

Configure system preferences‚ such as HVAC type and heat/cool stages․

Set temperature range and differential for optimal performance․

Program daily and weekly schedules for energy efficiency․

Enable humidity control if applicable․

Set up automatic or manual changeover for heating and cooling․

Test all functions to ensure proper operation․

Save settings to complete the configuration process․

Programming and Operating the Thermostat

The Honeywell TH8320U1008 offers intuitive touchscreen controls for scheduling and temperature adjustments․ Users can program daily and weekly schedules or manually override settings for flexibility and comfort․

3․1 Understanding the Touchscreen Interface

The Honeywell TH8320U1008 features an 8․8-square-inch blue backlit touchscreen display‚ providing clear visibility in both bright and low-light conditions․ The intuitive menu-driven interface allows users to navigate through settings effortlessly․ The touchscreen responds to taps and swipes‚ enabling quick adjustments to temperature‚ scheduling‚ and system modes․ Key features include one-touch temperature control‚ schedule overrides‚ and access to advanced settings like humidity control and system changeover options․ The interface is designed for user-friendly operation‚ making it easy to customize comfort settings and optimize energy efficiency․

3․2 Setting Up Daily and Weekly Schedules

The Honeywell TH8320U1008 allows users to create customized daily and weekly schedules for precise temperature control․ Using the touchscreen interface‚ you can set temperature points for different times of the day and week․ The menu-driven system simplifies programming‚ enabling you to adjust settings with ease․ Features like one-touch overrides and manual adjustments provide flexibility․ By programming schedules‚ you can optimize energy use and ensure comfort․ The thermostat also adapts to your routine‚ offering energy-saving options and seamless integration with your lifestyle․ This feature balances convenience and efficiency effectively․

3․3 Manual Temperature Override and Hold Function

The Honeywell TH8320U1008 offers a manual temperature override feature‚ allowing users to temporarily adjust settings without altering the programmed schedule․ By pressing and holding the touchscreen‚ you can set a specific temperature‚ which remains until the next scheduled change․ The HOLD function enables permanent temperature control‚ overriding all programmed settings․ This feature is ideal for maintaining a consistent temperature or addressing unexpected comfort needs․ It provides flexibility while ensuring energy efficiency and convenience‚ making it a practical solution for various scenarios․ The thermostat ensures seamless operation with these intuitive controls․

Advanced Features and Settings

The Honeywell TH8320U1008 offers advanced features like humidity control‚ automatic/manual changeover‚ and energy-saving modes․ These settings enhance comfort and efficiency‚ tailoring the system to specific needs․

4․1 Humidity Control and Sensor Options

The Honeywell TH8320U1008 supports humidity control‚ integrating seamlessly with compatible sensors․ This feature allows users to monitor and adjust humidity levels‚ ensuring optimal indoor air quality․ The thermostat can be configured to work with external humidity sensors‚ enabling automatic adjustments to maintain a comfortable environment․ By managing both temperature and humidity‚ it enhances overall home comfort and prevents issues like mold growth or dry air․ This dual control capability makes the thermostat versatile for various climates and home setups․ Additionally‚ the system provides alerts for extreme humidity levels‚ ensuring proactive management of indoor conditions․

4․2 Automatic vs․ Manual Changeover for Heating and Cooling

The Honeywell TH8320U1008 offers both automatic and manual changeover options for heating and cooling systems․ Automatic changeover switches between heating and cooling modes based on the programmed schedule‚ ensuring seamless transitions․ Manual changeover allows users to override the system‚ providing direct control over the mode․ This flexibility is ideal for adjusting to unexpected temperature changes or specific comfort needs․ The thermostat supports systems with up to 3 heating and 2 cooling stages‚ making it adaptable to various home configurations․ This feature ensures efficient operation and customizable comfort year-round․

4․3 Energy-Saving Modes and Programming Strategies

The Honeywell TH8320U1008 features energy-saving modes that optimize heating and cooling usage․ Programmable schedules allow users to set temperature adjustments for specific times‚ reducing energy waste․ Strategies include lowering temperatures during off-peak hours and raising them when the home is unoccupied․ The thermostat also supports manual overrides‚ enabling temporary adjustments without altering the programmed schedule․ These features help minimize energy consumption while maintaining comfort․ By strategically programming the thermostat‚ users can achieve significant energy savings and lower utility bills․ This makes it an ideal choice for budget-conscious homeowners seeking efficient climate control․

Troubleshooting Common Issues

Common issues with the Honeywell TH8320U1008 include display malfunctions and system errors․ Error codes provide clues for resolving problems like faulty sensors or wiring issues․

Check power connections and ensure proper installation․ Resetting the thermostat or updating firmware can often resolve software-related glitches․ Refer to the manual for detailed solutions․ Always follow safety guidelines when troubleshooting electrical components․ If issues persist‚ contact a certified technician for professional assistance․ Regular maintenance and updates help prevent recurring problems․ Addressing issues promptly ensures optimal performance and energy efficiency․

5․1 Diagnosing Display and Touchscreen Problems

Display and touchscreen issues with the Honeywell TH8320U1008 can often be resolved by checking error codes and ensuring proper power connections․ A blank or unresponsive screen may indicate a firmware glitch or loose wiring․ Restarting the thermostat by removing batteries or resetting it can resolve temporary malfunctions․ Clean the touchscreen gently with a soft cloth to remove dirt or smudges that might affect responsiveness․ If problems persist‚ verify that the firmware is up-to-date and consult the manual for troubleshooting steps․ Contact a professional if issues remain unresolved․

5․2 Resolving Heating and Cooling System Malfunctions

Malfunctions in heating and cooling systems can often be traced to issues like faulty wiring or incorrect thermostat settings․ Ensure the system switch is set to “Heat‚” “Cool‚” or “Auto” as needed․ Check filters for cleanliness and replace them if clogged․ Verify that the thermostat is properly configured for your system type․ If error codes appear‚ consult the manual for specific solutions․ Cycling issues may require adjusting the temperature differential settings․ If problems persist‚ consult a licensed HVAC technician to diagnose and repair deeper system issues․

5․3 Error Codes and Their Solutions

The Honeywell TH8320U1008 thermostat displays error codes to indicate specific issues․ For example‚ “E1” typically signifies a temperature difference exceeding 3°F‚ while “E2” may indicate a system mismatch․ “E3” could point to a sensor issue‚ and “E4” might signal a communication problem between components․ Refer to the user manual for a comprehensive list of error codes and their corresponding solutions․ Addressing these codes promptly ensures optimal system performance and prevents further malfunctions․

Maintenance and Care

Regularly clean the touchscreen and sensors to ensure accuracy․ Update firmware for optimal performance and security․ Properly recycle old units to minimize environmental impact․

6․1 Cleaning the Thermostat and Touchscreen

Regular cleaning ensures optimal performance and longevity․ Power off the thermostat before cleaning․ Use a soft‚ dry cloth to wipe the touchscreen and exterior․ For stubborn marks‚ dampen the cloth with water‚ but avoid harsh chemicals or excessive moisture․ Gently clean the screen in circular motions‚ focusing on high-touch areas․ Allow the device to air dry completely before turning it back on․ Avoid touching the screen excessively to prevent fingerprints․ Regular maintenance helps maintain accuracy and responsiveness of the thermostat’s controls and display․

6․2 Updating Firmware and Software

Keeping your Honeywell TH8320U1008 thermostat updated ensures optimal performance․ Check for firmware updates via the menu or download from Honeywell’s official website․ Use a USB connection for updates‚ following on-screen instructions carefully․ Ensure compatibility before installing new software․ Backup settings beforehand to avoid data loss․ Updates often improve functionality‚ security‚ and energy efficiency․ Regularly checking for updates helps maintain your thermostat’s performance and integrates new features seamlessly․ Always follow manufacturer guidelines to avoid issues during the update process․

6․3 Proper Disposal and Recycling Instructions

Contact your local waste management authority for recycling and disposal guidelines․ Remove the wallplate by grasping the top and bottom‚ then pulling to detach it․ Properly recycle the thermostat and its components to minimize environmental impact․ Do not dispose of the device in regular trash to prevent hazardous material contamination․ Eco-friendly disposal ensures responsible management of electronic waste․ Follow local regulations for safe and sustainable disposal of the Honeywell TH8320U1008 thermostat and its accessories․

PDF

the servant song lyrics pdf

The Servant Song, written by Richard Gillard, is a beloved Christian hymn emphasizing servitude and love. This PDF provides easy access to its lyrics, perfect for worship and reflection.

1.1 Overview of the Song’s Significance

The Servant Song, written by Richard Gillard in 1977, holds deep spiritual significance as it embodies the essence of Christian servitude and love. Inspired by Jesus’s teachings on leadership through service, the song has become a cornerstone in worship, fostering a sense of community and mutual support. Its enduring message transcends time, resonating with believers across generations and diverse worship styles, making it a timeless hymn that continues to inspire and guide followers in living out their faith through service and compassion.

1.2 Purpose of Providing Lyrics in PDF Format

Providing The Servant Song lyrics in PDF format ensures accessibility and convenience for worshippers, educators, and musicians. The PDF allows for easy downloading, printing, and sharing, making it ideal for use in worship services, religious education, and personal reflection. This format preserves the song’s integrity, ensuring the lyrics are presented clearly and professionally. It also enables seamless incorporation into church hymnals and study materials, fostering a deeper connection with the song’s message of servitude and love in various spiritual contexts.

Background of “The Servant Song”

The Servant Song, written by Richard Gillard in 1977, is inspired by Jesus’s teachings on servant leadership. Its message of mutual service and Christian values resonates deeply in worship settings.

2.1 History and Inspiration Behind the Song

The Servant Song was written by Richard Gillard in 1977, inspired by Jesus’s teachings on humility and service. The song reflects Gillard’s deep faith and his vision of a community united in love and mutual support. Drawing from biblical principles, particularly Matthew 20:26-28, it emphasizes servant leadership and the importance of serving others. The song’s creation was a response to the need for a hymn that would foster unity and encourage believers to live out their faith through service. Its timeless message has made it a beloved hymn worldwide.

2.2 Biographical Sketch of Richard Gillard

Richard Gillard, born in 1953 in the United Kingdom, is a British-New Zealand Christian songwriter and worship leader. He is best known for writing The Servant Song, a hymn that has become a staple in Christian worship worldwide. Gillard’s music career began in the 1970s, and his compositions often reflect his deep faith and commitment to servant leadership. Despite his prominence in Christian music, Gillard has maintained a humble and low-profile life, allowing his work to speak for itself. His contributions continue to inspire believers globally.

Lyrics and Their Biblical Foundations

The Servant Song lyrics deeply reflect biblical teachings on servitude and love, drawing inspiration from Jesus’s call to serve others, as seen in Matthew 20:26-28.

3.1 Key Verses and Their Scriptural References

The Servant Song draws its inspiration from biblical teachings on servitude. The line “Will you let me be your servant, let me be as Christ to you” reflects Jesus’s call to humility in Matthew 20:26-28. Another key verse, “We are pilgrims on a journey, we are travelers on the road”, echoes the biblical theme of life as a spiritual journey, as seen in Acts 2:42-47. The song’s emphasis on bearing one another’s burdens aligns with Galatians 6:2, highlighting mutual service as a Christian duty.

3.2 Themes of Servitude and Love in the Lyrics

The Servant Song beautifully explores themes of servitude and love, reflecting Jesus’s teachings on humility and selfless service. The lyrics emphasize mutual support and compassion, encouraging believers to serve one another as Christ served. Lines like “I will hold the Christlight for you in the shadow of your fear” highlight the transformative power of love and sacrifice. The song’s message of servant leadership and communal care resonates deeply, inspiring unity and devotion among worshippers.

Theological Themes in the Song

The Servant Song explores profound theological themes, emphasizing servant leadership, humility, and selfless love, reflecting Jesus’s example of surrender and devotion to humanity.

4.1 The Concept of Servant Leadership

The Servant Song profoundly illustrates servant leadership, a concept rooted in Jesus’s teachings. The lyrics echo Matthew 20:26-28, where Jesus emphasizes that true greatness lies in serving others. Lines like “Let me be as Christ to you” reflect the sacrificial love and humility central to servant leadership. The song’s message aligns with biblical principles, encouraging believers to embrace a life of selflessness and mutual service. This theological theme underscores the reciprocity of serving and being served, fostering a deeper understanding of Christ-like leadership in Christian communities. It resonates universally, inspiring followers to embody this transformative model of leadership.

4.2 Mutual Service as a Core Christian Value

The Servant Song highlights mutual service as a foundational Christian value. The lyrics emphasize a reciprocal relationship, with lines like “pray that I may have the grace to let you be my servant too.” This reflects a community where service is not one-sided but shared among believers. The song underscores the biblical mandate to bear one another’s burdens (Galatians 6:2), fostering unity and love. By celebrating mutual service, the song reinforces the idea that Christian living is about both giving and receiving, creating a harmonious and supportive community rooted in Christ’s example. This theme resonates deeply, inspiring believers to embrace a life of shared service and compassion.

Musical Composition and Structure

  • The song features a simple, memorable melody with harmonious chord progressions.
  • Its structure includes verses and a chorus, with a hymn-like rhythm and rhyme scheme.
  • The composition creates a reflective yet uplifting atmosphere, enhancing its lyrical message.

5.1 Melody and Chord Progressions

The melody of The Servant Song is simple yet profound, written in the key of E with a moderate tempo, making it accessible for congregational singing. The chord progressions, often featuring I-IV-V patterns, create a harmonious flow that complements the song’s reflective nature. The melody’s rise and fall mirror the emotional depth of the lyrics, fostering a sense of intimacy and connection. This structure supports the hymn-like quality, ensuring the song remains both memorable and singable for worshipers across diverse settings.

5.2 Hymn Structure and Verse Analysis

The Servant Song follows a traditional hymn structure with verses and a repeated chorus, creating a sense of unity and reinforcement of its themes. Each verse builds on the idea of servitude, with the first verse posing a question of service, while subsequent verses expand on the journey of faith and mutual support. The chorus serves as a heartfelt affirmation, emphasizing the reciprocal nature of service. The structure ensures the song’s message resonates deeply, making it a powerful tool for communal worship and personal reflection.

Popular Usage and Cultural Impact

The Servant Song is widely used in worship services globally, inspiring congregations with its message of servitude and love, and has become a cornerstone in Christian music culture.

6.1 The Song’s Role in Worship Services

The Servant Song is frequently incorporated into worship services worldwide, serving as a powerful expression of Christian devotion. Its lyrical emphasis on servitude, love, and mutual support resonates deeply with congregations. The song’s simple yet profound structure makes it accessible for communal singing, fostering a sense of unity and spiritual reflection. Many churches include it in their hymnals, and its adaptability to various musical styles has made it a staple in both traditional and contemporary worship settings, enriching the liturgical experience for diverse faith communities.

6.2 influence on Contemporary Christian Music

6.2 Influence on Contemporary Christian Music

The Servant Song has significantly influenced contemporary Christian music, inspiring many artists and worship leaders. Its heartfelt lyrics and timeless message of servitude have made it a model for modern hymn-writing. The song’s themes of love and mutual service continue to resonate, encouraging a deeper commitment to faith. Its adaptability to various musical styles has also made it a popular choice for worship bands, ensuring its enduring relevance in the evolving landscape of Christian music and devotion.

Availability of “The Servant Song” in PDF

The Servant Song lyrics are widely available in PDF format, accessible through various online platforms like GitHub and worship resource websites, ensuring easy download for personal or communal use.

7.1 Sources for Downloading the PDF

The Servant Song lyrics in PDF format can be downloaded from various online platforms, including GitHub and worship resource websites. Many churches and ministries offer free access to the document, ensuring its availability for congregational use. Additionally, hymnal archives and Christian music repositories provide downloadable versions, often in multiple formats such as PDF and text files. Some sources may require registration or subscription, while others offer direct links for immediate access to the lyrics and sheet music.

7.2 Legal and Copyright Considerations

The Servant Song, published in 1977, is managed by Integrity’s Hosanna Music, necessitating proper licensing for use. Churches must obtain licenses for worship services and distributions. Personal use may also require permissions, ensuring copyright compliance and fair compensation to Richard Gillard and publishers. Additionally, the song’s inclusion in hymnals like Glory to God highlights the importance of respecting copyright laws. Always check with licensing organizations to ensure legal and ethical use of the hymn in various settings.

Educational and Liturgical Applications

The Servant Song is widely used in religious education to teach Christian values of servitude and love. Its inclusion in church hymnals enhances liturgical worship, fostering community and reflection.

8.1 Use in Religious Education

The Servant Song is widely utilized in religious education to teach themes of servitude and love. Its lyrics, emphasizing mutual service, align with Christian values. The PDF format allows educators to easily distribute the song for classroom use, facilitating discussions on biblical teachings. The song’s message of servant leadership, inspired by Jesus’s teachings, helps students grasp the importance of serving others. Its repetitive structure aids in memorization, making it a valuable resource for youth groups and Bible studies, fostering spiritual growth and community service.

8.2 Incorporation into Church Hymnals

The Servant Song is frequently included in church hymnals due to its timeless message of servitude and love. Its simple, repetitive structure makes it accessible for congregational singing. The song’s themes of mutual service and humility resonate deeply, aligning with core Christian values. Many hymnals, such as Glory to God, feature the song, ensuring its widespread use in worship. The PDF format of the lyrics further facilitates its inclusion in church materials, making it a staple for congregations worldwide seeking to emphasize servant leadership in their worship services.

The Song’s Enduring Relevance

The Servant Song remains timeless due to its universal themes of love and servitude. Its message transcends generations, adapting to diverse worship styles and cultural settings effortlessly.

9.1 Timeless Message of Servitude

The Servant Song conveys a timeless message of servitude and humility, reflecting Jesus’ teachings on leadership through selfless love. Its lyrics, inspired by biblical principles, emphasize mutual service and compassion, resonating across generations. The song’s enduring appeal lies in its universal call to embrace humility and support one another, making it a cherished hymn in worship services worldwide. Its adaptability to various musical styles ensures its relevance in modern and traditional settings alike, fostering a spirit of unity and devotion.

9.2 Adaptability Across Different Worship Styles

The Servant Song seamlessly integrates into diverse worship settings, from contemporary to traditional. Its simple, heartfelt melody and chord progressions allow for varied arrangements, making it suitable for both intimate gatherings and large congregations. The song’s flexibility in style ensures its relevance across cultures and musical preferences, enabling it to resonate with a broad audience. This adaptability has cemented its place in worship repertoires worldwide, maintaining its enduring appeal and spiritual impact.

Canada

costco chicken broccoli cooking instructions

Cooking Costco chicken broccoli is a delicious and healthy meal option, offering versatile methods like oven, stovetop, or microwave. This dish combines tender chicken with steamed broccoli, providing a balanced and flavorful experience perfect for any meal prep or family dinner.

1.1 Overview of the Dish

Costco chicken broccoli is a hearty, flavorful dish combining tender chicken, fresh broccoli, and a creamy sauce, often served as a casserole. It’s a quick, nutritious meal perfect for busy households, offering a balance of protein, vegetables, and carbohydrates. This versatile recipe is ideal for meal prep and can be adapted to suit various dietary preferences, including keto-friendly options.

1.2 Importance of Proper Cooking Techniques

Proper cooking techniques ensure the chicken and broccoli are cooked evenly, preventing undercooking or overcooking. Following guidelines like internal temperature checks and recommended cooking times guarantees food safety and optimal flavor. This attention to detail ensures a tender, juicy chicken and crisp broccoli, enhancing the overall dining experience while maintaining nutritional value and texture balance.

Ingredients and Supplies Needed

The dish requires pre-cooked chicken, broccoli, cheese sauce, and seasonings. Essential supplies include a baking dish, utensils, and aluminum foil for even cooking and presentation.

2.1 List of Required Ingredients

  • 1-2 cups broccoli florets
  • 1-2 pre-cooked chicken breasts, diced
  • 1 cup cheese sauce (included in Costco kit)
  • 2-3 tbsp olive oil
  • Salt and pepper to taste
  • Optional: garlic powder, onion powder, or paprika

These ingredients ensure a flavorful and balanced meal.

2.2 Essential Cooking Utensils and Tools

To prepare Costco chicken broccoli, you’ll need:

  • A large baking dish for oven cooking
  • A skillet for stovetop preparation
  • A microwave-safe dish for quick reheating
  • An air fryer for crispy results
  • A cutting board and knife for prep work
  • A spatula for even cooking

These tools ensure efficient and even cooking.

Cooking Methods for Costco Chicken Broccoli

Cooking Costco chicken broccoli can be done using various methods, including oven baking, stovetop cooking, microwave heating, or air frying, each offering a convenient and flavorful result.

3.1 Oven Cooking Instructions

Preheat your oven to 400°F (200°C). Remove the plastic lid and cover the dish with aluminum foil. Place on a baking sheet and bake for 50-60 minutes, or until the internal temperature reaches 165°F. This method ensures even cooking and tender results, perfect for a hassle-free meal.

3.2 Stovetop Cooking Method

Heat a large skillet over medium heat and add a drizzle of olive oil. Carefully place the chicken and broccoli mixture into the pan. Cook for 8-10 minutes on each side, or until the chicken reaches an internal temperature of 165°F. Cover the pan during cooking to ensure even heating and tender results.

3.3 Microwave Cooking Guidelines

Place the Costco Chicken Broccoli in a microwave-safe dish, adding a splash of water or broth to maintain moisture. Cover with a lid or microwave-safe plastic wrap. Cook on high for 3-4 minutes, checking until the chicken is cooked through and broccoli is tender. Adjust cooking time in short intervals to avoid overcooking. Use a food thermometer to ensure the chicken reaches 165°F for safety. For even heating, consider using a lower power level, such as 70%, and a round dish to ensure uniform cooking. Be cautious with the cheese sauce, as it may separate when heated. Always check the packaging for specific microwave instructions if available.

3.4 Air Fryer Cooking Instructions

Preheat the air fryer to 390°F (200°C). Place the Costco Chicken Broccoli in a single layer in the air fryer basket, ensuring even distribution. Cook for 12-15 minutes, shaking the basket halfway through for uniform crisping. Check that the chicken reaches 165°F internally for safety. This method delivers a crispy exterior and tender interior without excess oil, perfect for a quick, flavorful meal.

Nutritional Information and Health Benefits

Cooking Costco chicken broccoli provides a balanced meal, rich in protein and fiber. Chicken offers lean protein, while broccoli adds vitamins and antioxidants, supporting a healthy diet and meal prep.

4.1 Nutritional Facts of the Dish

Cooking Costco chicken broccoli offers a nutrient-rich meal with approximately 350 calories per serving. It contains 30g of protein, 10g of fat, and 20g of carbohydrates, making it a balanced option. The dish is also low in saturated fat and high in essential vitamins like vitamin C and calcium, supporting overall health and wellness.

4.2 Health Benefits of Chicken and Broccoli

Chicken and broccoli provide a wealth of health benefits. Chicken is a lean protein source, supporting muscle growth and repair, while broccoli is rich in vitamins C and K, and antioxidants. Together, they help boost immunity, reduce inflammation, and support heart health, making this dish a nutritious and balanced choice for overall wellness.

Meal Prep and Freezing Instructions

Portion the cooked chicken and broccoli into individual containers for easy meal prep. Freeze for up to 3 months and reheat in the microwave or oven for a quick, convenient meal.

5.1 How to Prepare for Meal Prep

For meal prep, thaw the Costco chicken broccoli overnight in the fridge. Divide into portions, storing in airtight containers. Label with dates and refrigerate for up to 3 days or freeze for up to 3 months. Ensure containers are sealed tightly to maintain freshness and prevent freezer burn. Perfect for quick, healthy meals throughout the week.

5.2 Freezing and Reheating Guidelines

Freeze Costco chicken broccoli in airtight containers or freezer bags for up to 3 months. When reheating, thaw overnight in the fridge or reheat directly from frozen. Use the oven at 350°F for 20-25 minutes or the microwave for 3-4 minutes. Ensure an internal temperature of 165°F for food safety. Stovetop reheating is also effective, stirring occasionally until heated through.

Serving Suggestions and Variations

Serve Costco chicken broccoli with garlic bread, rice, or a fresh salad. Enhance flavor by adding shredded cheese or spices for a creative twist. Enjoy!

6.1 Recommended Side Dishes

Pair Costco chicken broccoli with garlic bread, roasted vegetables, or a fresh green salad for a well-rounded meal. Mashed potatoes or rice also complement its savory flavors. Add herbs like parsley or basil for a fresh finish, enhancing both presentation and taste. These sides balance the dish perfectly, making it a satisfying dining experience.

6.2 Creative Variations for the Recipe

Elevate your Costco chicken broccoli by adding garlic butter drizzle or sriracha for a spicy kick. Mix in mozzarella for a creamier texture or feta for tanginess. Try pairing with roasted red peppers or zesty herbs like basil. For extra crunch, top with toasted breadcrumbs or crispy onions. These twists add unique flavors and textures to the classic dish.

Pricing and Value for Money

Costco chicken broccoli meals are affordably priced, typically ranging from $4.99 to $6.99, offering excellent value for a filling and nutritious meal that serves 3-4 people.

7.1 Cost Analysis of the Meal

Cooking Costco chicken broccoli is cost-effective, with meals typically priced between $4.99 and $6.99, providing 3-4 servings. This makes it an affordable option for families or meal prep, offering a balanced and nutritious meal at a lower cost compared to similar products available in the market.

7.2 Comparison with Similar Products

Costco’s chicken broccoli dish stands out for its balanced nutrition and flavor, competing favorably with other pre-packaged meals. While options like chicken alfredo offer richness, this dish excels in healthiness due to broccoli’s vitamins. Priced competitively, it rivals similar products in convenience and taste, making it a top choice for quick, wholesome meals compared to other market offerings.

Common Mistakes to Avoid

Avoid overcooking the chicken, as it can become dry. Also, ensure broccoli isn’t undercooked, as it may lose its texture and nutritional value. Proper timing is key.

8.1 Overcooking the Chicken

Overcooking the chicken can result in dry, tough meat. To prevent this, monitor cooking time closely and ensure the internal temperature reaches 165°F. Avoid leaving it unattended, especially when using the oven or microwave. Proper timing ensures juicy, flavorful chicken that complements the dish perfectly.

8.2 Undercooking the Broccoli

Undercooking the broccoli can leave it crunchy and unpalatable. To avoid this, steam or cook broccoli until tender but not overcooked. Check texture during cooking, and ensure it reaches a vibrant green color. Proper cooking enhances flavor and texture, making the dish more enjoyable. Avoid rushing the process for the best results.

Step-by-Step Cooking Guide

Prep the chicken, steam broccoli until tender, and combine with sauce. Bake in the oven until cooked through, checking internal temperature for safety. Serve hot.

9.1 Preparing the Chicken

Preheat the oven to 400°F (200°C). Thaw the chicken overnight in the fridge. Pat dry with paper towels, season with garlic, paprika, and pepper. Marinate for 30 minutes. Sear in a skillet with olive oil until golden, then bake on a lined sheet for 20-25 minutes until cooked through to 165°F internally. Ensure even cooking for tender results.

9.2 Steaming the Broccoli

Fill a pot with 2-3 inches of water and bring to a boil. Place a steamer basket over the water, add broccoli florets, and cover. Steam for 4-6 minutes until tender but crisp. Remove, drain, and season with salt, pepper, or butter for enhanced flavor. Ensure broccoli retains its vibrant green color for optimal texture and nutrients.

9.3 Combining and Baking

Preheat the oven to 375°F (190°C). Combine the prepared chicken and steamed broccoli in a baking dish. Cover with aluminum foil and bake for 25-30 minutes. Remove foil, top with cheese, and bake for an additional 5 minutes until bubbly. Ensure the internal temperature reaches 165°F for safety; Serve hot for a satisfying, well-balanced meal.

Tips for Achieving the Best Flavor

Enhance flavor by marinating chicken in herbs and spices before cooking. Add garlic, lemon zest, or grated cheese to the broccoli for extra depth and richness.

10.1 Seasoning Techniques

To elevate flavor, pre-season chicken with salt, pepper, and herbs like thyme or rosemary. Add garlic, lemon zest, or grated cheese to broccoli for brightness. Marinate chicken beforehand for deeper flavor, and sprinkle spices during cooking. For extra richness, mix in soy sauce or olive oil. Adjust seasonings to taste for a perfectly personalized touch.

10.2 Enhancing with Additional Ingredients

Add garlic, lemon zest, or grated Parmesan to broccoli for a burst of flavor. Drizzle olive oil or soy sauce during cooking for richness. Incorporate butter, cream, or cheese sauce for a creamy texture. Toss in roasted vegetables or nuts for added crunch. These enhancements create a more satisfying and customizable meal tailored to your taste preferences.

Safety Precautions

Always handle hot dishes with oven mitts and ensure proper thawing to prevent bacterial growth. Avoid cross-contamination by using separate utensils for raw and cooked ingredients.

11.1 Handling Frozen Products

When handling frozen Costco chicken broccoli, always store at 0°F or below to maintain quality. Thaw in the refrigerator or cold water, never at room temperature, to prevent bacterial growth. Use separate utensils for handling frozen and thawed products to avoid cross-contamination. Ensure all packaging is sealed tightly to preserve freshness and flavor.

11.2 Ensuring Proper Internal Temperature

Always check the internal temperature of the chicken to ensure food safety. Use a meat thermometer to confirm the chicken reaches 165°F (74°C). Insert the thermometer into the thickest part of the breast or thigh, avoiding bones or fat. Proper cooking prevents undercooked meat and ensures a safe, evenly cooked meal every time.

Reviews and Ratings

Customers praise Costco chicken broccoli for its convenience and flavor, making it a family favorite. Many appreciate the easy cooking process and satisfying taste it delivers.

12.1 Customer Feedback on Taste

Customers consistently praise the Costco chicken broccoli dish for its delicious flavor profile. The tender chicken and perfectly cooked broccoli, combined with savory seasonings, create a satisfying meal. Many describe it as a family favorite, emphasizing its rich and comforting taste that appeals to both kids and adults alike, making it a crowd-pleaser.

12.2 Satisfaction with Cooking Instructions

Customers generally express satisfaction with the clear and easy-to-follow cooking instructions for Costco chicken broccoli. The step-by-step guidelines ensure a well-cooked meal, with many appreciating the flexibility of multiple cooking methods. The instructions are praised for their simplicity, allowing even less experienced cooks to achieve delicious results with confidence.

Cooking Costco chicken broccoli is a balanced, flavorful option offering versatility in preparation. With multiple cooking methods, it’s perfect for quick dinners or meal prep, ensuring delicious results every time.

13.1 Final Thoughts on the Dish

Cooking Costco chicken broccoli offers a delightful combination of flavors and textures, making it a crowd-pleaser. The dish is versatile, allowing for oven, stovetop, microwave, or air fryer preparation. With its balanced mix of tender chicken and healthy broccoli, it’s an excellent option for quick meals or meal prep. Perfect for satisfying cravings while maintaining a nutritious diet.

13.2 Encouragement to Try the Recipe

Cooking Costco chicken broccoli is a simple yet satisfying experience that offers delicious results. With easy-to-follow instructions and versatile cooking methods, it’s perfect for beginners and busy households. The combination of tender chicken and nutritious broccoli ensures a healthy, flavorful meal. Give it a try and discover why it’s a favorite for many looking for convenience and taste in one dish!

PDF

tarot card meanings pdf

A comprehensive guide to understanding tarot card meanings, this PDF offers detailed insights into Major and Minor Arcana, helping you master interpretations for meaningful readings․

1․1 What is a Tarot Card Meanings PDF?

A Tarot Card Meanings PDF is a digital guide that provides detailed interpretations of all 78 tarot cards, including the Major and Minor Arcana․ It typically includes keywords, upright and reversed meanings, and symbolic insights to help users understand each card’s significance․ This resource is ideal for both beginners and experienced readers, offering a quick reference for mastering tarot interpretations and enhancing readings with deeper understanding and accuracy․ It’s often printable, making it a convenient tool for study and practice․

1․2 Why Use a Tarot Card Meanings Guide?

A Tarot Card Meanings Guide is essential for anyone seeking to deepen their understanding of tarot․ It serves as a quick reference for interpreting cards, offering clarity and consistency in readings․ Whether you’re a beginner or an advanced reader, this guide enhances your ability to connect with the cards’ symbolism and meanings․ It’s a valuable tool for personal growth, self-reflection, and making informed decisions, making tarot more accessible and meaningful for everyone who uses it․

Understanding the Major Arcana

The Major Arcana consists of 22 cards, each carrying profound symbolism and deeper meanings․ These cards guide readers through major life events and transformations, offering timeless wisdom and insight․

2․1 Overview of the Major Arcana

The Major Arcana consists of 22 cards, each representing significant life events and spiritual lessons․ From the Fool’s new beginnings to the World’s fulfillment, these cards symbolize personal growth and transformation․ Each card offers deep symbolism and insight, guiding readers through life’s challenges and triumphs․ Understanding their meanings is crucial for interpreting tarot readings effectively, as they reveal profound truths about our journey and destiny․

2․2 Key Major Arcana Cards and Their Meanings

The Major Arcana includes 22 cards, each with unique symbolism․ Key cards like the Fool signify new beginnings, while the Magician represents manifestation․ The High Priestess embodies intuition, and the Death card symbolizes transformation․ Other pivotal cards include the Tower, representing upheaval, and the World, marking fulfillment․ These cards offer profound insights into life’s transitions, providing guidance on personal growth, challenges, and spiritual evolution․ Their meanings are essential for deeper tarot interpretations․

2․3 The Role of Major Arcana in Readings

The Major Arcana cards play a central role in tarot readings, representing significant life events and spiritual themes․ They often signify major transitions, challenges, and opportunities for growth․ These cards provide deeper insights into a situation, guiding individuals through pivotal moments․ Their presence in a reading highlights key themes, offering a framework for understanding broader life patterns and facilitating meaningful self-reflection․ They are essential for uncovering the deeper context of a question or situation, making them indispensable in tarot interpretations․

Exploring the Minor Arcana

The Minor Arcana consists of 56 cards, divided into four suits: Wands, Cups, Swords, and Pentacles․ Each suit represents a unique aspect of life, offering insights into daily challenges and emotions․

3․1 Structure of the Minor Arcana

The Minor Arcana is structured into four suits: Wands, Cups, Swords, and Pentacles․ Each suit contains 14 cards, including numbered cards (Ace to 10) and four court cards (Page, Knight, Queen, King)․ These suits correspond to different elements and aspects of life, with Wands representing creativity and passion, Cups emotions, Swords thoughts and conflicts, and Pentacles material wealth and practicality․ This organization allows for detailed insights into various areas of life during tarot readings․

3․2 Meanings of the Four Suits (Wands, Cups, Swords, Pentacles)

Wands symbolize creativity, energy, and passion, often representing new opportunities and personal growth․ Cups relate to emotions, relationships, and intuition, reflecting inner feelings and connections․ Swords embody logic, decisions, and challenges, highlighting mental clarity and conflicts․ Pentacles represent material success, stability, and practicality, focusing on finances, work, and tangible achievements․ Each suit provides distinct insights into different aspects of life, enriching tarot interpretations with depth and specificity․

3․3 Court Cards: Kings, Queens, Knights, and Pages

Court cards represent individuals or energies in a reading․ Kings embody authority, leadership, and mastery, while Queens symbolize nurturing, intuition, and emotional depth․ Knights are action-oriented, tied to adventure and change, and Pages represent curiosity, new beginnings, and messages․ Each court card reflects a unique personality or situation, offering insights into relationships, challenges, and personal growth․ Their interpretations vary by suit, adding layers to tarot readings and self-reflection․

Interpreting Tarot Card Combinations

Discover how to decode tarot card combinations, unlocking deeper meanings and connections․ This section reveals techniques to interpret paired cards, enhancing your readings with clarity and insight․

4․1 Techniques for Combining Cards

Mastery of tarot card combinations begins with understanding how cards interact․ Techniques include analyzing relationships between cards, storytelling through spreads, and using intuition to weave meanings․
Contextualizing cards based on their positions in a spread is crucial, as is recognizing patterns or contrasts․
Advanced methods involve synching card elements, like suits or symbols, to uncover deeper connections․
These techniques empower readers to move beyond individual card meanings, crafting a cohesive narrative for insightful readings․

4․2 Examples of Common Tarot Combinations

Common tarot combinations often reveal deeper insights when cards interact․ For example, the “Three-Card Spread” (Past-Present-Future) helps narrate a situation’s timeline․ Another example is the “Relationship Spread,” where cards depict dynamics between individuals․ Combining the Lovers with the Ten of Cups signals harmonious relationships, while the Tower paired with the Five of Swords may indicate conflict․ These combinations provide a framework for interpreting complex scenarios and uncovering hidden meanings․

Downloading and Using Tarot Card Meanings PDF

Downloading a tarot card meanings PDF provides a portable guide for quick reference, enabling easy learning and application of tarot interpretations during readings and personal study․

5․1 Benefits of a Printable Tarot Guide

A printable tarot guide offers convenience and portability, allowing you to study card meanings anywhere․ It provides quick reference during readings, ensuring easy access to interpretations․ Printable formats enable customization, such as highlighting or annotating key points․ This tool is ideal for learners and professionals alike, facilitating deeper understanding and application of tarot symbolism․ Having a physical copy enhances focus and serves as a lasting resource for personal or client readings․

5․2 How to Effectively Use a Tarot Meanings PDF

To effectively use a tarot meanings PDF, start by referencing it during readings to interpret card symbolism and meanings․ Use it to decode combinations of cards, enhancing your understanding of their interactions․ Print the guide for easy access or digital access on your device․ Customize it by highlighting key points or adding personal notes․ Regularly review the PDF to deepen your knowledge and improve your tarot reading skills over time․

Advanced Tarot Reading Techniques

Explore advanced methods like reversed card interpretations and card combinations to deepen your readings․ These techniques enhance understanding and provide clarity in complex situations, improving accuracy․

6․1 Understanding Reversed Tarot Cards

Reversed tarot cards offer deeper insights by indicating blocked energies, delays, or opposing forces․ They can signify challenges, unconscious patterns, or the need for reflection․ For example, the Death card reversed may suggest resistance to change, while the Tower reversed could indicate hidden truths․ By interpreting reversals, readers gain a more nuanced understanding of the situation, helping to address underlying issues and provide balanced guidance during readings․

6․2 Using Tarot for Yes/No Questions

Tarot can be an effective tool for answering yes/no questions by interpreting upright and reversed cards․ Upright cards often signify “yes,” while reversed cards may indicate “no” or a need for further reflection․ Some readers use specific spreads, like drawing a single card or pairing cards, to gain clarity․ For instance, the Star upright suggests a positive outcome, while the Tower reversed might signal caution or delays․ This method simplifies decision-making and provides clear, actionable insights․

The History and Evolution of Tarot

Originating as a 18th-century game, tarot evolved into a divination tool through occultist interpretations in France and England, spreading globally and becoming a popular spiritual practice today․

7․1 Origins of Tarot Cards

Tarot cards first emerged in 15th-century Europe as a game called tarocchi, with no initial connection to divination․ Over time, occultists in France and England discovered symbolic meanings in the cards, transforming them into tools for spiritual insight and fortune-telling․ This shift marked the beginning of tarot’s evolution from entertainment to a deeply mystical practice, spreading globally and becoming a cornerstone of modern spirituality․

7․2 How Tarot Evolved into a Divination Tool

Tarot’s transformation into a divination tool began in 18th-century France, where occultists linked its imagery to ancient wisdom and symbolism․ Arthur Edward Waite and Pamela Colman Smith later created the iconic Rider-Waite deck, enhancing its mystical appeal․ Tarot’s popularity soared in the 20th century, becoming a global phenomenon used for self-reflection, guidance, and spiritual exploration, solidifying its place as a powerful tool for personal and mystical insights․

Personalizing Tarot Meanings

Personalizing tarot meanings involves creating individual connections to each card, using intuition, journaling, and reflective practices to deepen understanding and interpretation for meaningful, tailored readings․

8․1 Creating Personal Keywords for Each Card

Assigning personal keywords to each tarot card enhances interpretation by linking symbols to individual experiences․ This method allows readers to connect deeply with card meanings, fostering intuition and personalized insights․ Keywords can reflect emotions, memories, or themes, making readings more relatable and impactful․ Over time, these associations become a powerful tool for self-reflection and divination, enriching your tarot practice;

8․2 Journaling and Reflecting on Tarot Meanings

Journaling your tarot interpretations is a powerful way to deepen understanding and track personal growth․ Record each card’s meaning, your initial impressions, and how it relates to your life․ Reflecting on past entries reveals patterns and insights, enhancing intuition․ This practice encourages self-reflection, helping you connect with the cards on a deeper level and fostering a more meaningful tarot journey over time․

Empowering your tarot journey, this PDF guide enhances intuition and provides a tool for self-discovery․ It offers a comprehensive understanding of tarot symbolism, aiding in meaningful readings and personal growth․

9․1 Final Thoughts on Tarot Card Meanings PDF

Empower your tarot journey with this comprehensive guide․ It simplifies mastering the craft, offering keyword summaries and practical advice for readings․ Perfect for all levels, it enhances intuition, aiding in personal growth and self-discovery․ This versatile tool bridges traditional tarot symbolism with modern, personal insights, making it indispensable for anyone seeking deeper understanding and connection with the cards․

Guide

soul hackers 2 trophy guide

Welcome to the Soul Hackers 2 Trophy Guide! This comprehensive guide covers all 47 trophies, from Bronze to Platinum, helping you unlock them efficiently with expert strategies and tips.

1.1 Overview of Soul Hackers 2 and Its Trophy System

Soul Hackers 2 is a cyberpunk JRPG developed by Atlus, part of the Megami Tensei series. Released for PS4, PS5, Xbox One, Xbox Series X/S, and PC, it offers a deep story, turn-based combat, and demon recruitment mechanics. The trophy system includes 47 achievements: 34 Bronze, 9 Silver, 3 Gold, and 1 Platinum. These range from completing story milestones to mastering specific gameplay elements, rewarding both casual players and completionists. The system encourages exploration, strategic thinking, and mastery of the game’s mechanics.

1.2 Importance of Trophies in Soul Hackers 2

Trophies in Soul Hackers 2 are more than just achievements; they enhance the gaming experience by rewarding dedication and exploration. They encourage players to fully engage with the game’s story, combat, and mechanics, offering a sense of accomplishment. Trophies also provide additional challenges, pushing players to master the game. For completionists, they add significant replay value, while for casual players, they serve as milestones celebrating progress. Unlocking trophies reflects mastery of the game’s world, making them a key part of the JRPG experience.

Trophy Distribution in Soul Hackers 2

Soul Hackers 2 features 47 trophies, including 34 Bronze, 9 Silver, 3 Gold, and 1 Platinum. The distribution reflects a balanced challenge, with achievements ranging from easy to complex tasks.

2.1 Total Number of Trophies (47)

Soul Hackers 2 offers a total of 47 trophies, providing players with a variety of challenges to complete. These include 34 Bronze trophies, which are relatively straightforward, 9 Silver trophies that require moderate effort, 3 challenging Gold trophies, and 1 prestigious Platinum trophy for completing the entire list. The trophies cover aspects like combat, exploration, and story progression, ensuring a well-rounded experience for players aiming to fully master the game.

2.2 Breakdown of Trophy Tiers: Bronze, Silver, Gold, and Platinum

Soul Hackers 2 features a balanced trophy system with 34 Bronze trophies for common achievements, 9 Silver trophies for moderate challenges, 3 Gold trophies for difficult tasks, and 1 Platinum trophy for completing the entire list. This tiered structure ensures players are rewarded for both simple and complex accomplishments, making the journey to 100% completion engaging and satisfying. The distribution encourages exploration, combat mastery, and story progression, offering a well-rounded experience for trophy hunters.

Secret Trophies in Soul Hackers 2

Soul Hackers 2 contains 15 secret trophies, hidden from view until unlocked. These trophies are tied to specific story events, rare actions, or unique conditions, adding an extra layer of challenge and discovery for dedicated players.

3.1 List of Secret Trophies and How to Unlock Them

Soul Hackers 2 features 15 secret trophies, each tied to specific actions or story events. Examples include completing certain requests, achieving hidden milestones, or unlocking rare content. For instance, the “Harvest Festival” trophy is awarded for completing a specific request chain, while others may involve defeating bosses under unique conditions or uncovering hidden story paths. These trophies add depth and challenge, rewarding players for exploration and dedication. Tips include saving frequently, exploring thoroughly, and revisiting key areas to avoid missing these hidden achievements.

Platinum Trophy Guide

To unlock the Platinum Trophy in Soul Hackers 2, you must earn all other 46 trophies. This requires completing the story, achieving 100% compendium, and fulfilling all requests and directives with dedication and efficient gameplay.

4.1 Requirements for Unlocking the Platinum Trophy

To unlock the Platinum Trophy in Soul Hackers 2, you must complete all story-related trophies, achieve 100% compendium completion, and fulfill every request and Aion directive. Playing on Normal difficulty is recommended for a balanced experience. Ensure you manually save often to avoid progress loss. Completing New Game Plus and obtaining the best ending is also necessary. This trophy requires dedication, efficient gameplay, and thorough exploration of the game’s mechanics and content.

4.2 Tips for Achieving the Platinum Trophy Efficiently

To efficiently achieve the Platinum Trophy in Soul Hackers 2, focus on completing all story-related trophies first. Prioritize filling the Demon Compendium to 100% for the Compendium Completionist trophy. Complete at least 85 Requests and Aion Directives, as this is required for the Legendary Summoner trophy. Explore Axis up to 5F thoroughly and utilize New Game Plus to unlock the best ending. Regularly save your progress manually to avoid losing valuable time and ensure all requirements are met in a single playthrough.

Bronze Trophies

Soul Hackers 2 features 34 Bronze trophies, the easiest to unlock. These are awarded for completing basic actions like hacking your first soul or defeating initial enemies.

5.1 Common Bronze Trophies and Their Unlock Conditions

Soul Hackers 2 offers 34 Bronze trophies, many of which are unlocked by completing basic in-game actions. Examples include “Soul Hacked” for hacking your first soul and “Blade Novice” for defeating 10 enemies. These trophies are straightforward, requiring minimal effort. They cover a range of tasks, such as completing early quests, mastering simple combat mechanics, or interacting with key features like demon recruitment. Earning these trophies provides a solid foundation for progressing toward higher-tier achievements.

Silver Trophies

Silver trophies in Soul Hackers 2 represent moderate challenges, such as completing specific requests or achieving milestones. Examples include “Legendary Summoner” for finishing 85 requests and “Compendium Completionist” for filling demon registries.

6.1 Moderate-Difficulty Trophies and Strategies

Silver trophies in Soul Hackers 2 require strategic effort. For “Legendary Summoner,” complete 85 requests by thoroughly exploring Aion Directives and side quests. “Compendium Completionist” demands a 100% filled demon registry, achieved by fusing and recruiting diverse demons. Use Auto-Battle for grinding and save often to avoid progress loss. Focus on building a balanced team and mastering elemental weaknesses to streamline your progress toward these challenging but rewarding trophies.

Gold Trophies

Soul Hackers 2 features 3 challenging Gold Trophies, with “Compendium Completionist” being the most demanding, requiring a 100% filled demon registry. Master fusion and recruitment to succeed.

7.1 Challenging Trophies and How to Achieve Them

The Gold Trophies in Soul Hackers 2 are among the most challenging, requiring dedication and strategic play. The “Compendium Completionist” trophy demands a 100% filled demon registry, necessitating thorough exploration and successful demon recruitment. Another Gold Trophy, “Legendary Summoner,” requires completing 85 Requests and Aion Directives, which involves extensive gameplay and attention to detail. To achieve these, focus on mastering demon fusion, regularly saving progress, and exploring all areas meticulously. Utilize guides to track rare demons and optimize your team for efficiency. Consistency and patience are key to unlocking these prestigious achievements.

Additional Tips for Trophy Hunters

To maximize your trophy progress in Soul Hackers 2, save frequently, utilize NG+ runs for missables, and focus on completing all Requests and Aion Directives thoroughly.

8.1 General Strategies for Maximizing Trophy Progress

To efficiently unlock trophies in Soul Hackers 2, focus on completing all Requests and Aion Directives, as they contribute significantly to trophy progress. Regularly save your game manually, especially before challenging encounters, to avoid losing progress. Utilize the Demon Compendium to track and fuse demons, aiming for 100% completion to earn the Compendium Completionist trophy. Explore every area thoroughly and interact with NPCs to discover hidden quests and secrets. Building a well-rounded team and upgrading weapons will also aid in tackling difficult enemies and achievements.

Earning all 47 trophies in Soul Hackers 2, including the elusive Platinum, is a rewarding journey that tests skill and dedication, offering a true sense of accomplishment.

9.1 Final Thoughts on Completing the Trophy List

Completing the Soul Hackers 2 trophy list is a testament to dedication and skill, offering a deep sense of accomplishment. The journey through 47 trophies, from Bronze to Platinum, challenges players to master the game’s mechanics, explore its world, and uncover its secrets. With careful planning and persistence, earning the Platinum trophy is achievable, leaving a lasting impression of the game’s engaging story and rewarding gameplay. This achievement is a celebration of both the player’s effort and the game’s design.

Final Note

Embark on the journey to unlock all 47 trophies in Soul Hackers 2, with the Platinum trophy as your ultimate goal. Experience a rich, engaging story and rewarding gameplay that makes every achievement worthwhile. Start your adventure today and embrace the challenge!

10.1 Encouragement for Players to Start Their Trophy Journey

Every trophy in Soul Hackers 2 is a step closer to an unforgettable adventure. With 47 trophies to unlock, including a Platinum, the journey is both rewarding and engaging. Start by exploring the game’s rich story and mechanics, and don’t hesitate to dive into challenges. Each achievement, from Bronze to Gold, offers unique insights into the game’s depth. Embrace the thrill of discovery and the satisfaction of completing your collection. Begin your trophy journey today and experience Soul Hackers 2 like never before.

Instructions

mini tacos air fryer instructions

Preheating the Air Fryer

Preheating your air fryer at 400°F (200°C) for 3-5 minutes ensures optimal performance and even heat distribution. This step is crucial for achieving crispy mini tacos.
Allow the air fryer to preheat with an empty basket to maximize air circulation, ensuring your tacos cook evenly from the start.

1.1 Recommended Temperature Settings

For optimal results, preheat your air fryer to 400°F (200°C) before cooking mini tacos. This temperature ensures a crispy exterior and a warm, fully cooked interior.
If using frozen mini tacos, maintain the same temperature for consistent heating. For homemade tacos, slightly lower the temperature to 375°F (190°C) to prevent burning. Always preheat the air fryer for 3-5 minutes before adding the tacos to ensure even heat distribution and the best cooking outcome.

1.2 Importance of Preheating for Even Cooking

Preheating your air fryer ensures even heat distribution, which is vital for cooking mini tacos uniformly. A preheated air fryer helps achieve a crispy exterior and a well-cooked interior. Without preheating, the temperature may fluctuate, leading to undercooked or burnt areas. Preheating also prevents sticking by creating a hot surface for the tacos. This step ensures consistent results, with all tacos ready simultaneously, enhancing both texture and flavor. Proper preheating is key to achieving perfectly cooked mini tacos every time.

Preparing Mini Tacos for Air Frying

Preparing mini tacos involves using frozen ones or homemade shells. Place frozen tacos in a single layer or assemble homemade with fillings. Lightly spray with oil.

2.1 Using Frozen Mini Tacos

For frozen mini tacos, place them in a single layer in the air fryer basket. Cook at 400°F (200°C) for 5-6 minutes, flipping halfway. This ensures even crispiness.
Lightly spray with oil before cooking for an extra crunch. Frozen mini tacos are a convenient option, requiring minimal prep and delivering delicious results quickly.

2.2 Preparing Homemade Mini Taco Shells

To make homemade mini taco shells, cut small corn tortillas into 3-4 inch circles. Preheat the air fryer to 350°F (175°C) and lightly cook the tortillas for 2-3 minutes to soften them.
Remove the tortillas and carefully shape each into a mini taco shell using a mold or by hand. Return the shaped shells to the air fryer basket in a single layer and cook at 375°F (190°C) for 4-5 minutes, until crispy. This ensures a fresh, customizable base for your mini tacos.

Air Fryer Basket Preparation

Line the air fryer basket with parchment paper for easy cleanup and spray with cooking oil to enhance crispiness. This ensures even cooking and prevents sticking.

3.1 Lining the Basket with Parchment Paper

Line the air fryer basket with parchment paper to prevent sticking and simplify cleanup. Cut a sheet to fit snugly, ensuring it doesn’t obstruct air circulation.
This step is especially important when cooking mini tacos, as it helps maintain their shape and prevents delicate shells from breaking.
Parchment paper also promotes even cooking by allowing air to circulate freely around the tacos, enhancing crispiness without direct contact with the basket.

3.2 Spraying with Cooking Oil for Crispiness

Spraying the air fryer basket with a small amount of cooking oil enhances crispiness and prevents sticking.
Lightly coat the basket or parchment paper with oil before adding mini tacos.
This step ensures the tacos develop a golden, crispy exterior while staying tender inside.
Avoid over-spraying, as excess oil can lead to greasiness.
Cooking oil also helps seasonings adhere, amplifying flavor.
For even distribution, use a spray bottle or brush oil lightly across the basket.

Cooking Mini Tacos in the Air Fryer

Place mini tacos in a single layer in the preheated air fryer basket. Cook at 400°F for 5-6 minutes, flipping halfway for even crispiness.
Adjust time based on your air fryer model and desired crispiness. Ensure even cooking by not overcrowding the basket.
This method ensures crispy shells and perfectly cooked fillings.

4.1 Placing Tacos in a Single Layer

Arrange mini tacos in a single layer within the air fryer basket to ensure proper air circulation and even cooking. Overlapping can lead to uneven crispiness and undercooked areas.
If necessary, cook in batches to accommodate all tacos without crowding. This step is crucial for achieving the perfect balance of crunch and flavor.
A well-organized layout ensures each taco is exposed to the hot air, resulting in a crispy exterior and a delicious interior.
This method prevents steaming and promotes browning, enhancing the overall texture.

4.2 Cooking Time and Temperature Variations

Cooking time and temperature may vary depending on your air fryer model and the type of mini tacos. Typically, cook at 400°F (200°C) for 5-6 minutes or until crispy and golden brown.
For frozen mini tacos, 400°F (200°C) for 5-7 minutes is standard. Adjust the temperature slightly if needed, but avoid exceeding 425°F (220°C).
Cooking times may differ based on the air fryer’s power and the tacos’ filling. Always check for crispiness and internal temperature (if applicable) before serving. Flipping halfway can ensure even cooking.
Refer to your air fryer’s guidelines for precise adjustments.

4.3 Flipping Tacos for Even Cooking

Flipping mini tacos halfway through cooking ensures even browning and crispiness. Use tongs to carefully turn each taco, avoiding breakage. This step prevents one side from becoming overly cooked while the other remains soft.
After flipping, continue cooking for an additional 2-3 minutes to crisp the other side. Check for golden brown color and crispy edges before removing from the air fryer. Proper flipping ensures both sides are perfectly cooked and the filling is heated through evenly. This simple step elevates the texture and flavor of your air-fried mini tacos.

Cooling and Serving

Allow mini tacos to cool slightly before serving to maintain crispiness. Serve with salsa, guacamole, or sour cream for added flavor.
Cooling ensures the tacos remain crunchy and enjoyable.

5.1 Allowing Tacos to Cool Slightly

After air frying, allow mini tacos to cool for 1-2 minutes. This prevents the filling from becoming too hot and helps retain crispiness.
Cooling slightly ensures the exterior stays crunchy while the interior remains warm and flavorful.

5.2 Serving Suggestions and Toppings

Enhance your air-fried mini tacos with fresh, flavorful toppings. Classic choices include salsa, guacamole, shredded cheese, and cilantro. For added creaminess, try sour cream or Greek yogurt.
Optional additions like diced tomatoes, shredded lettuce, or diced avocado add texture and freshness. Serve warm and enjoy the combination of crispy shells and vibrant flavors.

Tips for Achieving Crispy Tacos

To achieve crispy mini tacos, preheat the air fryer to 400°F, cook in a single layer, and flip halfway. Adjust settings based on your air fryer model for optimal crispiness. Patience and monitoring ensure perfection.

6.1 Patience and Monitoring During Cooking

Patience is key when air frying mini tacos, as rushing can lead to undercooked or burnt results. Monitor the cooking process closely, especially during the last few minutes, to ensure even crispiness. Depending on your air fryer model, cooking times may vary slightly, so it’s important to check on the tacos periodically. Flipping them halfway through ensures consistent results. Avoid overcrowding the basket, as this can prevent proper air circulation. By staying attentive and adjusting as needed, you’ll achieve perfectly crispy and delicious mini tacos every time. Consistent monitoring ensures the best outcome.

6.2 Adjusting Settings Based on Air Fryer Model

Different air fryer models vary in power and performance, so adjusting settings is essential for perfect mini tacos. Some models may require slightly lower temperatures or shorter cooking times to prevent burning. For example, if your air fryer runs hotter, you might reduce the temperature by 10-20°F. Always check the tacos near the end of the cooking time, as some models cook faster than others. Consulting the user manual for specific guidance can help tailor settings to your device. Adjustments ensure crispy, evenly cooked tacos without overcooking.

Maintaining the Air Fryer After Use

Regularly clean the air fryer basket and pan after use to prevent food residue buildup. Dry thoroughly to avoid moisture damage and ensure optimal performance for future use.

7.1 Cleaning the Basket and Pan

Cleaning the air fryer basket and pan is essential for maintaining hygiene and performance. Wash them with mild soap and warm water using a soft sponge or brush to remove food residue. Avoid abrasive cleaners or scourers, as they may damage the non-stick coating. For tough stains, soak the parts in warm soapy water for 30 minutes before scrubbing gently. Dry thoroughly with a clean towel to prevent rust or water spots. Regular cleaning ensures your air fryer remains in great condition for future use.

7.2 Storing Leftover Tacos

After cooking, allow the mini tacos to cool slightly before storing. Place them in an airtight container or zip-top bag to maintain crispiness and freshness. Store in the refrigerator at 40°F (4°C) or below within two hours of cooking. For reheating, use the air fryer at 350°F (175°C) for 2-3 minutes to restore crispiness. Leftover tacos can be enjoyed for up to 3 days when stored properly. This method ensures your air-fried mini tacos remain flavorful and satisfying even after refrigeration.

PDF

karyotype worksheet answers pdf

Karyotype worksheets are educational tools used to analyze and interpret chromosome structures. They include exercises, answer keys, and visual aids for identifying normal and abnormal karyotypes, aiding genetics students in understanding chromosomal disorders and sex determination through hands-on practice.

Overview of Karyotype Analysis

Karyotype analysis involves examining the structure and number of chromosomes to identify abnormalities. It is a fundamental tool in genetics, helping detect disorders like Down syndrome or Turner syndrome. By arranging chromosomes in homologous pairs, scientists can visualize genetic makeup. This process aids in understanding hereditary conditions, diagnosing chromosomal disorders, and conducting research. Worksheets with answer keys provide guidance, enabling students to master karyotype interpretation, enhancing their understanding of genetic principles and applications in medicine and biology.

Importance of Karyotype Worksheets in Genetics Education

Karyotype worksheets are essential tools in genetics education, providing hands-on practice for students to analyze chromosome structures. They help students identify homologous pairs, determine chromosome number, and recognize abnormalities. These exercises enhance understanding of genetic disorders and their implications. Worksheets with answer keys allow students to assess their work, fostering independent learning and critical thinking. They are invaluable for developing diagnostic skills and reinforcing key genetic concepts, making them a cornerstone of genetics curriculum and practical training.

Understanding Karyotypes

Karyotypes are visual representations of an individual’s chromosomes, arranged by size and structure. They are crucial for identifying genetic abnormalities and understanding chromosomal inheritance patterns.

Structure and Organization of Chromosomes

Chromosomes are organized into pairs, with each consisting of two sister chromatids joined at the centromere. The short arm is labeled “p,” and the long arm “q.” In karyotypes, chromosomes are arranged by size, with homologous pairs placed together. Sex chromosomes (X and Y) are placed at the end. This standardized arrangement allows for easy identification of abnormalities, such as aneuploidy or structural changes, making karyotypes essential tools in genetics education and diagnostic workflows.

Differences Between Male and Female Karyotypes

Male and female karyotypes differ primarily in their sex chromosomes. Females have two X chromosomes, while males have one X and one Y. This distinction is crucial for determining genetic sex. The X chromosome is larger and carries more genes, whereas the Y is smaller and carries genes specific to male development. These differences are key to identifying sex in karyotype analysis and understanding conditions related to sex chromosome abnormalities.

Analyzing Karyotypes

Analyzing karyotypes involves identifying homologous pairs, counting chromosomes, and determining sex by examining sex chromosomes. This systematic approach helps detect abnormalities and understand genetic conditions effectively.

Identifying Homologous Pairs

Homologous pairs are pairs of chromosomes that are similar in shape, size, and genetic content. In karyotype analysis, identifying these pairs is crucial for determining the normality of a karyotype. Each pair consists of one chromosome inherited from each parent. By examining the length, centromere position, and banding patterns, students can match homologous chromosomes. Abnormalities in pairing, such as missing or extra chromosomes, can indicate genetic disorders like monosomy or trisomy, emphasizing the importance of accurate identification.

Determining Chromosome Number and Sex

Determining chromosome number and sex is a fundamental step in karyotype analysis. A normal human karyotype contains 46 chromosomes. To determine sex, examine the last pair: XY indicates male, while XX indicates female. The total chromosome count helps identify abnormalities like aneuploidy. Accurate counting and sex determination are essential for diagnosing genetic disorders, such as Turner syndrome (45,X) or Klinefelter syndrome (47,XXY). Worksheets often include exercises to practice these skills, ensuring precise interpretation of karyotype data.

Normal vs. Abnormal Karyotypes

A normal karyotype has 46 chromosomes with a typical structure, while an abnormal karyotype shows variations like aneuploidy or structural changes, impacting genetic health and disease risk.

Recognizing Normal Karyotype Features

A normal karyotype consists of 46 chromosomes, arranged into 23 homologous pairs. These include 22 pairs of autosomes and one pair of sex chromosomes (XX for females, XY for males). Each chromosome has distinct size, shape, and banding patterns, allowing for precise identification. Homologous pairs are similar in structure, while sex chromosomes differ slightly. Recognizing these features is crucial for genetics education and identifying abnormalities, as deviations indicate potential chromosomal disorders like aneuploidy or structural changes.

Common Abnormalities and Their Implications

Common chromosomal abnormalities include aneuploidy (e.g., trisomy 21 in Down syndrome), monosomy (e.g., Turner syndrome with 45,X), and structural changes like deletions or duplications. These abnormalities can lead to developmental disorders, congenital anomalies, or reduced fertility. Analyzing karyotypes helps identify these conditions, enabling early diagnosis and genetic counseling. Such analysis is vital for understanding the implications of chromosomal variations on human health and reproduction, as seen in exercises within karyotype worksheets.

Sex Chromosomes and Karyotype Analysis

Sets of XY chromosomes determine male sex, while XX chromosomes determine female sex in karyotypes. Analyzing these helps identify genetic conditions like aneuploidy or structural abnormalities.

Role of X and Y Chromosomes

The X and Y chromosomes play a crucial role in determining an organism’s sex and genetic traits. The X chromosome is larger and carries many genes, while the Y chromosome is smaller and primarily responsible for male sexual development. In karyotype analysis, identifying these chromosomes helps determine the sex of an individual and diagnose conditions like Turner syndrome or Klinefelter syndrome, which result from abnormal numbers of sex chromosomes.

Identifying Sex Chromosome Abnormalities

S

Answer Keys and Resources

Karyotype worksheet answer keys provide essential solutions for genetics education. They include exercises, discussions, and abnormality identifications, helping students verify their findings and master chromosomal analysis techniques.

Locating Karyotype Worksheet Answer Sheets

Karyotype worksheet answer sheets are widely available online, often in PDF format. They can be found on educational platforms, scientific websites, and resources like Docsity. Many worksheets, such as “Karyotype Worksheet With Answers” and “Answer Sheet 4. Downs Male Karyotype (Smear 4),” provide detailed solutions for autosomal and sex chromosome analysis. These resources include exercises, discussions, and abnormality identifications, helping students verify their findings. Online tools and platforms like Flinn Scientific also offer updated materials for comprehensive learning.

Using Online Tools for Karyotype Analysis

Online tools and platforms like Docsity and Flinn Scientific offer comprehensive resources for karyotype analysis. These tools provide interactive activities, PDF guides, and detailed answer keys. Students can practice identifying homologous pairs, determining chromosome numbers, and detecting abnormalities. Additionally, online workshops and tutorials guide learners through complex analyses, making karyotyping more accessible and engaging. These resources are invaluable for both classroom use and self-study, enhancing understanding of chromosomal structures and genetic disorders.

Practicing with Karyotype Worksheets

Practicing with karyotype worksheets enhances skills in identifying homologous pairs, determining chromosome numbers, and detecting abnormalities, aiding in understanding genetic disorders through interactive exercises.

Exercises for Autosomal and Sex Chromosomes

Exercises focus on analyzing autosomal and sex chromosomes to identify homologous pairs, numerical changes, and structural abnormalities. Students match karyotypes with genetic disorders, such as Down syndrome or Turner syndrome, to understand their implications. Answer keys provide feedback, ensuring accuracy. These exercises also cover sex chromosome anomalies, like XXX or XXY, to highlight their effects on phenotypes. Practical activities include labeling chromosomes, counting pairs, and interpreting abnormal patterns, reinforcing understanding of genetic principles and chromosomal variations. Online tools and PDF resources support these exercises for comprehensive learning.

Case Studies for Chromosomal Disorders

Case studies provide real-world applications of karyotype analysis, focusing on disorders like Down syndrome, Turner syndrome, and Klinefelter syndrome. Students analyze karyotypes to identify abnormalities, such as trisomy or monosomy, and discuss their clinical implications. These exercises bridge theory with practical observation, helping learners understand genetic conditions. Answer keys and supplementary resources guide students in interpreting complex chromosomal patterns and connecting them to human health outcomes, enhancing their ability to diagnose and comprehend genetic disorders effectively.

Mastery of karyotype analysis is essential for understanding genetic disorders. Worksheets and answer keys provide practical skills in identifying normal and abnormal chromosomal patterns, aiding future genetic research and healthcare applications.

Karyotype worksheets are fundamental tools for genetics education, enabling students to analyze and interpret chromosome structures. They help identify homologous pairs, determine chromosome number, and distinguish between male and female karyotypes. These resources also highlight normal and abnormal chromosomal features, such as aneuploidy or structural anomalies. By practicing with these worksheets, learners gain essential skills in recognizing genetic disorders and understanding the role of sex chromosomes in determining sex and potential abnormalities. This hands-on approach enhances comprehension of chromosomal inheritance and its implications in health and disease.

Final Tips for Mastering Karyotype Analysis

To excel in karyotype analysis, practice regularly with worksheets and answer keys to refine your skills. Pay attention to homologous pairs, chromosome numbers, and sex determination. Use online tools for interactive learning and to verify your results. Review mistakes to understand common errors. Apply your knowledge to real-world case studies to deepen your understanding of chromosomal disorders. Consistent practice and thorough review will enhance your ability to interpret karyotypes accurately and confidently.

Manuals

honeywell t4 pro installation manual

Welcome to the Honeywell T4 Pro Installation Manual! This guide provides step-by-step instructions for installing, configuring, and maintaining your programmable thermostat. Designed for efficiency and ease of use, the T4 Pro helps you regulate your home’s temperature with precision. Follow this manual carefully to ensure proper setup and optimal performance.

1.1 Overview of the Honeywell T4 Pro Thermostat

The Honeywell T4 Pro Thermostat is a programmable device designed for efficiency and ease of use. Part of Honeywell’s Pro Series, it offers advanced features for smart home integration and precise temperature control. With models like the TH4110U2005 and TH4210U2002, it supports various HVAC systems, ensuring compatibility and optimal performance. This thermostat is ideal for homeowners seeking a reliable, user-friendly solution to manage heating and cooling systems effectively.

1.2 Importance of Proper Installation

Proper installation of the Honeywell T4 Pro Thermostat is crucial for ensuring optimal performance and safety. Incorrect wiring or setup can lead to system malfunctions, reduced efficiency, and potential safety hazards. Following the installation manual closely guarantees correct connections, avoids damage to the device, and ensures compliance with electrical standards. A well-executed installation also maximizes the thermostat’s features and extends its lifespan, providing reliable temperature control for years to come.

System Requirements and Compatibility

The Honeywell T4 Pro Thermostat is compatible with most standard HVAC systems, including gas furnaces, heat pumps, and dual-fuel systems. It requires a 24V AC power supply and works with systems like TH4110U2005 and TH4210U2002. Compatibility varies, so ensure your system meets the specified requirements before installation.

2.1 Compatible HVAC Systems

The Honeywell T4 Pro Thermostat is compatible with most standard HVAC systems, including gas furnaces, heat pumps, and dual-fuel systems. It supports systems like TH4110U2005 and TH4210U2002, ensuring versatile installation options. The thermostat works seamlessly with single-stage and multi-stage heating and cooling systems, making it a flexible choice for various home setups. Always verify compatibility with your specific HVAC system before proceeding with installation.

2.2 Electrical Requirements

The Honeywell T4 Pro Thermostat requires a 24V AC power supply. Ensure the power switch for your HVAC system is turned off at the breaker before installation. The red wire connects to RH or RC terminals, with a jumper if necessary. Use fresh AA alkaline batteries for the thermostat if required. Verify all wiring connections are secure and meet local electrical codes to ensure safe and proper operation.

Pre-Installation Preparation

Before installing, ensure the power to your HVAC system is turned off. Gather all necessary tools and materials, and review safety precautions. Verify system compatibility and electrical requirements to ensure a smooth installation process.

3.1 Tools and Materials Needed

To ensure a successful installation, gather the following tools and materials: screwdrivers (Phillips and flathead), pliers, wire strippers, drill bits, a level, voltage tester, marker, mounting screws, wall anchors, and the base plate. Additionally, have the Honeywell T4 Pro thermostat unit, AA batteries, and the user manual ready. These items will help you complete the installation efficiently and safely.

(Note: This response is generated for illustration purposes only and is not an actual excerpt from the manual.)

3.2 Safety Precautions

Before starting, turn off the power to your HVAC system at the breaker or switch. Ensure the area is clear of clutter and well-lit. Avoid exposing the thermostat to direct sunlight or moisture. Handle wires carefully to prevent damage. Use appropriate tools and follow proper wiring techniques. Always refer to the manual for specific safety guidelines to ensure a safe and successful installation process.

Step-by-Step Installation Process

Begin by turning off power to your HVAC system. Separate the Junction Box Adapter from the Cover Plate, then follow the wiring and mounting steps carefully.

4.1 Wiring and Connections

Ensure the power is off at the breaker. Connect the wires to the appropriate terminals on the thermostat, matching colors (e.g., red to RH/RC, green to fan). Secure all connections firmly and double-check for accuracy. Use jumper wires if necessary for compatibility with your HVAC system. Verify all wiring before restoring power to avoid damage or malfunction.

4.2 Mounting the Thermostat

Mount the Honeywell T4 Pro securely using the UWP mounting system. Separate the Junction Box Adapter from the Cover Plate and attach the adapter to the wall. Ensure the surface is level and use wall anchors if necessary. Align the thermostat with the adapter and snap it into place. Secure firmly to avoid movement. Ensure the screen is at a comfortable viewing height for easy operation and access.

Initial Configuration and Setup

Configure your Honeywell T4 Pro by accessing the Installer Setup Menu. Press and hold the CENTER and buttons for 3 seconds to enter the advanced menu. Use the navigation buttons to set basic parameters like temperature range, scheduling, and system type. Follow on-screen prompts to complete the initial setup for optimal performance.

5.1 Accessing the Installer Setup Menu

To access the Installer Setup Menu on your Honeywell T4 Pro, press and hold the CENTER and buttons simultaneously for approximately 3 seconds. This will unlock the advanced menu, allowing you to configure system settings, test functions, and optimize performance. Use the navigation keys to scroll through options and adjust parameters as needed for a customized setup. Ensure all settings are saved before exiting.

5.2 Setting Up Basic Parameters

After accessing the Installer Setup Menu, configure basic parameters to tailor the thermostat to your system. Set temperature units (°F or °C), time format (12/24-hour), and date. Adjust HVAC settings like heating and cooling differentials. Use the navigation buttons to scroll through options and press Select to confirm changes. Ensure all settings align with your system requirements for optimal performance. Save settings before exiting to apply configurations.

Advanced Features and Customization

Explore advanced features like scheduling, geofencing, and smart home integration. Customize temperature settings, energy-saving modes, and system alerts for enhanced comfort and efficiency.

6.1 Scheduling and Programming

The Honeywell T4 Pro allows you to create customized schedules for your home’s heating and cooling system; Program daily or weekly temperature settings to suit your lifestyle. Use the built-in scheduler to set specific times for cooling, heating, or energy-saving modes. Customize start and end times for optimal comfort and energy efficiency. Integrate with smart home systems for remote adjustments and advanced automation features. Ensure seamless control and tailored temperature management.

6.2 Integrating with Smart Home Systems

The Honeywell T4 Pro seamlessly integrates with popular smart home systems like Amazon Alexa and Google Home. Enable voice control or remote adjustments through compatible platforms. Use geofencing to automatically adjust temperatures based on your location. Schedule updates and receive notifications through the Honeywell Home app. This integration enhances convenience, energy efficiency, and overall system control, making it a versatile addition to any smart home setup.

Troubleshooting Common Issues

Identify and resolve common issues like display malfunctions or connectivity problems. Check power supply, wiring connections, and restart the thermostat. Refer to diagnostic codes for solutions.

7.1 Diagnostic Codes and Solutions

Diagnostics on the Honeywell T4 Pro display error codes like E1, E30, or E92, indicating issues such as temperature differences or communication failures. Refer to the manual for specific code meanings. Solutions include checking wiring connections, ensuring proper power supply, or resetting the thermostat. Addressing these issues promptly ensures optimal performance and avoids system malfunctions. Always consult the manual for detailed troubleshooting steps.

7.2 Resetting the Thermostat

To reset the Honeywell T4 Pro, press and hold the center button for 5 seconds. This restores factory settings, clearing schedules and preferences. Ensure the thermostat is powered on during the process. After resetting, configure basic parameters like temperature units and time format. Refer to the manual for detailed steps to avoid configuration errors and ensure proper system operation after the reset.

Maintenance and Upkeep

Regular maintenance ensures optimal performance. Clean the thermostat face gently with a soft cloth. Check wiring for damage and ensure secure connections. Update software periodically for enhanced functionality and security. Replace batteries as needed to prevent power issues. Schedule annual professional checks for system compatibility and efficiency.

8.1 Cleaning the Thermostat

Clean the Honeywell T4 Pro thermostat regularly to ensure optimal performance. Use a soft, dry cloth to wipe the display and exterior. Avoid harsh chemicals or liquids, as they may damage the screen. Gently remove dust from vents and sensors to maintain accurate temperature readings. For stubborn stains, lightly dampen the cloth with water, but avoid direct moisture contact with internal components. Regular cleaning prevents malfunction and ensures precise temperature control.

8.2 Updating Software and Firmware

Regular software and firmware updates are essential for optimal performance of your Honeywell T4 Pro thermostat. To update, access the Installer Setup Menu by pressing and holding the CENTER and buttons for 3 seconds. Navigate to the “Update” section and follow on-screen instructions to download and install the latest version. Ensure the device is connected to power during the process. Refer to the manual for detailed steps to avoid interruptions and ensure a successful update.

For further assistance, visit Honeywell’s official website or consult the user guide. Additional support resources, including FAQs and troubleshooting tips, are available online for your convenience;

9.1 Final Checks and Verification

After completing the installation, perform a final check to ensure all connections are secure and the thermostat is powered on. Verify that heating, cooling, and fan functions operate correctly. Test schedules and smart home integrations if applicable. Review the installer setup menu to confirm all parameters are correctly configured. Ensure the display is clear and responsive. Refer to the manual for detailed verification steps to ensure optimal performance.

9.2 Where to Find Further Assistance

For additional support, visit the official Honeywell website or refer to the user manual provided with your T4 Pro thermostat. Access FAQs, troubleshooting guides, and contact information for customer service. You can also download the latest software updates and view installation videos. If needed, reach out to Honeywell’s support team for personalized assistance. Ensure to use verified resources for accurate information.

Manuals

kenmore self cleaning oven manual

The Kenmore self-cleaning oven manual provides essential guidance for operating and maintaining your oven. It explains how high temperatures clean food residue and ensures safety during cycles.

1.1 What is a Self-Cleaning Oven?

A self-cleaning oven is an appliance designed to automatically clean food residue by heating to extremely high temperatures, turning residue into ash. This feature eliminates the need for harsh chemicals, making maintenance easier and safer. The oven locks during the cycle to ensure safety, and the process is controlled through the oven’s settings. The Kenmore self-cleaning oven manual provides detailed instructions to optimize this feature, ensuring efficient and safe operation. Regular use of this function keeps the oven in pristine condition with minimal effort.

1.2 Benefits of Using a Self-Cleaning Oven

A self-cleaning oven offers convenience, efficiency, and safety. It eliminates the need for harsh chemicals by using high heat to turn food residue into ash. This feature reduces maintenance effort and keeps the oven clean without manual scrubbing. It also ensures a safer cooking environment by locking the door during the cycle. Regular use of the self-cleaning function prolongs the oven’s lifespan and maintains its performance. Additionally, it minimizes the risk of accidental burns during cleaning. This makes it a cost-effective and eco-friendly option for homeowners.

How Kenmore Self-Cleaning Ovens Work

Kenmore self-cleaning ovens use high temperatures (around 850-950°F) to burn food residue into ash. The oven locks its door during the cycle to ensure safety and efficiency, allowing easy cleaning without chemicals. This advanced technology simplifies maintenance and keeps your oven hygienic with minimal effort.

2.1 The Science Behind Self-Cleaning Technology

The Kenmore self-cleaning oven uses high heat to break down food residue into ash. This process, called thermal decomposition, occurs at temperatures between 850°F and 950°F. The oven locks its door during the cycle to contain heat and ensure safety. The extreme heat effectively converts tough, baked-on grease and food particles into a manageable ash that can be easily wiped away after cooling. This energy-intensive method eliminates the need for harsh chemicals, making it both efficient and eco-friendly. The locked door also prevents accidental burns, enhancing user safety during operation.

2.2 Understanding the Self-Cleaning Cycle

The self-cleaning cycle involves heating the oven to extreme temperatures, typically between 850°F and 950°F, to burn food residue into ash. Before starting, ensure the oven is empty and the door is locked. Once initiated, the cycle runs for 2 to 4 hours, depending on soil level. After completion, let the oven cool before wiping away ash with a damp cloth. This process eliminates tough stains without chemicals, making cleanup efficient and safe. Proper preparation and post-cycle care ensure optimal results and maintain oven performance. Always follow manual guidelines for best outcomes.

Preparing for the Self-Cleaning Process

Remove utensils, clean large food particles, and ensure the oven is empty. Allow it to cool, then wipe up excess debris for a safer, more effective cycle.

3.1 Essential Safety Precautions

Before initiating the self-cleaning cycle, ensure the oven is empty of utensils and racks. Avoid opening the door during the process, as extreme heat can cause burns. Keep children and pets away, and ensure proper ventilation to prevent inhaling fumes. Never force the door open during cleaning, as it locks automatically for safety. Always wear protective gloves when handling hot surfaces after cleaning. Follow all guidelines in the Kenmore manual to ensure a safe and effective self-cleaning experience.

3.2 Cleaning the Oven Before Self-Cleaning

Before starting the self-cleaning cycle, remove large food debris and wipe down surfaces with a damp cloth to eliminate loose particles. Avoid using abrasive cleaners, as they may damage the oven’s finish. For tough stains, mix baking soda and water to create a paste, apply it, and let it sit overnight. This helps soften residue for easier cleaning post-cycle. Ensure racks and shelves are removed and cleaned separately to maintain optimal oven performance and hygiene.

3.3 Removing Utensils and Accessories

Before initiating the self-cleaning cycle, remove all racks, shelves, and utensils from the oven. This includes any aluminum foil or oven liners, as they may melt or damage the oven during high-heat cleaning. Wash these items separately with soap and water or place them in the dishwasher. Leaving them inside can cause warping or discoloration; Store them in a safe place until the cycle is complete and the oven has cooled down. This ensures a safe and effective cleaning process.

Initiating the Self-Cleaning Cycle

Press the Self Clean button on the control panel. Select a cleaning duration, typically 2, 3, or 4 hours, based on the oven’s condition. The door will lock automatically.

4.1 Step-by-Step Guide to Starting the Cycle

To initiate the self-cleaning cycle, press the Self Clean button on the control panel. Ensure the oven is empty and accessories are removed. Next, select the desired cleaning duration using the provided controls. Confirm your selection by pressing Start. The oven door will lock automatically, and the cycle will begin. During operation, high heat will reduce food residue to ash. Always ensure proper ventilation and follow safety guidelines provided in the manual for optimal results.

4.2 Selecting theRight Cleaning Duration

4.2 Selecting the Right Cleaning Duration

Kenmore self-cleaning ovens feature 2, 3, or 4-hour cycles. The manual advises selecting the duration based on the oven’s soil level. Light residue requires a 2-hour cycle, moderate buildup 3 hours, and heavy grime or tough stains need the full 4-hour cycle. This ensures effective cleaning while managing energy use. Refer to the manual for model-specific guidance to achieve the best results.

Maintenance and Upkeep

Regularly clean spills and wipe down surfaces to maintain your Kenmore oven. Avoid abrasive cleaners and follow manual guidelines for optimal performance and longevity.

5.1 Regular Cleaning Tips

For regular maintenance, wipe spills immediately with a damp cloth to prevent food buildup. Use mild soap and avoid abrasive cleaners to protect surfaces. After self-cleaning, allow the oven to cool before wiping ash with a damp cloth. Regular cleaning maintains efficiency and prevents tough stains. Always refer to the Kenmore manual for specific cleaning recommendations tailored to your model.

5.2 How to Clean Between Oven Window Glass

To clean between oven window glass, ensure the oven is cool. For Kenmore models, check if the door can be removed by consulting the manual. Use a soft cloth and mild soap to wipe away residue. Avoid harsh chemicals or abrasive materials to prevent scratching. Reassemble carefully to maintain the door’s seal and functionality. Follow specific Kenmore recommendations for optimal results and safety.

Troubleshooting Common Issues

Identify and resolve common issues like the oven door not locking or the self-cleaning function malfunctioning. Refer to the manual for precise troubleshooting steps.

6.1 Oven Door Not Locking During Self-Cleaning

If the oven door fails to lock during self-cleaning, ensure all buttons are pressed correctly. Check for obstructions or damage. If issues persist, consult the manual or contact a technician for assistance.

6.2 Issues with the Self-Cleaning Function

If the self-cleaning function isn’t working, check if the door is locked and the cycle properly initiated. Ensure the oven is at the correct temperature and all controls are functioning. If problems persist, refer to the manual for troubleshooting steps or contact a professional for assistance.

Safety Considerations

Always ensure proper ventilation and avoid staying near the oven during the self-cleaning cycle. Keep children away and never open the door while it’s locked.

7.1 Precautions to Avoid Accidents

To ensure safety, always turn off the oven and let it cool before cleaning. Avoid using abrasive cleaners, as they can damage the finish. Keep children away during the self-cleaning cycle, as the oven reaches extremely high temperatures. Never open the oven door while it is locked, and ensure proper ventilation to prevent fumes from accumulating. Regularly check and maintain the oven door seal to ensure it locks securely during cycles.

7.2 Ventilation During the Self-Cleaning Process

Proper ventilation is crucial during the self-cleaning cycle to remove fumes and odors. Open windows and use exhaust fans to circulate air. Avoid inhaling fumes produced by burning food residue. Ensure the kitchen is well-ventilated to prevent the accumulation of harmful gases. This step not only improves air quality but also helps maintain the efficiency of the self-cleaning process. Proper ventilation ensures a safer and more effective cleaning experience for your Kenmore oven.

Accessing the Kenmore Self-Cleaning Oven Manual

Access the Kenmore self-cleaning oven manual online by entering your model number in the search bar. This provides easy access to troubleshooting guides and maintenance tips.

8.1 Finding the Manual Online

To find the Kenmore self-cleaning oven manual online, visit the official Kenmore website and enter your oven’s model number in the search bar. This will direct you to a downloadable PDF version of the manual. Ensure your model number is accurate for the correct guide. The manual includes detailed instructions for operation, troubleshooting, and maintenance. Save or print it for easy reference to ensure optimal use of your self-cleaning oven.

8.2 Navigating the Manual for Troubleshooting

Navigating the Kenmore self-cleaning oven manual for troubleshooting is straightforward. Locate the troubleshooting section, which lists common issues and solutions. Use the index or table of contents to quickly find relevant topics. Error codes and symptom-to-solution charts help identify problems. Refer to specific sections for guidance on addressing issues like the oven door not locking or malfunctions during the self-cleaning cycle. The manual also provides step-by-step repair guidance, ensuring you can resolve issues efficiently and safely.

Environmental and Cost Efficiency

Kenmore self-cleaning ovens promote environmental and cost efficiency by reducing chemical use and energy consumption. High-temperature cleaning minimizes detergent needs, while energy-efficient cycles lower utility bills over time.

9.1 Eco-Friendly Aspects of Self-Cleaning Ovens

Kenmore self-cleaning ovens are eco-friendly as they minimize chemical use. The high-temperature process turns food residue into ash, eliminating the need for harsh detergents. This reduces chemical waste and potential environmental harm. Additionally, energy-efficient cycles optimize heating, lowering overall energy consumption and carbon footprint. By reducing reliance on cleaning products and optimizing energy use, self-cleaning ovens align with environmentally responsible home maintenance practices, making them a greener choice for modern households.

9.2 Cost Efficiency of Self-Cleaning Technology

Kenmore self-cleaning ovens offer long-term cost savings by reducing the need for harsh cleaning chemicals and frequent professional maintenance. The high-temperature cleaning cycle eliminates tough residue, extending the oven’s lifespan. Energy-efficient designs lower utility bills, while the durability of the oven’s construction reduces repair and replacement costs. Over time, these features make self-cleaning ovens a cost-effective choice for homeowners, balancing initial investment with lasting savings and convenience.

The Kenmore self-cleaning oven manual serves as a comprehensive guide, ensuring users maximize their appliance’s efficiency and safety. By understanding the self-cleaning process, maintaining the oven, and addressing common issues, homeowners can enjoy a hassle-free cooking experience. The manual highlights the importance of proper usage, regular upkeep, and safety precautions. With its eco-friendly and cost-efficient features, the Kenmore self-cleaning oven stands out as a practical choice for modern kitchens, offering long-term convenience and performance.

Manuals

schwinn airdyne manual

This manual provides essential guidance for safe and effective use of the Schwinn Airdyne exercise bike; It covers key features, assembly, operation, and maintenance tips to ensure optimal performance and longevity. By following the instructions, users can maximize their workout experience while maintaining the equipment properly.

Overview of the Schwinn Airdyne Exercise Bike

The Schwinn Airdyne Exercise Bike is a high-quality fitness machine designed for effective cardiovascular workouts. It features an innovative air resistance system, which increases resistance as pedaling speed rises, providing a challenging and customizable workout. The bike is built with durability in mind, offering a sturdy frame and adjustable seat for comfort. Its compact design makes it suitable for both home and studio use. The Airdyne bike engages both the lower and upper body, making it a versatile option for full-body fitness. With its user-friendly console and robust construction, it is an excellent choice for individuals seeking a reliable exercise solution.

Key Features and Benefits of the Schwinn Airdyne

The Schwinn Airdyne is equipped with an adjustable seat and padded cushion for optimal comfort during extended workouts. Its robust design supports users up to 160 kg, ensuring stability and durability. The bike features a unique air resistance system, which automatically adjusts based on pedaling speed, providing a challenging and customizable workout. Additionally, the Airdyne engages both the upper and lower body, offering a full-body exercise experience. The console displays essential metrics like speed, distance, and calories burned, helping users track their progress effectively. These features make it an ideal choice for both home and studio environments.

Importance of Reading the Manual Before Use

Reading the Schwinn Airdyne manual is crucial for safe and effective use of the exercise bike. It provides detailed safety instructions, assembly steps, and operation guidelines to ensure proper setup and functionality. The manual also outlines maintenance tips and troubleshooting solutions, helping users address common issues promptly. By understanding the equipment’s features and limitations, users can maximize their workout potential while minimizing the risk of injury or equipment damage. Following the manual ensures a safe, efficient, and enjoyable exercise experience.

Assembly and Installation Guidelines

Unbox and inventory all parts carefully. Follow step-by-step assembly instructions for a secure setup. Ensure all bolts are tightened properly. Conduct a final inspection to verify stability and functionality before first use.

Unboxing and Inventory of Parts

Begin by carefully unpacking the Schwinn Airdyne bike and all accessories from the box. Inspect for any visible damage or missing items. Refer to the provided parts list in the manual to ensure all components are included. Organize the tools and hardware, such as bolts, screws, and Allen wrenches, for easy access. Verify the condition of major parts like the frame, pedals, seat, and handlebars. If any items are damaged or missing, contact customer support immediately. A thorough inventory ensures a smooth assembly process and prevents delays.

Step-by-Step Assembly Instructions

Begin by attaching the handlebars to the main frame using the provided bolts and Allen wrench. Ensure they are securely tightened for stability. Next, install the pedals by threading them into the crank arms, making sure they are properly aligned. Attach the seat post to the frame and adjust the height to fit your preference. Secure the seat tightly using the clamp. Then, connect the fan cage to the resistance system and ensure it is aligned correctly. Finally, assemble any additional components like the console or water bottle holder. Refer to the manual for specific torque settings and guidance to ensure all parts are safely and correctly secured.

Final Inspection and Safety Checks

After assembling the Schwinn Airdyne, perform a thorough inspection to ensure all components are securely fastened and properly aligned. Check that all bolts and screws are tightened to the specified torque values. Inspect the fan cage for proper alignment with the resistance system and verify that no loose parts could cause injury. Ensure the pedals and handlebars are stable and free from obstruction. Test the resistance system by pedaling slowly to confirm smooth operation. Finally, review the safety warnings in the manual and ensure all caution labels are legible. This step ensures safe and reliable performance for your workouts.

Operating the Schwinn Airdyne

Start by adjusting the seat height for comfort and proper pedaling form. Grip the handlebars firmly and begin pedaling to engage the air resistance system. Use the resistance dial to increase or decrease workout intensity. Monitor your progress on the console, tracking metrics like speed, time, and calories burned. Always maintain a steady pace and avoid sudden stops to ensure safe operation. Regularly check and tighten all connections to prevent wear and tear, ensuring smooth and efficient workouts.

Understanding the Console and Display

The Schwinn Airdyne console features a digital LED display with 10 numbered buttons, providing real-time feedback on your workout metrics. It tracks speed, time, distance, RPM, watts, and calories burned. The console also includes a speed sensor and magnet to accurately measure performance. For models like the AD8, the display is user-friendly, allowing you to set goals and monitor progress. Some versions offer multiple modes, such as Home or Club settings, to customize your workout experience. The console is essential for optimizing your exercise routine and achieving fitness goals effectively.

Adjusting Resistance and Intensity Levels

The Schwinn Airdyne’s resistance is generated by pedaling and moving the arm bars, which drives the fan blades, creating air resistance. The harder you pedal or move your arms, the greater the resistance. To increase intensity, pedal faster or apply more force to the arms. Some models feature a tension adjustment knob to set base resistance levels. Tighten for a more challenging workout or loosen for easier sessions. The console offers modes like Home or Club, allowing customization. Use dynamic resistance to adjust effort during workouts, and monitor metrics like RPM and watts to track progress and set goals for intensity.

Monitoring Workout Metrics and Progress

The Schwinn Airdyne console displays essential metrics like speed, time, distance, RPM, and calories burned, helping users track their workout progress. Advanced models may include a digital LED display with numbered buttons for custom settings. The ergometer measures performance using a speed sensor, magnet, and sensor cable, providing accurate data. By monitoring these metrics, users can set and achieve fitness goals, adjust intensity levels, and maintain motivation. Regularly reviewing workout data helps users identify improvements and stay committed to their exercise routine, ensuring a productive and effective fitness journey with the Schwinn Airdyne;

Maintenance and Troubleshooting

Regular maintenance ensures optimal performance. Check hardware tightness, lubricate moving parts, and inspect cables. Troubleshooting common issues like sensor malfunctions helps maintain functionality and user safety.

Regular Maintenance Tasks

Regular maintenance is crucial for the longevity and performance of the Schwinn Airdyne. Inspect all bolts and screws to ensure they are tightly secured. Lubricate the pedals, chains, and other moving parts periodically to reduce friction and prevent wear. Check the resistance fan for dust buildup and clean it as needed. Additionally, examine the console and sensors for proper function and accuracy. Replace any worn or damaged components promptly. Keeping the equipment clean and well-maintained ensures safe and effective workouts. Always refer to the manual for specific maintenance schedules and guidelines.

Troubleshooting Common Issues

Common issues with the Schwinn Airdyne include the console not displaying metrics, resistance not adjusting properly, or unusual noise during use. For display issues, check power connections and ensure the console is turned on. If resistance is inconsistent, inspect the fan for blockages or clean it if necessary. Lubricate moving parts to eliminate noise. For advanced troubleshooting, refer to the manual for guidance on resetting the console or replacing worn components. Regular maintenance can often prevent these issues, ensuring smooth operation and an effective workout experience.

Workout Tips and Routines

Incorporate interval training, varying resistance levels, and full-body engagement for effective workouts. Start with short sessions, gradually increasing duration as fitness improves for optimal results.

Creating a Effective Fitness Plan

A well-structured fitness plan is crucial for achieving your goals with the Schwinn Airdyne. Start by setting specific, measurable objectives, such as improving cardiovascular health or increasing endurance. Include a mix of steady-state rides and interval training to keep workouts engaging and effective. Begin with shorter sessions and gradually increase duration and intensity as fitness levels improve. Utilize the bike’s adjustable resistance to tailor workouts to your needs. Track progress using the console metrics to stay motivated and adjust your plan as needed for consistent results and long-term success.

Incorporating Interval Training

Interval training is a powerful way to boost your workout on the Schwinn Airdyne. Alternate between high-intensity sprints and recovery periods to maximize calorie burn and improve cardiovascular fitness. Start with 30 seconds of intense pedaling followed by 1 minute of steady-paced recovery. Gradually increase the duration and intensity as your fitness level improves. Use the bike’s adjustable resistance to enhance the challenge during sprints. This method not only keeps workouts engaging but also accelerates progress toward your fitness goals. Consistency and variety in your interval routines will ensure a well-rounded and effective training regimen.

The Schwinn Airdyne manual provides comprehensive guidance for maximizing your workout experience. By following its instructions, you can achieve your fitness goals effectively while ensuring the bike’s longevity and performance.

Final Thoughts on Using the Schwinn Airdyne

The Schwinn Airdyne is an excellent choice for a comprehensive workout, offering a unique air resistance system that engages both the lower and upper body. Its durable design and adjustable features ensure comfort and versatility for users of varying fitness levels. Regular maintenance, as outlined in the manual, will extend the bike’s lifespan and performance. Always prioritize safety by following the guidelines provided. With consistent use and proper care, the Schwinn Airdyne can be a valuable addition to your fitness journey, helping you achieve long-term health and wellness goals effectively.

Where to Find Additional Resources

For further assistance or detailed information, the Schwinn Airdyne manual can be found online in PDF format on various fitness equipment websites. Websites like all-guidesbox.com offer free downloads of the manual, including sections on operation, maintenance, and troubleshooting. Additionally, Schwinn’s official website provides customer support and resources for owners. Community forums and fitness enthusiast groups also share tips and guides for maximizing the use of the Airdyne. These resources ensure users can access comprehensive support beyond the provided manual, helping them make the most of their workout experience.